TANDBERG D50503.02 User Manual
Tandberg intern mxp edge install kit
TANDBERG Intern MXP Edge Install Kit
D50503.02
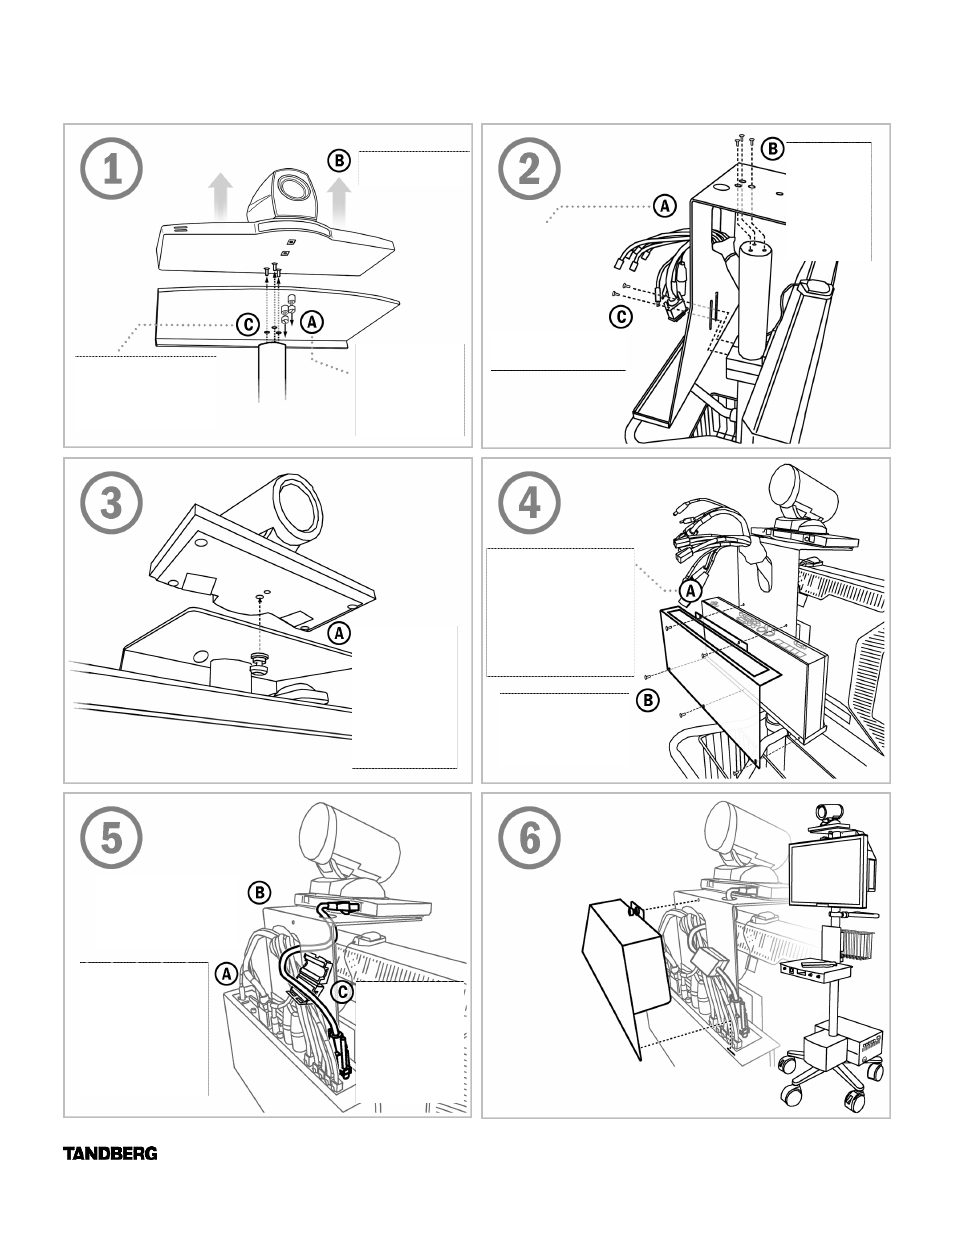
If installed, unscrew
the two thumbscrews
from underneath the
codec shelf to
remove the codec.
Remove the codec.
(If codec is installed.)
Unscrew the three (3) bolts
that hold the codec shelf to
the pole and remove shelf.
Set bolts aside for STEP 2.
Place the Precision HD
Camera shelf into
position as shown.
Be sure to feed
the cables through
the hole.
Use the same
three (3) bolts
from STEP 1 to
secure the new
PHD Camera
shelf to the
pole.
Use two (2) screws to
stabilize the new shelf.
Position the PHD
Camera onto the
shelf and securely
mount it with
thumbscrew (1)
found underneath
the shelf.
Remove the stand on the
Edge codec and place the
Edge onto the shelf with the
I/O facing up (be sure that
the power switch is on the
left –hand side when facing
the back of the system).
Secure the Edge codec
to the system with the
Edge cover plate with
five (5) screws.
Connect the cables as
labeled. Replace/use
the short cable for
camera connection by
feeding it through the
cable egress and up the
small hole on the shelf
platform.
Use the shorter camera
cable included with the
upgrade kit to connect the
codec and camera
Remove the ferrite
bead found with the
longer camera
cable included with
the Edge codec
and attach it to the
new camera cable.
Turn on the power to
the Edge codec.
Your TANDBERG Intern system is now HD ready.
Install cable
cover plate.