Installation requirements, Warning – Thermador KBUIT4250A User Manual
Page 15
15
INSTALLATION REQUIREMENTS
To o l s a n d Pa r t s
IMPORTANT:
■
Installer: Leave Installation Instructions with the homeowner.
■
Homeowner: Keep Installation Instructions for future
reference. Save these Installation Instructions for the local
electrical inspector’s use.
Tools needed:
Make sure that you have the tools necessary for proper
installation:
Parts needed:
■
6 - #8 x 3 in. (7.6 cm) wood screws (longer screws may be
needed)
■
1 or 2 - 2 in. x 4 in. x 32 in. (5 cm x 10 cm x 81 cm) wood
board(s)
■
Make custom or overlay panels or consult a qualified
cabinetmaker or carpenter to make the panels. See
“Installation Requirements” and “Design Specifications” for
more information.
■
If you are connecting the water line directly to copper tubing
and not to a shutoff valve, you need a ferrule, a union, and a
¹⁄₄ in. (6.35 mm) compression fitting.
L o c a t i o n R e q u i r e m e n t s
The refrigerator can be recessed in an opening between cabinets
or installed at the end of a cabinet run using a side panel to
enclose the refrigerator.
IMPORTANT:
■
Observe all governing codes and ordinances.
■
Do not install the refrigerator near an oven, radiator, or
other heat source, nor in a location where the temperature
will fall below 55°F (13°C).
■
Floor must support the refrigerator weight, more than
600 lbs. (272 kg), door panels and contents of the
refrigerator.
■
Ceiling height must allow for side or front tipping radius.
See “Tipping Radius.”
■
Location should permit doors to open fully. See “Door
Swing Dimensions.”
■
Location must permit top grille removal. See “Opening
Dimensions.”
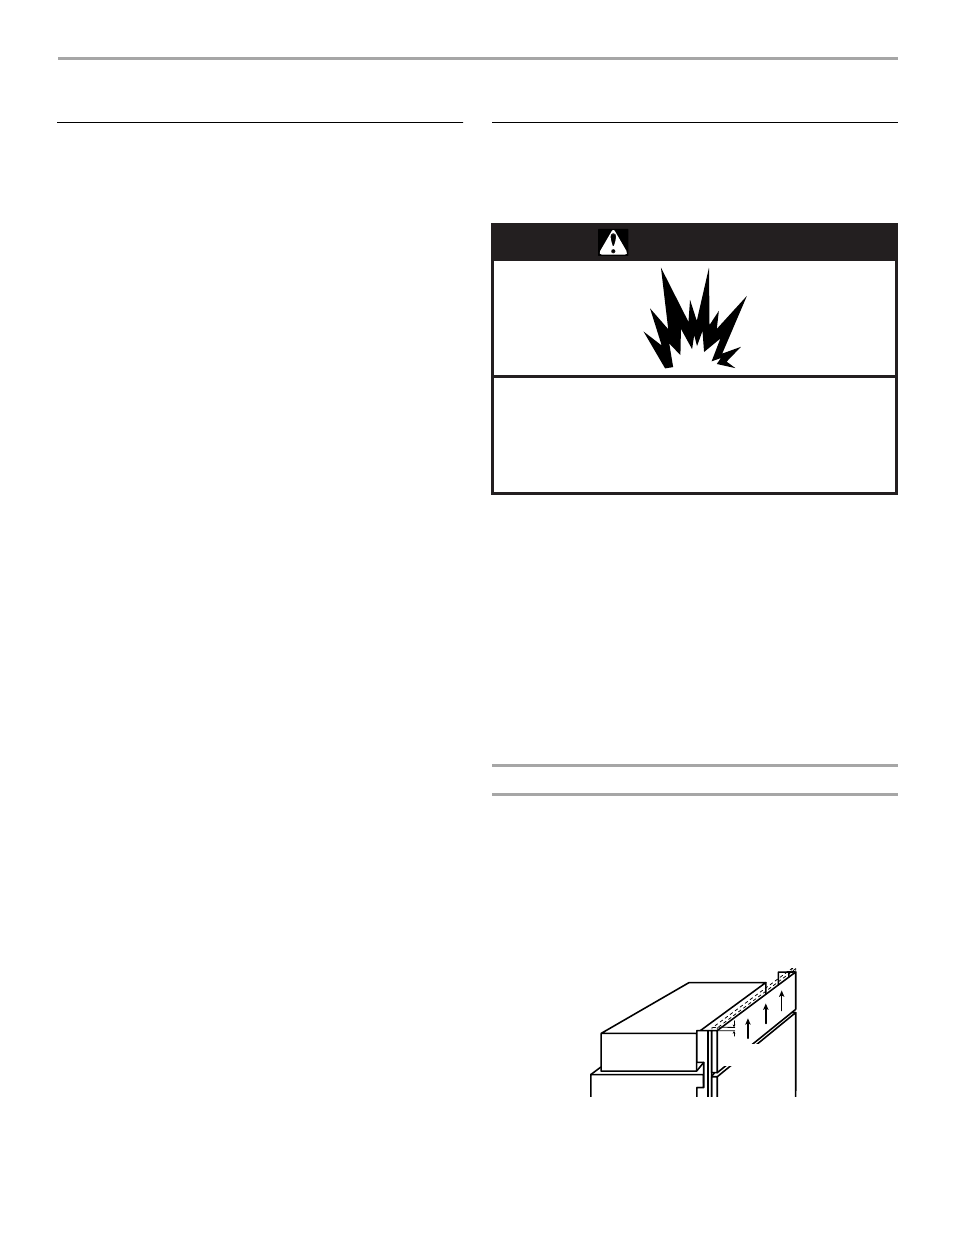
Opening Dimensions
■
The solid soffit must be within 1 in. (2.5 cm) maximum above
the refrigerator. If the solid soffit is higher than 1 in. (2.5 cm) or
one is not available, then the refrigerator must be braced to
prevent tipping during use.
If the anti-tip boards are needed, they must be attached to
the rear wall studs 80 in. to 90 in. (203 - 229 cm) above the
floor. See “Install Anti-Tip Boards” for more information.
NOTE: A clearance of
¹⁄₂ in. (1.3 cm) must be maintained
above the top grille in order for the top grille to be removed.
■
Hand drill or electric drill
(properly grounded)
■
T27 flat-head 6 point
driver
■
Drill bits
■
¹¹⁄₃₂ in. nut driver
■
Two adjustable wrenches
■
³⁄₈ in. and ¹⁄₂ in. open-end
wrenches
■
Phillips screwdriver
■
⁵⁄₃₂ in. Allen wrench
■
Small level
■
⁵⁄₁₆ in. socket wrench
■
Appliance dolly
■
Tape measure
WARNING
Explosion Hazard
Keep flammable materials and vapors, such as
gasoline, away from refrigerator.
Failure to do so can result in death, explosion,
or fire.
1
/
2
"
(1.3 cm)