Leveling and castor adjusting – True Manufacturing Company True Food Prep TFP-32-12M-D-2 User Manual
Page 8
6
6
True Food Service Equipment, Inc.
............ www.truemfg.com ............
INSTALLATION / OPERATION INSTRUCTIONS
LEVELING AND CASTOR ADJUSTING
A. Set unit in its final location. Be sure there is adequate
ventilation in your room. Under extreme heat
conditions, (100°F+, 38°C+), you may want to install
an exhaust fan.
WARNING
Warranty is void if ventilation is insufficient.
B. Proper leveling of your TRUE unit is critical to
operating success (for non-mobile models). Effective
condensate removal and drawer/door operation will
be effected by leveling.
C. The unit should be leveled from top of the cabinet.
Place a level on the top of the unit front to back and
side to side.
D. Ensure that the drain hose or hoses are positioned in
the pan.
E. Free plug and cord from inside the lower rear of the
cooler (do not plug in).
F. The unit should be placed close enough to the
electrical supply so that extension cords are never
used.
WARNING
Cabinet warranties are void if OEM power cord is tampered
with. TRUE will not warranty any units that are connected to
an extension cord.
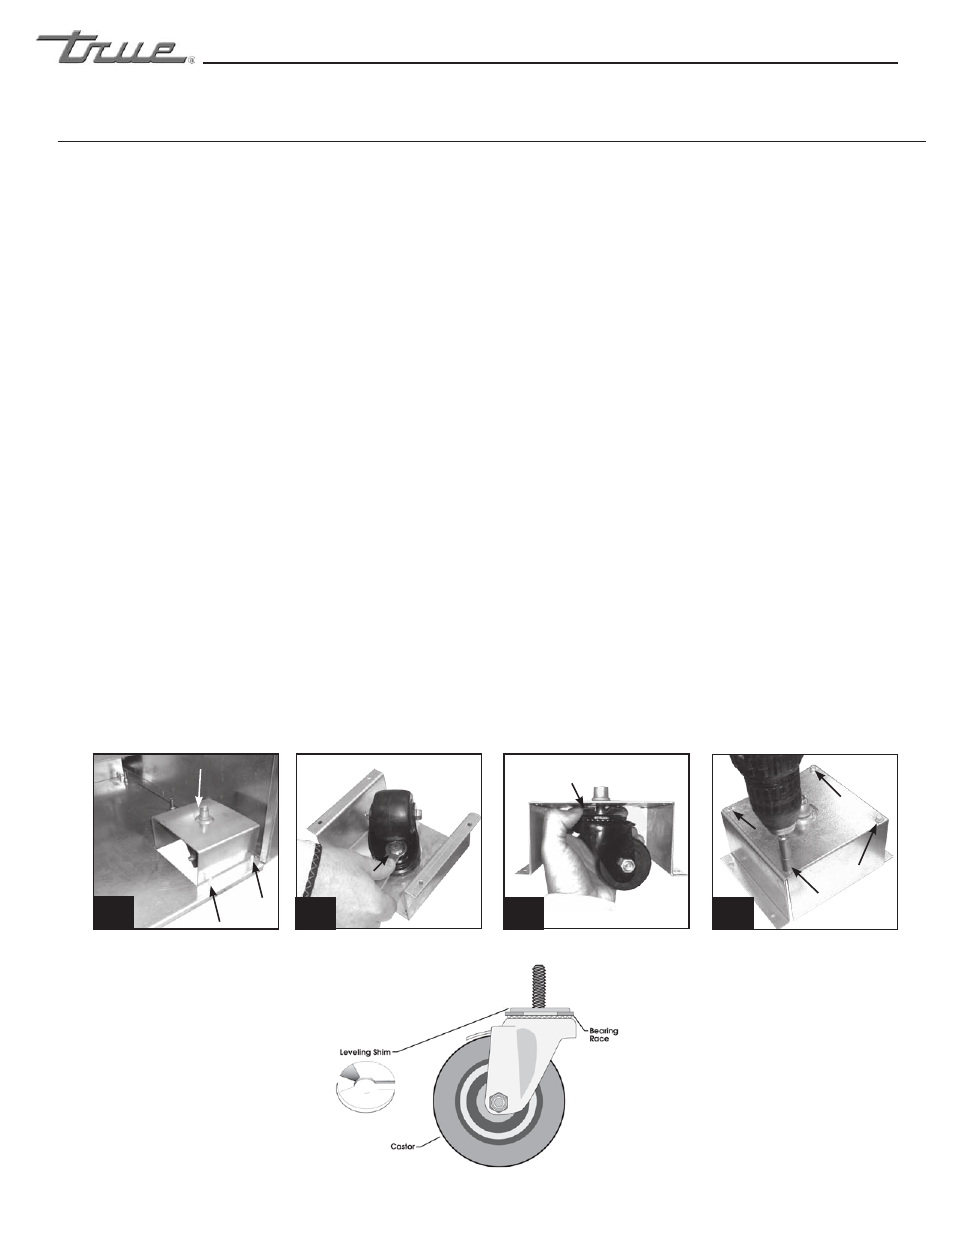
Adjusting Castors for Proper Leveling
Level unit. If unit is not level shims are required.
Follow these instructions to install shims.
1. Remove front and rear grill depending upon which
castor needs adjusting. Locate the castor box. (See
image 1).
2. Lay unit on it’s back. Use soft packing material and
be careful not to scratch the unit. Remove pans and
lid and place them to the side before laying unit on
it’s back.
3. Loosen castor with tool provided. (See image 3).
4. Install the desired number of shims, making sure the
slot of the shim is in contact with the threaded stem
of the castor. (See image 4). If more than one shim
is used, turn the slot at a 90° angle so they are not in
line.
5. Each unit has one castor box different from the
others. This box is totally inclosed. Remove this
castor box from bottom of unit. Back out four
screws anchoring the box. You will need a
1
/
4
” hex
head nut driver to disassemble this castor box. (See
image 4).
6. After adjusting castor reassemble and reinstall castor
box. Then carefully upright unit and reinstall pans
and lid.
1
4
2
3
Locate castor box
One castor box on each unit is
fully inclosed.
Loosen castor.
Install shims.
Castor Box
Anchor
Screws