Ba gs & rolls, Getting started – FoodSaver Professional III User Manual
Page 2
Ba
gs
&
Rolls
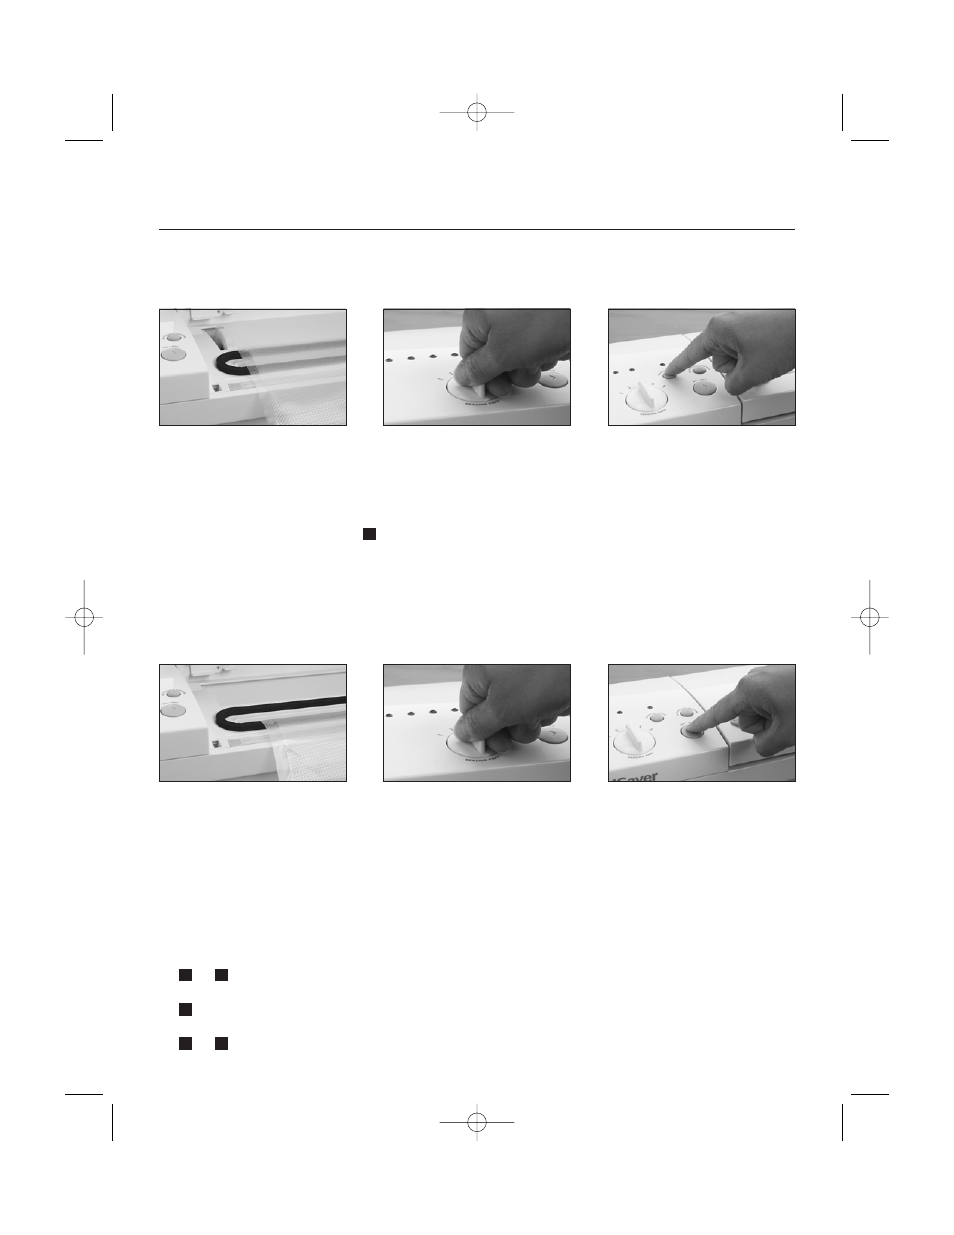
1.
Open appliance lid and place roll into Roll
Storage Compartment
(M)
.
2.
Pull out enough bag material to hold item to be
vacuum packaged, plus 3 inches. Close lid.
3.
Turn Seal Control Switch
(D)
to .
4.
Press and release Manual Seal Button
(B)
. Lid will
be pulled down automatically and red Indicator
Lights
(C)
will turn on, indicating bag material is
being sealed.
5.
When red Indicator Lights stop blinking, bag
material is sealed. Lid will open slightly.
6.
To cut bag, slide Bag Cutter
(I)
from one end of
sliding channel to other end.
7.
Open lid, remove bag, and tuck roll back
into Roll Storage Compartment before vacuum
packaging.
Now you are ready to vacuum package with your
new bag (see below).
3
Getting Started
Registering your appliance is quick and easy at www.foodsaver.com.
How to Make a Bag from a FoodSaver Roll
Pull Out Bag Material
Set Seal Control Switch
Press and Release Manual Seal Button
1.
Place item(s) in bag, allowing at least 3 inches of
space between bag contents and top of bag.
2.
Open appliance lid and place open end of bag
down into Vacuum Channel
(J)
. Make sure roll
material is tucked back into Roll Storage
Compartment
(M)
or it could prevent the appli-
ance from operating properly.
3.
Close lid.
4.
Set Seal Control Switch
(D)
to:
or
to re-seal non-FoodSaver bags, such as
Mylar
®
potato chip bags (shorter seal time).
to vacuum package using FoodSaver bags
(medium seal time).
or
to vacuum package moist or juicy foods
such as raw meat (longer seal time).
5.
To begin vacuum process, press and release
On/Off Button
(F)
. Motor will start and Indicator
Lights
(C)
will turn on in sequence.
6.
When motor and Indicator Lights turn off, vacuum
process is complete. Open lid and remove bag.
Refrigerate or freeze as needed. (See FoodSaver
Reference Guide for food safety tips.)
Tip:
The On/Off Button can also be used to cancel
vacuum process mid-way and open lid.
Note:
This appliance features a heavy-duty Sealing
Strip
(N)
that can perform 50 consecutive seals
without overheating.
5
4
3
2
1
How to Vacuum Package with FoodSaver Bags
Place Bag in Vacuum Channel
Set Seal Control Switch
Press and Release On/Off Button
QS.Pro3_GSturbo_v3 6/29/04 11:22 AM Page 2