Installation steps, Warning, Step 1. unpacking the oven – TMIO PS301SS00 User Manual
Page 7
7
Designed and manufactured in the USA with pride by TMIO, LLC • Chattanooga, TN • US toll-free +1.800.881.TMIO (8646) • www.tmio.com
Connect Io
TM
, Intelligent Oven
TM
, Intelligent Ovens
TM
, Green Clean
TM
, and TMIO
®
are registered trademarks of TMIO, LLC.
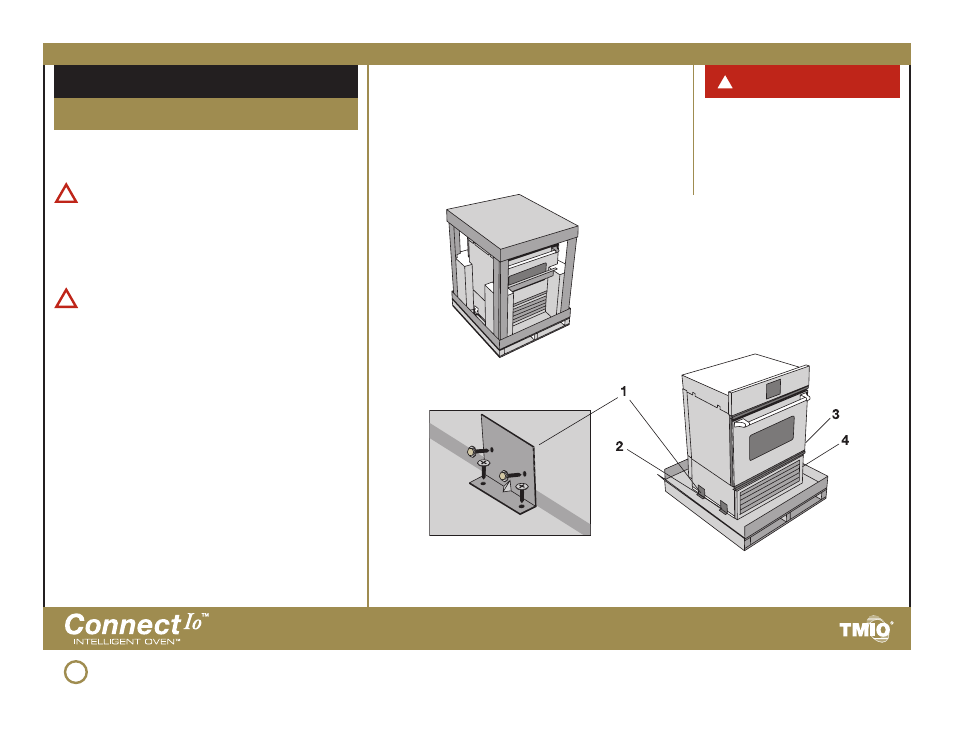
STEP 1. Unpacking the Oven
INSTALLATION STEPS
THE OVEN SHOULD NEVER BE LAID ON
ITS BACK OR SIDE. If the oven has been
laid on its back or side, the oil in the
compressor will need at least one (1)
hour to drain back into the compressor
before powering up the oven.
j
Make sure to TURN OFF the breaker for the
oven power supply.
WARNING: Use two or more people to move and
install oven. Failure to follow this instruction can
result in back injury or other injury.
k
Move the oven close to final installation
position prior to removing packaging materials.
WARNING: Never use door handles or any portion
of the control panel or trim for lifting the oven. This
may cause severe damage to the product.
l
Carefully remove plastic wrapping,
polystyrene protectors, cardboard, and blue tape.
Exercise care if using a knife or sharp object to
cut plastic or tape in order to prevent permanent
damage to the stainless steel surfaces.
m
Remove the four (qty. 4) screws from the
shipping brackets located on both sides of the
oven. Replace the four screws after removing
the brackets.
n
Carefully remove the louvered refrigeration
panel from the bottom front of the oven and
set the refrigeration panel in a safe place. The
refrigeration panel will be attached again later in
the installation process.
WARNING!
!
!
!
Carefully remove all packing
material from unit
CAUTION: Remove oven door, and remove the
louvered refrigeration panel before removing unit
from shipping pallet.
Remove four (qty. 4) screws
from shipping brackets