Operating controls and functions, Tv/dvd front panel remote control – Sylvania 6519DB User Manual
Page 8
– 8 –
EN
0C28
– 8 –
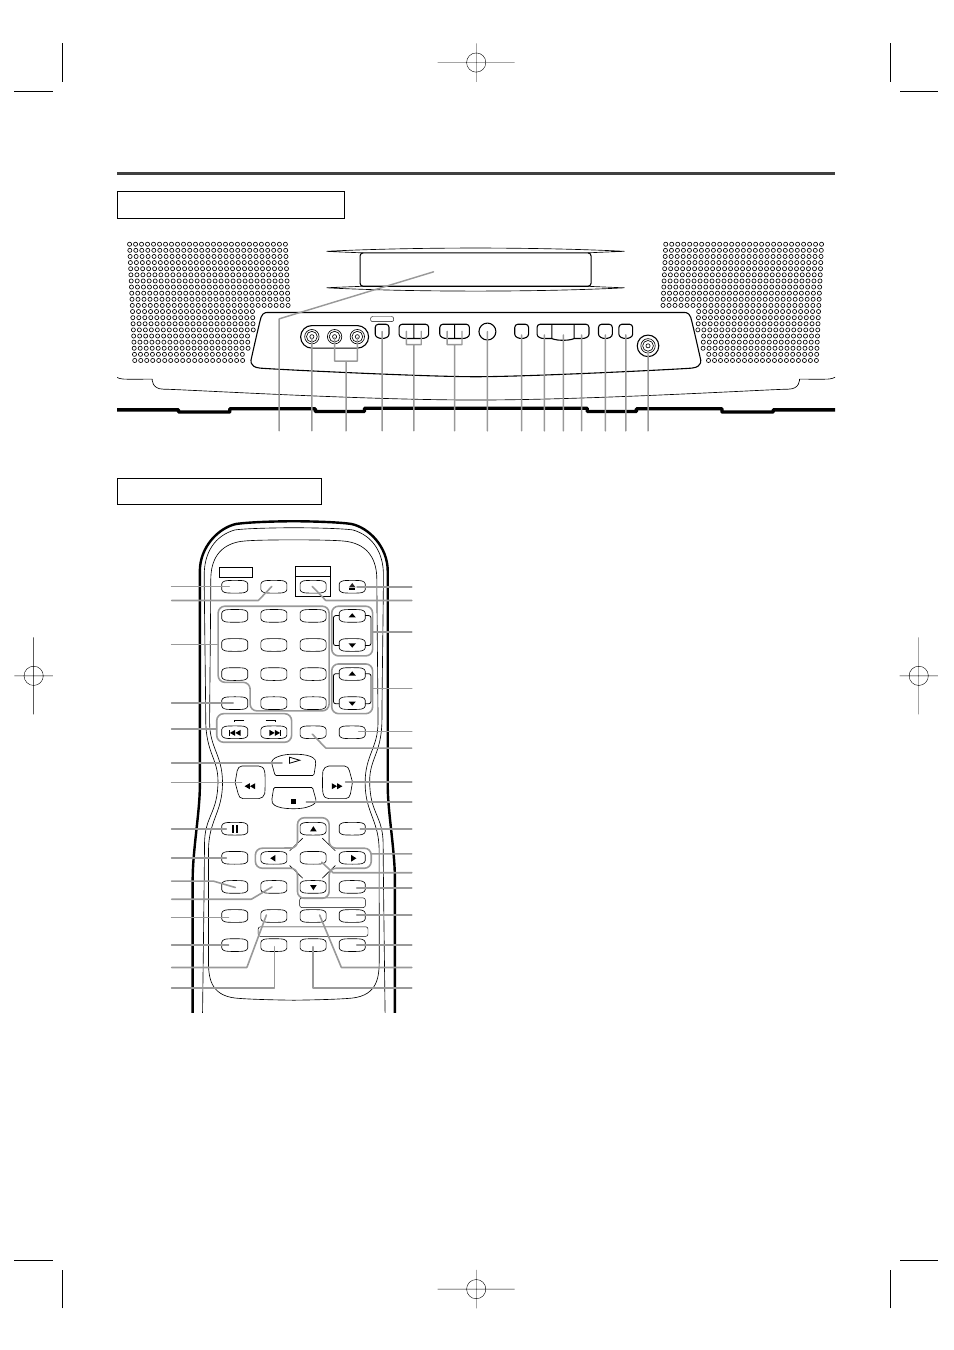
5.
VOLUME
K
/
L
buttons
Press to control the volume level for the DVD and TV.
6.
CHANNEL
K
/
L
buttons
Press to select memorized channel.
Press to change to TV mode when DVD mode.
7.
Remote Sensor Window
8.
STOP button
Stops operation of the disc.
9.
REV button
Fast reverses playback to a desired point.
10.
PLAY button
Starts playback of the disc contents.
Press to change to DVD mode when TV mode.
11.
FWD button
Fast forwards playback to a desired point.
12.
PAUSE button
Pauses the current disc operation.
13.
OPEN/CLOSE button
Press to insert discs into or remove them from the
tray.
14.
HEADPHONE jack
To connect headphone (not supplied) for personal
listening.
15.
MODE button
Activates program playback or random playback mode.
16.
NUMBER button
TV Mode:
Press two digits to directly access the desired
channel.
Remember to press a "0" before a single digit
channel.
+100 button–
Press to select cable channels which are equal or
greater than number 100.
DVD Mode:
Press to enter the desired number.
+10 button–
Press to enter the desired numbers which are
equal or greater than number 10.
L-AUDIO-R
VIDEO
STOP
PLAY
SKIP
SKIP
PAUSE
HEADPHONE
POWER
VOLUME
CHANNEL
OPEN/CLOSE
7
4
2
1
8 181018 12 13 14
6
5
3
REV
PLAY
STOP
FWD
ENTER
PAUSE
DISC
MENU
RETURN
TITLE
SETUP
A-B
REPEAT
SEARCH MODE
CLEAR
MODE
ANGLE
SUBTITLE
AUDIO
DISPLAY
SKIP
SELECT
POWER PICTURE
OPEN/
CLOSE
CH.
VOL.
MUTE
ZOOM
SLEEP
1
2
3
4
5
6
7
8
9
0
+10
+100
26
27
16
17
18
9
12
23
20
22
15
25
24
21
10
28
29
30
33
11
35
5
6
13
34
19
8
31
32
4
36
OPERATING CONTROLS AND FUNCTIONS
TV/DVD FRONT PANEL
REMOTE CONTROL
[Fig. 2]
[Fig. 1]
1.
Disc loading tray
2.
VIDEO input jack
Connect to the video output jack of a video
camera or VCR.
3.
AUDIO L/R input jacks
Connect to the audio output jacks of a video
camera or VCR.
4.
POWER button
Press to turn the power on and off.
TD250-Body 01.5.10 6:54 PM Page 8