Battery installation: main unit, Before you begin, Battery and channel installation: remote unit – Oregon Scientific BAR888 User Manual
Page 4
4
GB
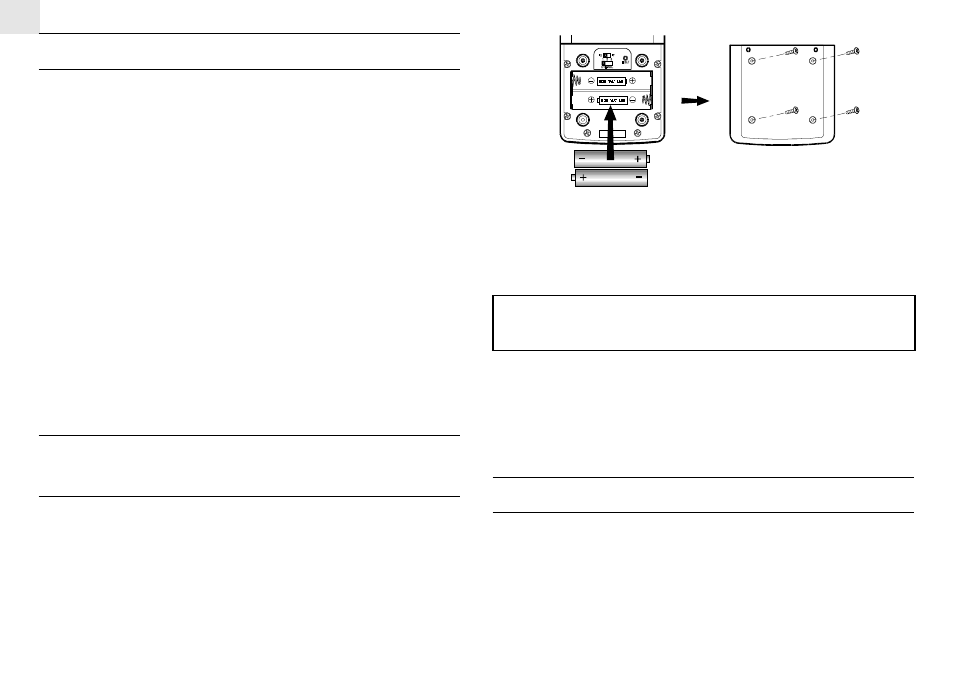
4. Insert the batteries strictly according to the polarities shown
therein.
5. Replace the battery compartment door and secure its screws.
6. Using a blunt styles such as a paper clip, press RESET.
Note: To avoid malfunction, alway press reset after
battery replacement.
Replace the batteries when the low-battery indicator of the particu-
lar channel lights up on the main unit. (Repeat the steps described
in section “BEFORE YOU BEGIN”)
Note that once a channel is assigned to a remote unit, you can only
change it by removing the batteries or resetting the unit.
BATTERY INSTALLATION: MAIN UNIT
The main unit uses four AA-size batteries. To install them,
1. Slide open the battery compartment door.
2. Insert the batteries strictly according to the polarities shown
therein.
BEFORE YOU BEGIN
For best operation,
1. Assign different channels to different remote units.
2. Insert batteries for remote units before doing so for the main
unit.
3. Place the main unit as close as possible next to the remote unit,
reset the main unit after installing batteries. This will ensure
easier synchronization between the transmission and reception
of signals.
4. Position the remote unit and main unit within effective trans-
mission range, which, in usual circumstances, is 20 to 30
meters.
Note that the effective range is vastly affected by the building
materials and where the main and remote units are positioned.
Try various set-ups for best result.
Though the remote units are weather proof, they should be
placed away from direct sunlight, rain or snow.
BATTERY AND CHANNEL
INSTALLATION: REMOTE UNIT
The remote unit uses two AAA-size batteries. To install them,
1. Remove the screws on the battery compartment.
2. Select the channel number on the CHANNEL slide switch.
3. Select the temperature display unit on the °C/°F slide switch.