Oregon Scientific Weather Station Advanced BAR628HG / BAR628HGU User Manual
Page 4
EN
4
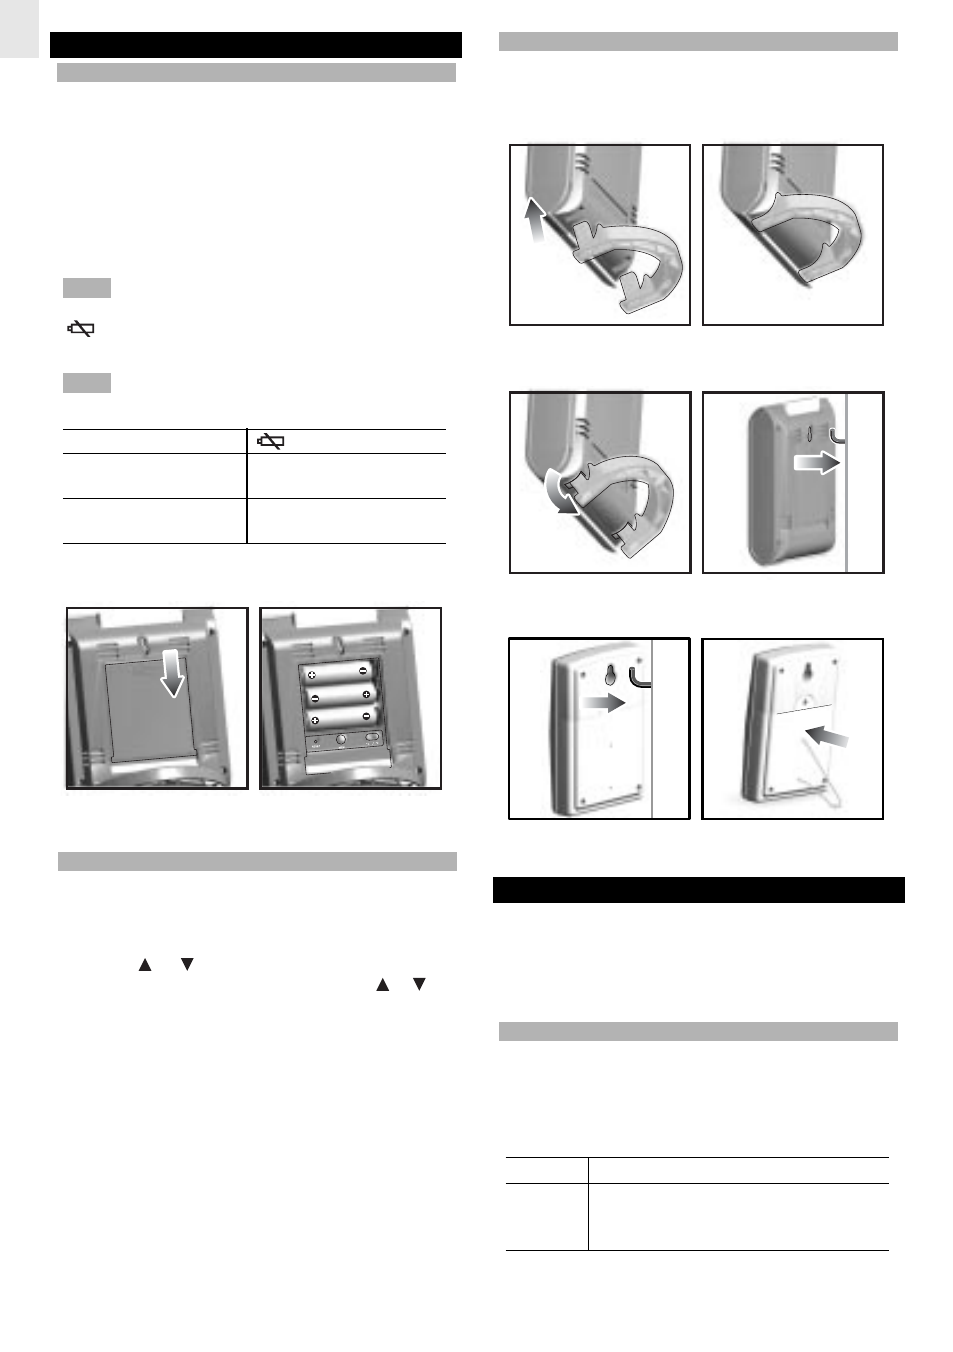
TABLE STAND OR WALL MOUNT
Use the stand on the back of the main unit / remote
sensor, or mount it on a wall with a nail.
To attach the main unit stand:
To use the main unit wall mount:
To use the remote sensor stand or wall mount:
REMOTE SENSOR (THGR122NX)
This product is shipped with a THGR122NX Thermo /
Hygro Sensor that collects Temperature and Humidity
data. Data can be collected from up to 3 sensors.
Additional sensors sold separately.
SETUP SENSOR
1. Open the remote sensor battery compartment with a
small Phillips screwdriver.
2. Insert the batteries, matching the polarity (+ and -) as
shown in the battery compartment.
SWITCH OPTION
Channel
Channel 1-3. If you are using more than
one sensor, select a different channel for
each sensor.
GETTING STARTED
BATTERIES
Batteries are supplied with this product:
Main unit
3 x UM-3 (AA) 1.5V batteries
Remote unit
2 x UM-4 (AAA) 1.5V batteries
Insert batteries before first use, matching the polarity
(+ and -) as shown in the battery compartment. For best
results, install batteries in the remote sensor before the
main unit. Press RESET after each battery change.
NOTE Do not use rechargeable batteries.
shows when batteries are low.
NOTE It is recommended that you use alkaline batteries
with this product for longer performance.
UNIT
LOCATION
Main
Indoor Temperature /
Humidity Area
Remote
Outdoor Temperature /
Humidity Area
Installing the batteries:
CHANGE SETTINGS
To change, time, calendar and language settings:
1. Press and hold MODE for 2 seconds to enter setting
mode.
2. Press
or to change settings. (To reach the
setting you want quickly, press and hold or .)
3. Press MODE to confirm.