Saw chain tension adjustment, Filling oil tank, Operating chain saw – Remington 104316-04 User Manual
Page 17: Continued
17
108539
www.desatech.com
2. Turn adjusting screw clockwise until all slack is
out of chain (see Figure 5).
Note: There should
be no gap between side links of chain and bottom
of guide bar (see Figure 6).
3. Wearing protective gloves, move chain around
guide bar. Chain should move freely. If chain
does not move freely, loosen chain by turning
adjusting screw counterclockwise.
4. After chain tension is correct, tighten guide
bar nuts firmly. If not, guide bar will move and
loosen chain tension. This will increase the risk
of kickback. This can also damage saw.
Note:
A new chain will stretch. Check new chain after
first few minutes of operation. Allow chain to
cool down. Readjust chain tension.
SAW CHAIN TENSION
ADJUSTMENT
Continued
FILLING OIL TANK
1. Remove oil cap.
2. Fill oil tank with SAE #30 motor oil.
Note: For
temperatures below 30°F, use SAE #10 oil. For
temperatures above 75°F, use SAE #40 oil.
3. Replace oil cap at once. Tighten oil cap firmly for
good seal. This will avoid oil seepage from tank.
4. Wipe off excess oil.
Note: It is normal for oil to seep when saw is not in use.
Empty oil tank after each use to prevent seepage.
OPERATING CHAIN SAW
EXTENSION CORDS
Use proper extension cords with this saw. Use only
extension cords marked for outdoor use. The cord
must be marked with suffix W or W-A following
the cord type designation.
Example: SJTW-A or
SJTW.
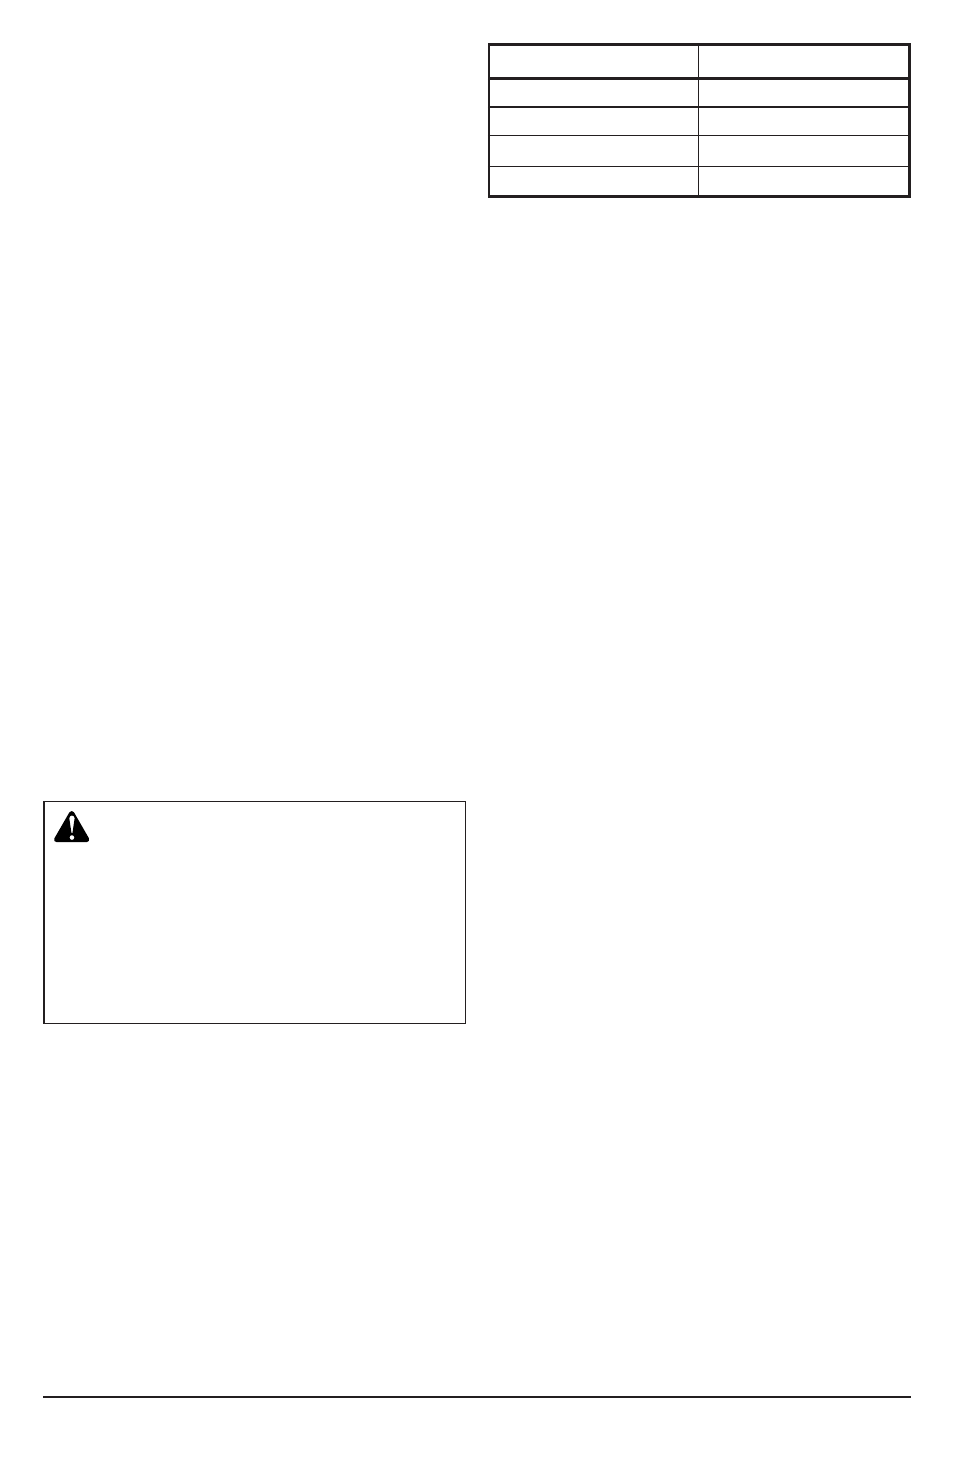
Use proper sized cord with this saw. Cord must be
heavy enough to carry current needed. An undersized
cord will cause voltage drop at saw. Saw will lose
power and overheat. Follow cord size requirements
listed below.
WARNING: Read and understand this
owner’s manual before operating this saw.
Make certain you read and understand all
Important Safety Information, pages 2
through 4. Improper use of this chain saw
can cause severe injury or death from
fire, electrical shock, or body contact with
moving chain, or falling wood.
Cord Length
AWG Cord Size
25 feet
16 AWG
50 feet
16 AWG
100 feet
16 AWG
150 feet
14 AWG
Models Pole Saw Assy: 104317, 106821, and
106821A; Pole Saw: 104316-04, 104316-05
(8˝/20.3 cm), 106890-01, 106890-02 (10˝/25.4 cm),
and 108526-01 [8˝(20.3 cm), 10˝ (25.4 cm)]
OILING CHAIN
Always check oil level before using saw. Do not attempt
to operate the oil system while saw is in operation. To oil
chain, press squeeze bulb. Oil will feed onto the guide bar
and chain. Press squeeze bulb at least once before each
cut. Check oil level often by looking at oil sight level
hole. Oil sight level hole is on left side of saw, between
front handle and front hand guard.
CUTTING WITH THE CHAIN SAW
1. Connect saw to extension cord. Connect exten-
sion cord to power supply.
2. Make sure section of log to be cut is not laying
on ground. This will keep chain from touching
ground as it cuts through log. Touching ground
with moving chain will dull chain.
3. Use both hands to grip saw. Always use left hand
to grip front handle and right hand to grip rear
handle. Use firm grip. Thumbs and fingers must
wrap around saw handles (see Figure 9).
4. Make sure your footing is firm. Keep feet apart.
Divide your weight evenly on both feet.
5. When ready to make a cut, press in switch lockout
with right thumb and squeeze trigger (see Figure
9). This will turn saw on. Releasing trigger will
turn saw off. Make sure saw is running at full speed
before starting a cut.
Continued
Keep cord away from cutting area. Make sure cord
does not catch on branches or logs during cutting.
Inspect cords often. Replace damaged cords.
The extension cord may come undone from the power
cord during use. To avoid this, make a knot with the
two cords as shown in Figure 7.