Assembly, Attaching the vacuum hose, Clamping the router table to a work bench – Ryobi A25RT01 User Manual
Page 16: Mounting the router table to a work bench, Vacuum hose vacuum port, Hex nut work table flat washer lock washer, Clamp work table
16
inch
FEED
DIRECTION
1
inch
1
VACUUM HOSE
VACUUM PORT
Inch
1
0
1
2
3
Inch
1
0
1
2
3
FEED
DIRECTION
Inch
1
0
1
2
3
Inch
1
0
1
2
3
FEED
DIRECTION
HEX NUT
WORK TABLE
FLAT
WASHER
LOCK
WASHER
ASSEMBLY
CLAMP
WORK TABLE
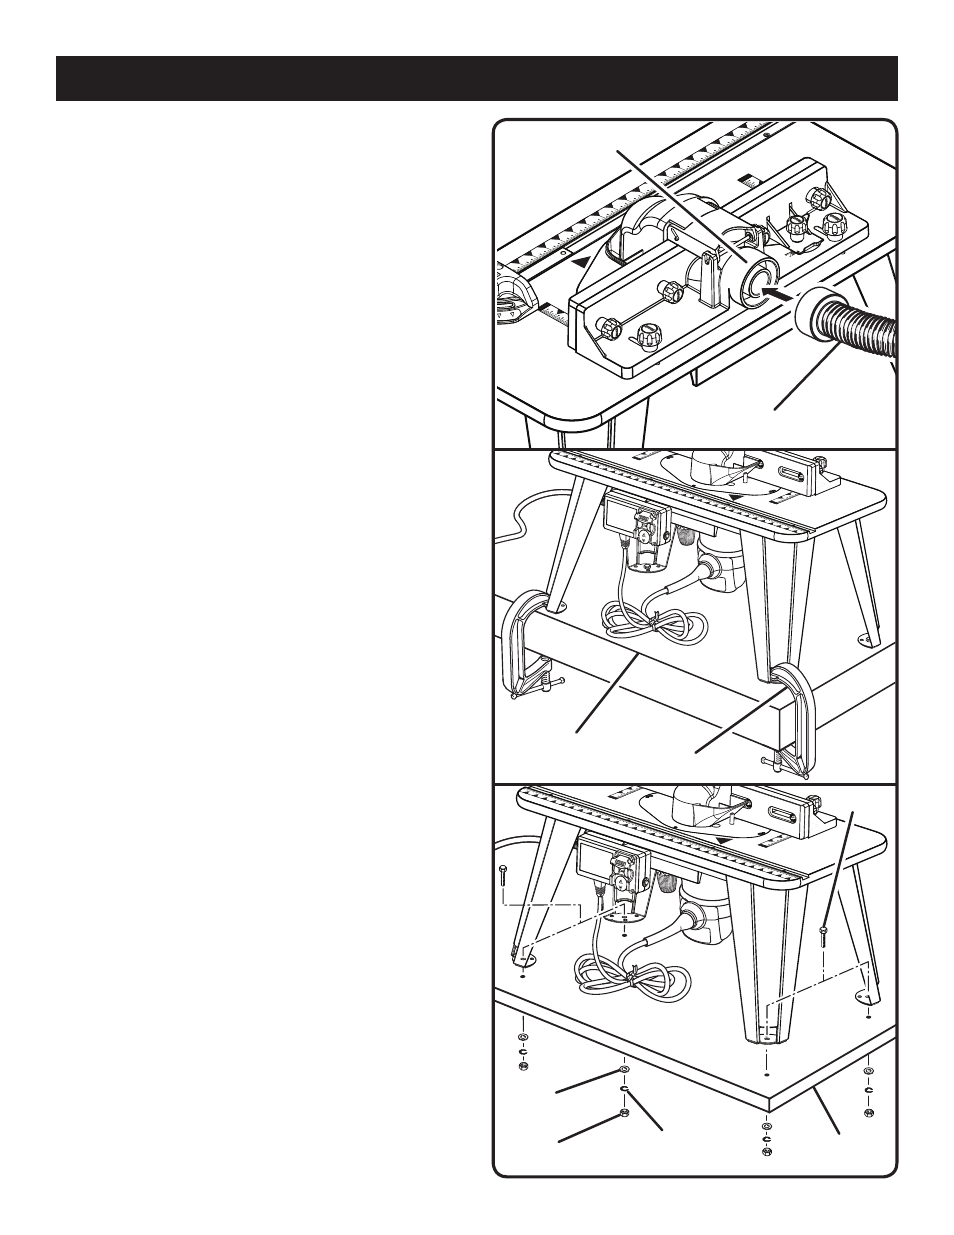
ATTACHING THE VACUUM HOSE
See Figure 17.
The vacuum port molded into the fence will accept either a
1-1/4 in. or 2-1/2 in. vacuum attachment.
CLAMPING THE ROUTER TABLE TO A WORK
BENCH
See Figures 18.
Unplug the router table and/or the router.
Place the router table right side up on a sturdy work
surface; e.g., leg stand, workbench, counter top.
Using a clamp, insert the top front of clamp through the
opening in the router table leg.
Tighten clamp securely.
MOUNTING THE ROUTER TABLE TO A
WORK BENCH
See Figure 19.
Unplug the router table and/or the router.
Place the router table right side up on a sturdy work
surface; e.g., leg stand, workbench, counter top.
Mark the holes with a
pencil.
Remove the router table.
Drill four holes through the work surface.
Place the router table back on the work surface, align-
ing the holes in the table legs with the holes in the work
surface.
NOTE: Position the router table surface at approximately
hip height.
Insert four bolts (not included, 1/4-20 recommended) and
tighten securely with flat washers, lock washers, and hex
nuts (not included).
Fig. 19
Fig. 18
BOLTS
Fig. 17