Radio Shack AirRage MicroFighters 60-479 User Manual
Page 2
When the plane is coming
towards you it appears to
turn in the "wrong" direction.
But if you imagine yourself
in the pilots seat, the model
is in fact turning correctly.
Try turning your back to the
aircraft and looking over
your shoulder.
Trouble shooting
SYMPTOM CAUSE
CORRECTION
Propeller will not rotate
ON/OFF switch is “OFF”
Set switch to “ON” Position.
Low battery.
Recharge battery.
Circles and descends after take off Trim knob requires adjustment.
Adjust the trim knob.
Can’t create lift
MicroFighters not facing the wind Point MicroFighters into the wind
Unable to stay in the air
Not enough power
Recharge MicroFighters
Poor response to transmitter
Frequency interference may occur Change location
near high voltage lines, transformers
and some large buildings
Difficult to control
Strong wind
Only fly during extremely calm
conditions or indoors
Loss of control
Another controller on the same
Change location
MicroFighter
frequency is being operated in
the same vicinity
Controller out of range from
Ensure the antenna is fully
extended and reduce distance
Landing gear bent
Landing gear may bend on impact
Remove landing gear from
(
This will not affect flight performance)
plane and bend back into
position
Landing gear will not
Damage occurred during impact
Use small amount of clear
stay inside plane insert
household tape to hold landing
gear in place.
NOTE: In the event that your MicroFighters sustains damage during impact, the problem
may be easily corrected by simply applying clear household tape to the damaged area.
Pre-Flight
• Do not touch the running propeller!
• Adult supervision is required!
• Always fly your aircraft in a large grassy area free of trees and other obstructions.
This will help protect your Micro Fighters during impact.
• The MicroFighters is designed for very stable outdoor flying with wind conditions not to
exceed 7 KPH / 4mph. If you can feel the wind, DO NOT FLY!
• Make first flights with the landing gear on to help stabilize the flight and simplify the
control of this sensitive and maneuverable aircraft. After you have gained experience you
can try flying with the Landing gear removed!
• Your MicroFighters can be flown with or without landing gear. In addition to enabling realistic
takeoffs and landings from smooth surfaces, the landing gear has the additional function of
slightly degrading the performance of this sensitive aircraft and also making it more stable
and easier to control smoothly, especially for beginners. It is strongly recommended that
you make all first flights WITH the landing gear on AND to use a normal hand-launch over
grass.
Notes: ONLY after you have gained experience should you consider a ground takeoff.
• After you have advanced to the Pro Mode you can remove the stabilizing landing gear to do
wild maneuvers just like a full-size jet fighter!
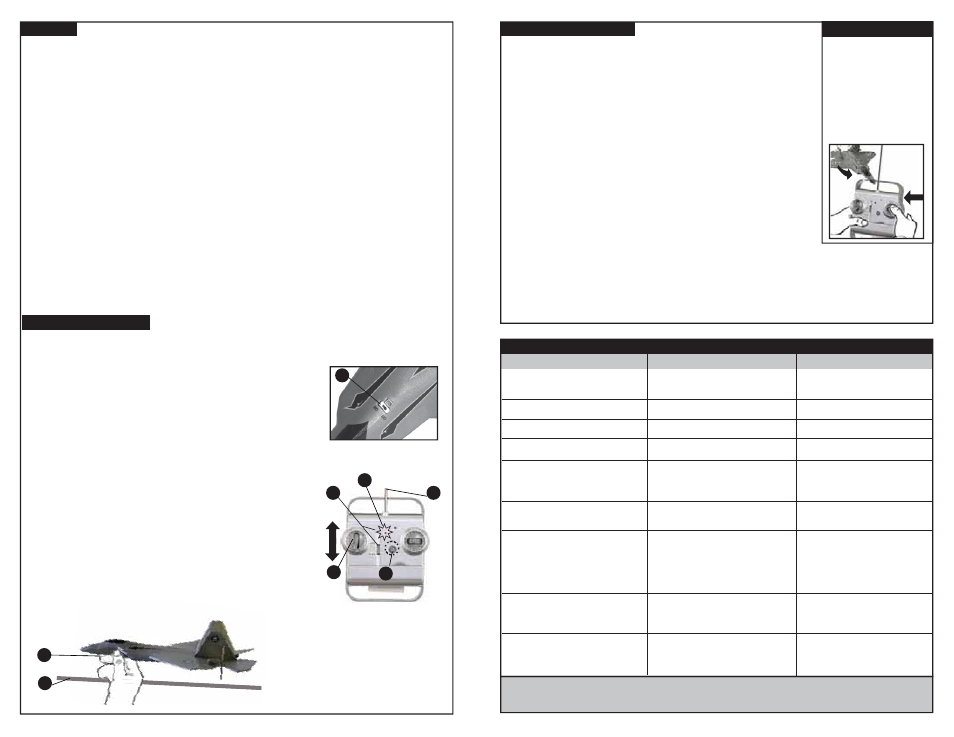
Flying your MicroFighters
1. Switch the MicroFighters to the “ON” position. (1)
2. Turn transmitter switch to “ON” position. (2)
The red LED will light steadily. (3)
3. Fully extend the antenna. (4)
4. Move throttle control (left control stick) fully forward and back
to activate the transmitter. (5)
5. Make sure trim knob is centered with arrow pointing up. (6)
6. Push throttle control forward to half (middle) before launch
for FIRST flights.
7. Hold the nose of the MicroFighters with two fingers to launch. (7)
8. Launch the MicroFighters as straight and level as possible;
always launch gently INTO the wind. (8)
9. Add throttle gently while adjusting the steering trim
knob on the transmitter.
10. Adjust trim Left when the MicroFighters turns Right.
11. Adjust trim Right when the MicroFighters turns Left.
12. Repeat steps (10) and (11) several times to make sure
your MicroFighters travels in a straight line.
Control Reversal
Advanced Flight Techniques
MicroFighters is designed to make sharper and tighter turns as you reduce the throttle
power! Maximum turning will be during gliding. Control is thus less sensitive during
full throttle.
Sharp turns can be performed by quickly reducing throttle power to pitch the nose up
and to increase control sensitivity. Then while holding the right stick for a turn, you can
precisely control the amount or radius of the turn with the “LEFT” (throttle) stick: pushing
forward on the LEFT stick widens the turn; pulling back the “LEFT” stick tightens the
turn. The left stick functions as an ELEVATOR control in this case!
Once the inside wing begins to bank a little move right stick back to center.
The MicroFighters will maintain the turn by itself; push right stick in opposite direction
to straighten out.
NOTE: Your MicroFighters is designed to self-stabilize automatically when power
is reduced. In an "emergency" situation in which the plane is out of control,
quickly pulling the left throttle stick ALL the way back to stop the motors will
let the plane save itself and not crash!
To land your MicroFighters direct it INTO any slight wind and decrease throttle for slow
and steady descent. For perfect landings on smooth surfaces with the landing gear
however, land WITH the wind in the same direction it is blowing for a gentle touchdown.
To let your MicroFighters take off from any smooth surface allow about 17 m / 50 ft takeoff run
and even more clear space for climb out. Point it INTO any slight wind and give full power while making careful steering
corrections. Practice with your MicroFighters until you are confident and skilled enough to cancel the restricting
feature of Easy Mode and use the Pro Mode. To switch over to Pro Mode: BEFORE you turn on the controller, hold the
RIGHT stick hard over to the right. Then turn on the controller while still holding the RIGHT stick to the right. You can
release the right stick and the red LED will blink three times indicating you have activated Pro Mode and deactivated
the Easy Mode! Move the LEFT stick forward and back once to enable the controller as before.
2
4
6
5
3
7
8
1