Radio Shack 25-3053 User Manual
Page 11
11
Operation
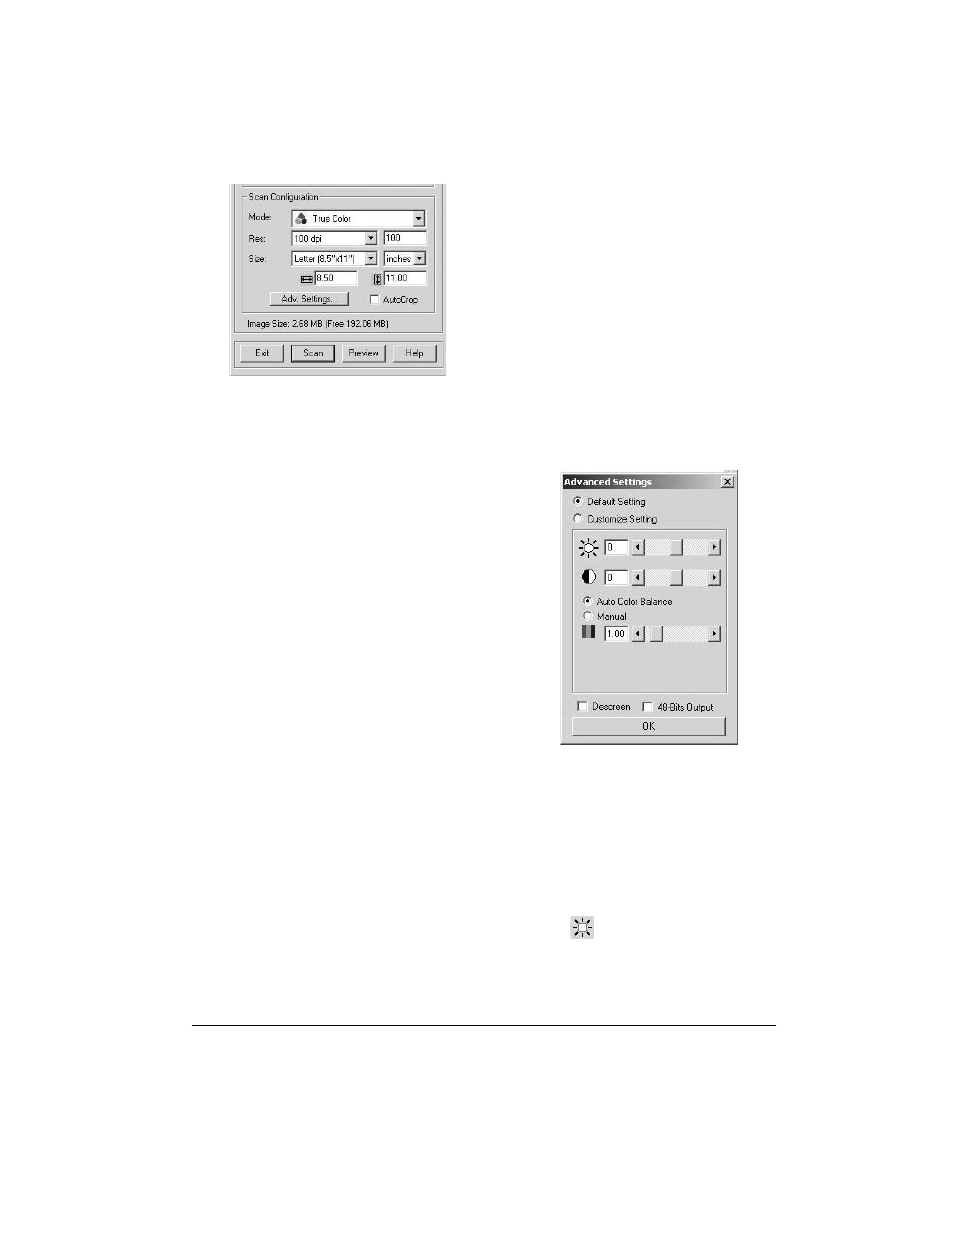
• Mode — Click the drop-down arrow
and choose True Color, Grayscale,
or Black-and-White.
• Res — This is the resolution setting
for the scan in dots-per-inch (DPI).
The higher the DPI, the sharper the
image. However, higher DPI settings
also produce larger files. Usually the
higher resolution settings are used for
precision work such as photographs
or fine artwork. Click the drop-down
arrow and choose a resolution setting
from the list.
Note: We recommend you use the
higher-resolution settings with the
supplied PageManager software.
• Size — The page size for the image.
If you want to use one of those preset
sizes, click the drop-down arrow and
choose the size from the list. To cre-
ate a custom size, click on the picture
window and drag the mouse. A dotted
box on the window indicates the page
size, and the two number boxes (with
the horizontal and vertical symbols
next to them) show the actual page
size in inches. You can also enter the
horizontal and vertical sizes in the
number boxes.
• AutoCrop — Select this option to let
the scanner automatically determine
the size of the object being scanned.
For example, if you put a photo in the
middle of the glass, the scanner will
automatically determine the size of
the photo. When
AutoCrop is
selected, the scanner makes two
passes. The first pass senses the
object's size and the second scans
the image.
Note: This option overrides any
selections you make using
Size.
• Adv. Settings — Select this option to
see advanced settings for scanning.
When you click on Adv. Settings, the
Advanced Settings dialog box
appears.
Default Setting — This option sets
the scanning software to its default
values. Default Setting works fine
for most scanning.
Customize Setting — This option
lets you set the Brightness, Con-
trast, and Gamma correction for the
scanned image.
•
(Brightness) — Drag the
slider to the left or right to adjust
the brightness of the scanned
image.