Testing the connections, Mounting the components, Mounting the cd changer – Radio Shack 10 Disc CD Changer User Manual
Page 13
13
TESTING THE
CONNECTIONS
Make sure all connections are secure
before continuing with the installation.
Then reconnect the cable to the vehicle
battery’s negative (–) terminal.
Verify that you connected the CD chang-
er correctly by turning on the changer
and playing a CD. Try to use the remote
control by pointing the front towards the
wired CD changer controller and press-
ing
PLAY/PAUSE
or
POWER OFF
.
If everything is connected correctly,
make sure the connections are correctly
marked or identified. Then follow the in-
structions in “Mounting the Compo-
nents.”
MOUNTING THE
COMPONENTS
Before you mount the CD changer and
its components, be sure it is connected
correctly. Then disconnect the cable
from the vehicle battery’s negative (–)
terminal.
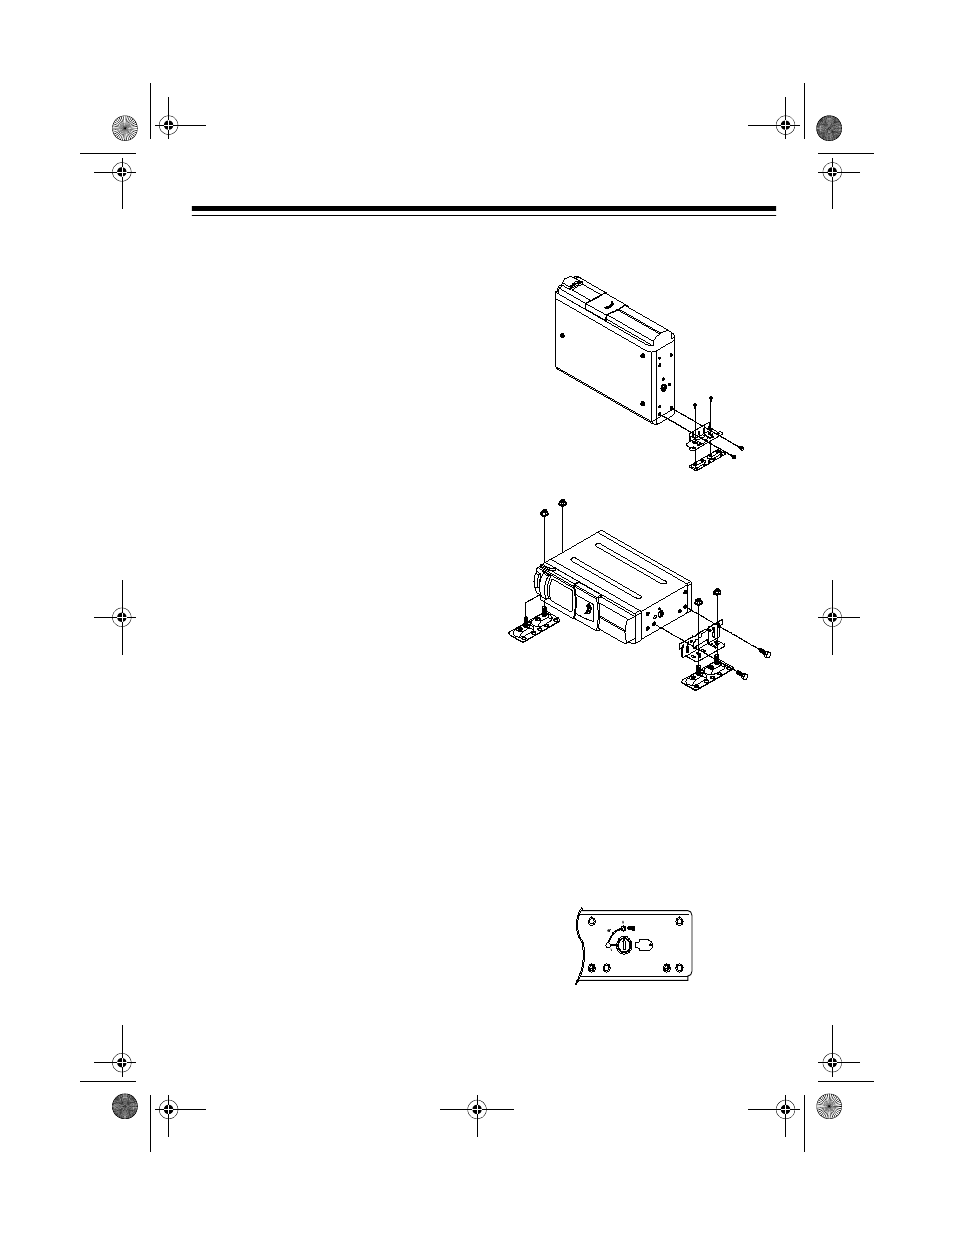
Mounting the CD Changer
1. Set
SPRING ATTACHMENT H/V
(hori-
zontal/vertical) on both sides of the
CD changer for the mounting axis
you chose.
SPRING ATTACHMENT H/V
is preset
to
H
. If you are mounting the CD
changer horizontally, go on to Step
2.
Rad
ioS
hac
k
10-C
D
CH
AN
GE
R
Vertical Mounting
Radio
Shac
k
10-C
D
CHA
NGE
R
Horizontal Mounting
12-2182.fm Page 13 Friday, September 3, 1999 7:31 AM