Assembly and set-up – Razor POCKET ROCKET 155001 User Manual
Page 4
3
asseMBly and set-up
1
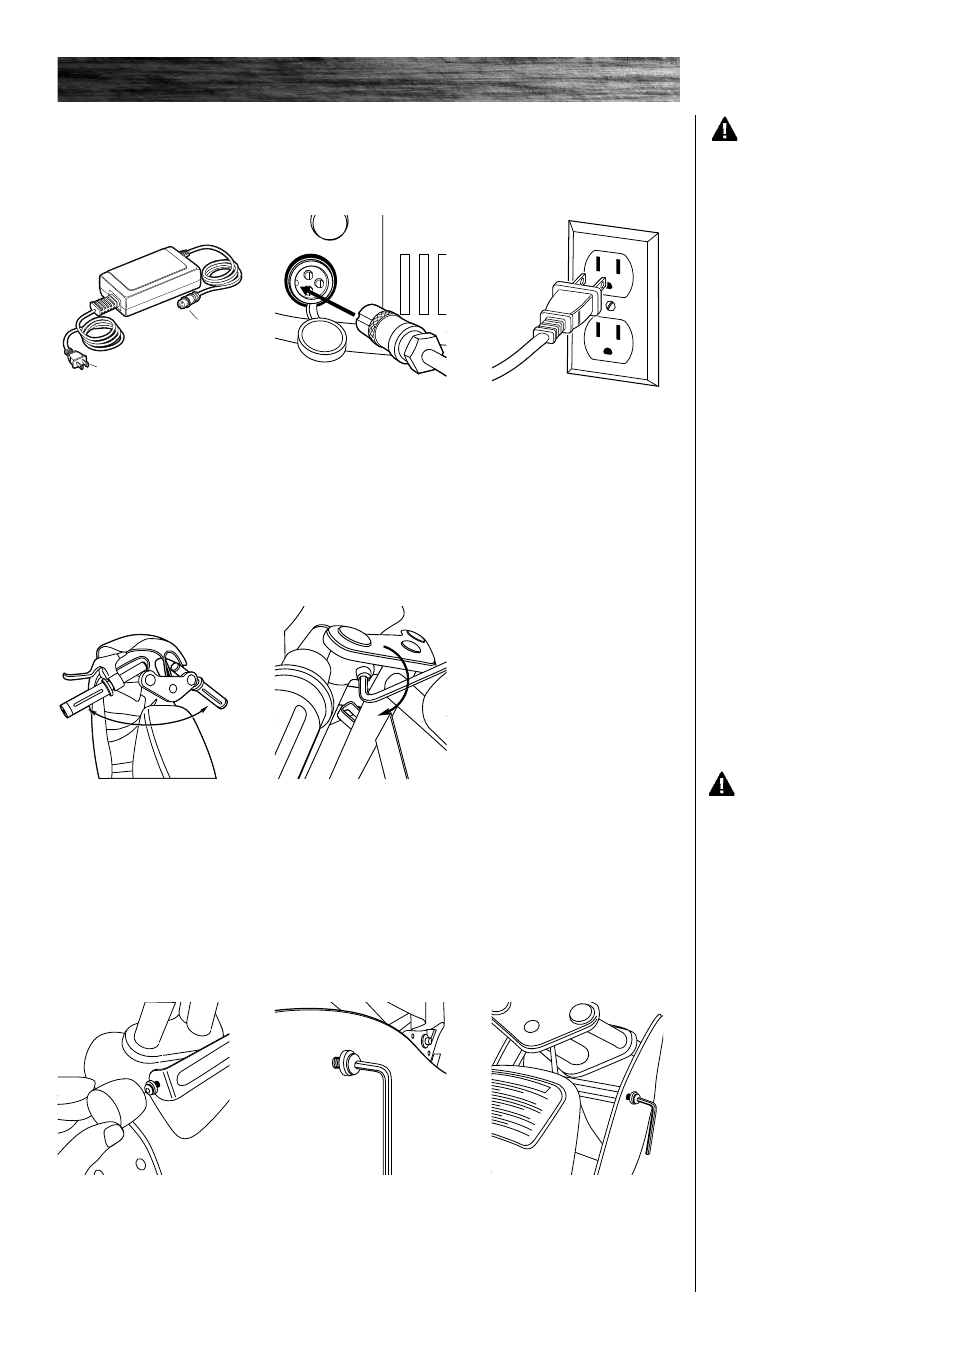
Swing the handlebars
outward as shown. You may
have to loosen the clamps
to allow the bar to pivot on
the fork.
2
Using a 5mm hex key
wrench, tighten both the left
and right side handlebar clamps
by turning the screws clock-
wise. When properly tightened,
the handlebars cannot be
twisted out of alignment.
attaching the Handlebars
warning:
Failure to properly tighten both
sides may cause the handlebars
to dislodge while riding and
may cause you to lose control
and fall. When correctly
tightened, the handlebars will
not rotate out of alignment
under normal circumstances.
charging the Battery
Your electric motorbike may not have a fully charged battery; therefore it is a good idea to charge the
battery prior to use.
• Initial charge time: 12 hours
• Run time: up to 40 minutes
• Recharge time: up to 8 hours,
• Average battery life: 250 charge/discharge cycles
depending on the level of depletion
1
Plug the charger port into the
port on the electric motorbike.
The charger works with the
power switch in either the on or
off position.
2
Plug the charger plug into a
wall outlet.
warning:
Always disconnect your electric
motorbike from the charger before
cleaning with liquid.
Note: If your charger does not
look like the one illustrated,
your unit has been supplied
with an alternative charger.
The specifications and charging
procedure would not change.
The charger has a small window
with one LED or two LEDs to
indicate the charge status. Refer
to the illustration on the charger
unit for the actual “charging” and
“charged” status indications for
your model charger.
Chargers have built-in over-charge
protection to prevent battery from
being over-charged.
Be sure to properly align the
groove on the charger input
plug with the corresponding
socket on the case; otherwise,
no charging action will occur.
Charger
Plug
Charger
Port
1
Remove two rubber protectors
from fairing mount. Remove two
button head screws with rubber
washers from both sides of fairing
mount.
2
Position the fairing and
align holes with holes in fairing
mount. Attach fairing to
mounting points and secure
with screws.
attaching the fairing
3
If you have trouble aligning
holes, put one screw in place
loosely and maneuver opposite
side into position. Tighten all
screws.