Newcon Optik MB-2 User Manual
Page 8
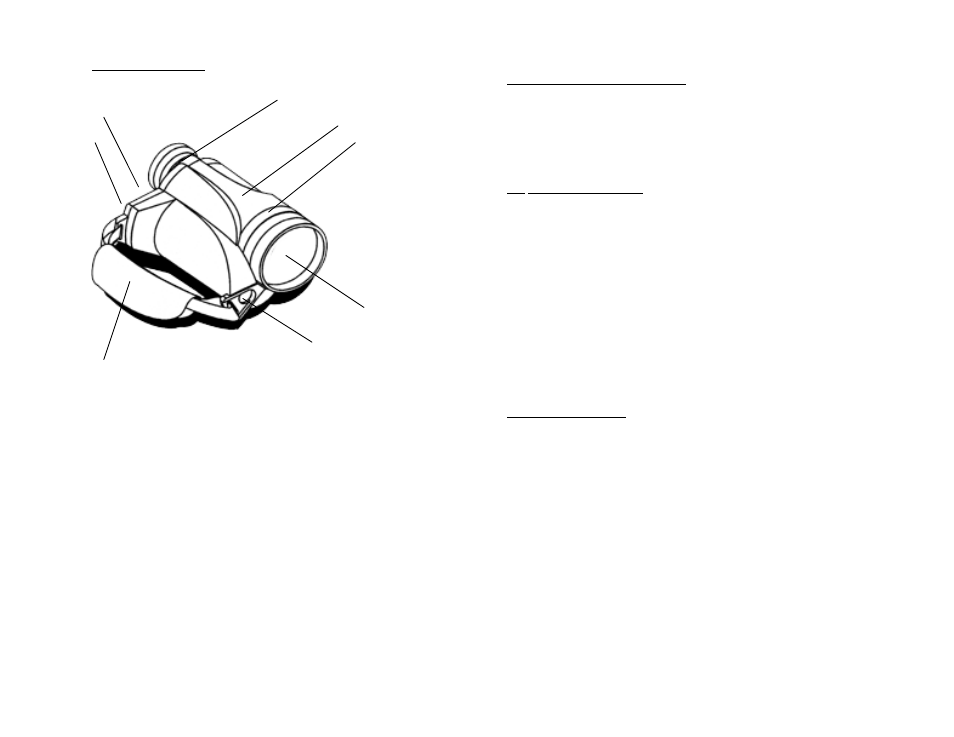
4. CONSTRUCTION
3
4, 5
1
7 2
8
6
9
1- Body
2-
Lens Focusing Ring
3-
Eye-piece Focusing Lever
4-
Switch Button for the Scope
5-
IR Illuminator Switch
6- IR
Illuminator
7-
Battery House Cover
8- Lens
Cover
9- Carrying Strap
5. OPERATION INSTRUCTIONS
WARNING!
NEVER OPERATE YOUR NIGHT VISION DEVICE IN DAYLIGHT
AREAS WITHOUT THE LENS COVER ON ! NEVER DIRECT THE
LENS IN THE DIRECTION OF BRIGHT LIGHT !
5.1 Pre-starting procedures.
1. Unpack the device. In order to replace the batteries unscrew battery house
cover (7) and replace the batteries observing the polarity indicated; close
cover (7). First, make sure the lens caps (8) are closed: Check the functioning of
the device by switching it on (click switch 4) and looking through eye-piece (3).
If power supply and the batteries are O.K., you will see greenish lit screen. If
the screen is not lit, check the batteries. Replace the batteries if necessary. If
everything works, now is a great time to fill the warranty card. You can find the
unit’s serial number on eyepiece focusing ring (3) or lens focusing ring (2).
NOTE:
The scope will remain on for up to several minutes after releasing the
ON button. This is normal.
NOTE:
Since the unit is tightly sealed to remain waterproof, lever (3) will not
rotate easily.
5.2. Testing of operation
Turn on the device-using switch (4). Lens cap (8) must be on. Direct the device
on an object placed within 40-50 m from the viewer. Turning the eye-piece (3)
try to achieve the sharpest image on the screen of the image tube. For close
focusing rotate the front lens (2)