Installation method, E 10 – Nextar NCU101 User Manual
Page 11
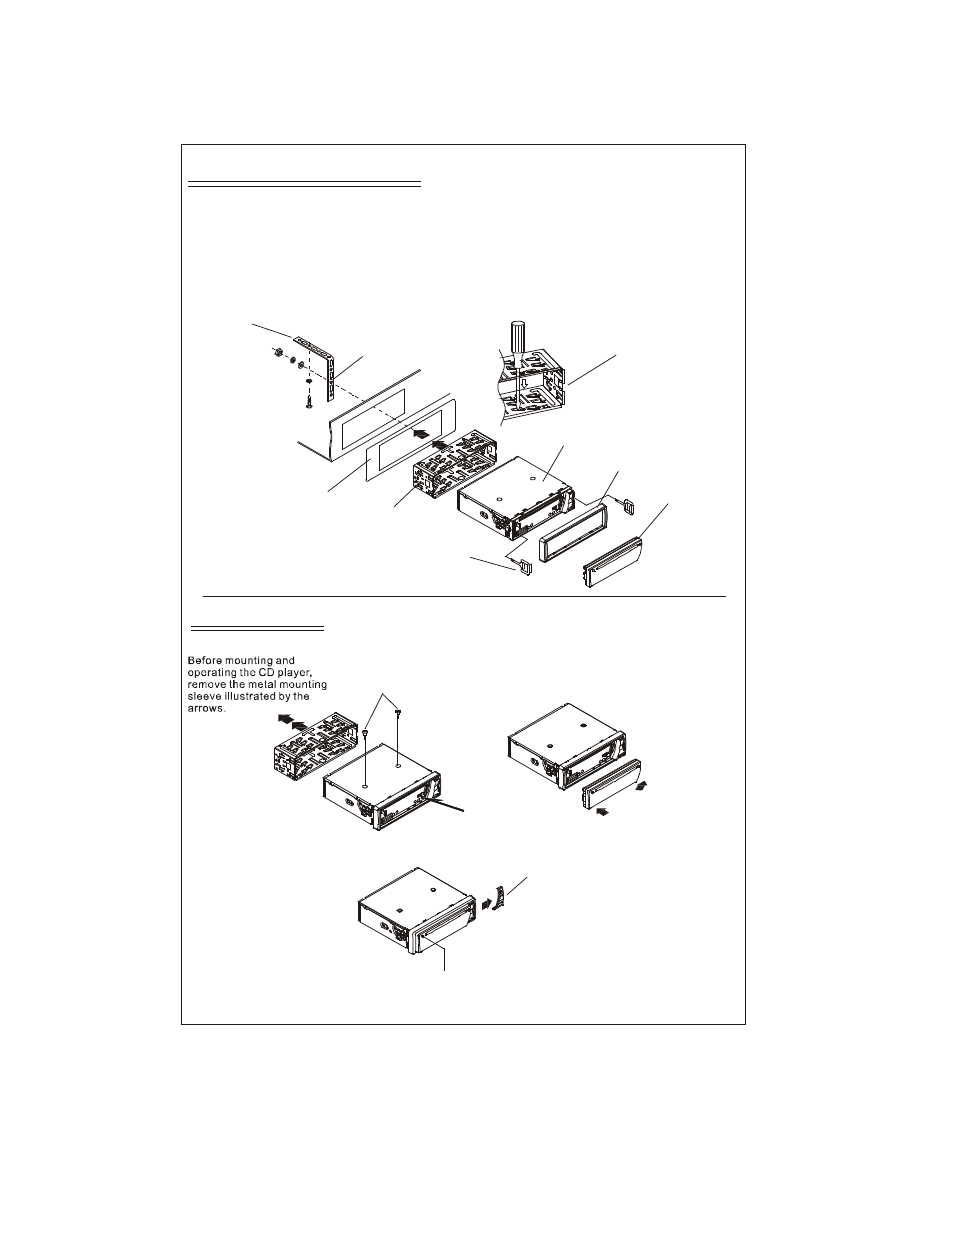
This is an anti-theft installation method.
The main unit wears a METAL MOUNTING SLEEVE.
Please connect the wiring, eg, the Power Supply, the Speakers and the Antenna
according to the requirements of this Instruction Manual, then install the metal
mounting sleeve into the car as per the diagram illustrated below.
METAL SUPPORT STRAP
METAL MOUNTING SLEEVE
DASHBOARD
FRONT PANEL
PLASTIC TRIM RING
UNIT CHASSIS
NOTE
Remove th e two screws that
protect the CD player du ring
transportation before o perating
the player.
To attach the removable faceplate, insert the
right side of the faceplate into the left of the
CD player chassis first. Then push the left side
of the faceplate into the chassis until.
Push thi s reset button with a
cuspidal obj ect to renovate the
distorted program once the program
is distorted.
INSTALLATION METHOD
To properly fix the metal mounting
sleeve, bend the tabs of the sleeve
against the DASH BOARD with a
screwdriver.
To raise the anti-skip capability of the unit
please ensure the metal support strap is
connected firmly to the car chassis.
To remove the CD player from the Cage insert the
supplied keys into the Left and Right side slots of the
chassis then pull the chassis out of the cage as shown.
RESET BUTTO N
N OTE:
W h e n needing to insert MM C/SD card
into the M MC /S D c a rd c o mpartment or
to insert USB bar into the U SB s o cket,
pull the plas tic c over rightward away
from the player and then s tore it for safety.
W h e n no needing to do MM C/SD or USB
operation, pleas e m ake the plastic c o ver
m atch its r ight position in the fr ont panel
and then push it from right to left till get to
the right position of th e fron t panel.
To remove the front panel from the unit chass is,
p ress the REL k e y to release the front panel from
the unit chassis , the n pu ll it up a little to tak e out
fro m th e un it c hassis .
E 10