Step 2 : cabinet assembly continued, Top !!! bott om panel, Check panel orientation – Nuvo 220 User Manual
Page 6
~ 6 ~
~ 7 ~
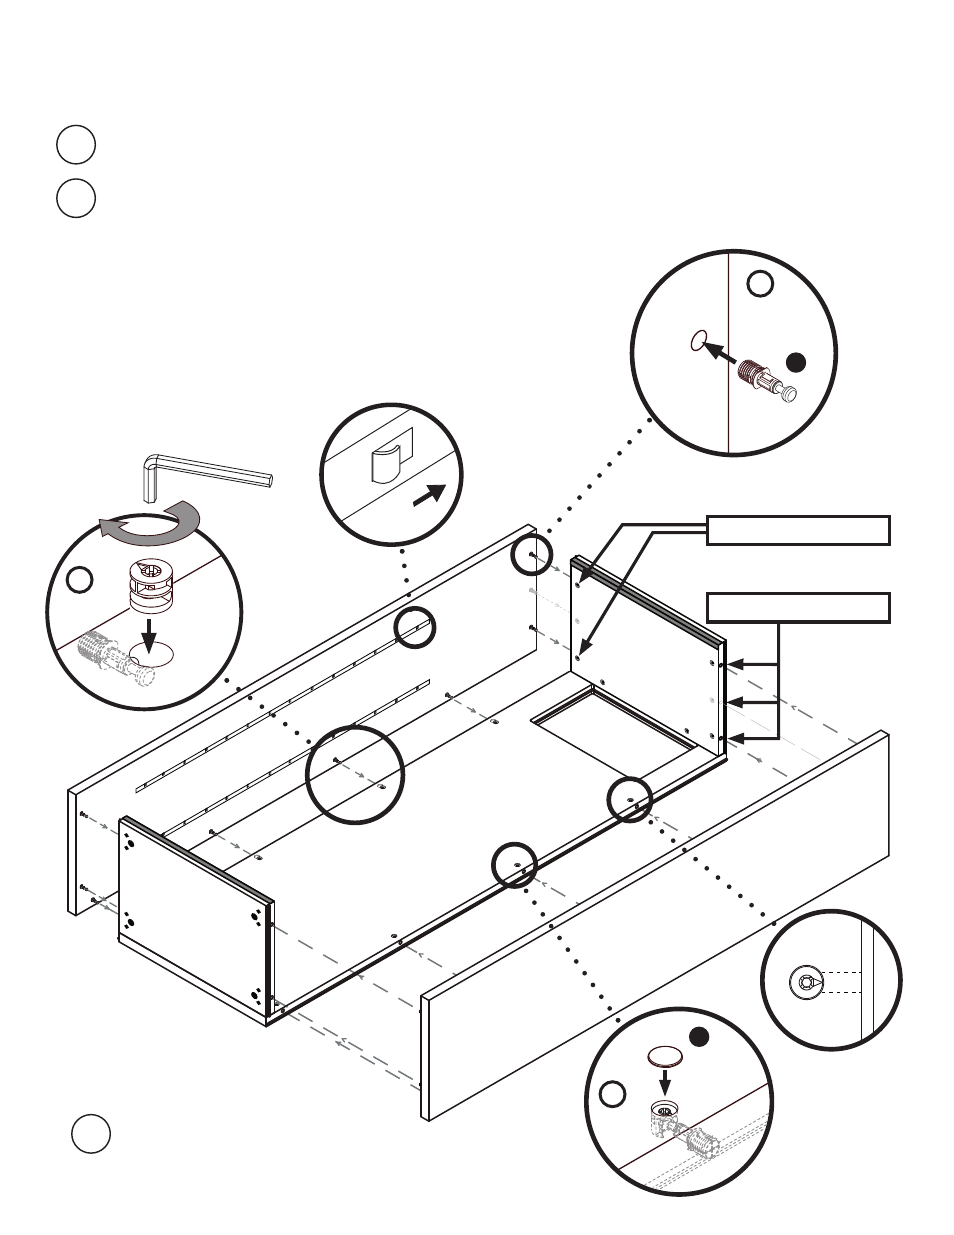
STEP 2 : CABINET ASSEMBLY CONTINUED
CHECK PANEL ORIENTATION !!!
Open Box VP5 or VP2.
Insert
Cam Pins (E) into SIDE PANEL’S predrilled holes both sides
down to TAB.
(May require some force)
Attach SIDES to Back/Bottom/Top by
Carefully aligning edge
holes over Cam Pins and gently push together to avoid damaging
cam pins.
CHECK PANEL ORIENTATION !!!
Insert
Cam and make sure Arrow points to outside edge, use
allen key provided or #3 phillips screwdriver. Start locking one
cam at each end first.
Lock all Cams.
Cam Arrow faces away from outside edge when tightened.
1
����
����
2
Insert
Cam Cap (A) in all Cam Holes.
3
����
3
2
1
TOP !!!
BOTT
OM
PANEL
Place cabinet against a
wall to push sides in place.
A
E
2 HOLES FOR MODEL 110
3 HOLES FOR MODEL 220
This manual is related to the following products: