Bend joists, Bend, Fig.1 fig.2 – NHT iC1 User Manual
Page 4
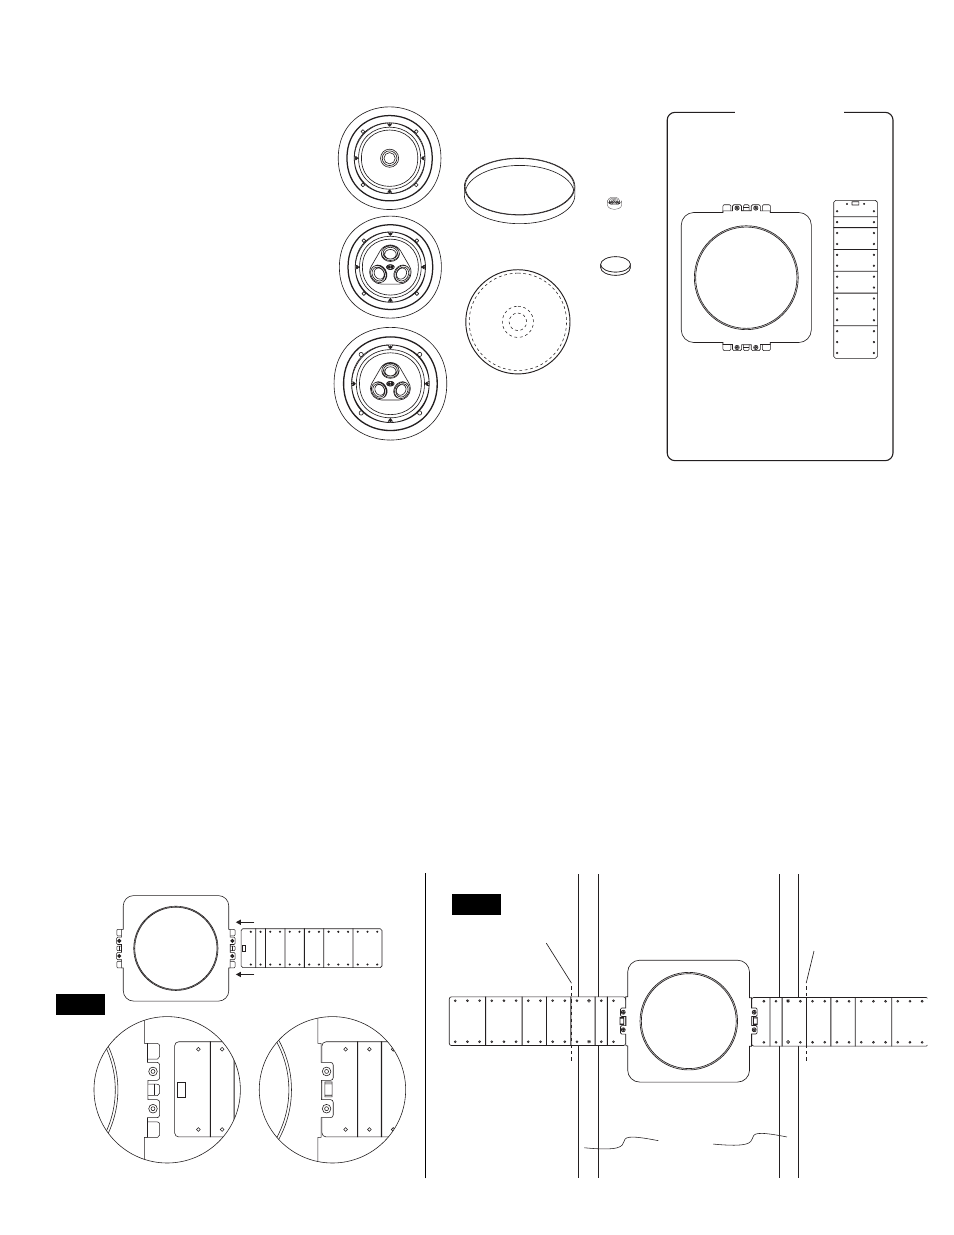
Parts List (each speaker):
“Speaker” pack includes:
(1) Speaker assembly
(1) Metal grille
(2) Absorptive foam pad (except iC1)
(1) Paint shield - cutout template
(1) Roll of butyl rubber
iCB6 and iCB8 Mounting Bracket pack
includes:
(1) Mounting bracket
(2) Metal mounting wings
(4) 5 x 50mm flathead screws
Tools Needed:
#2 Philips screwdriver
Pencil
Tape measure
Utility knife or keyhole saw
Level
Wire strippers
Safety goggles
Protective gloves
Installation: New Construction (unfinished ceilings)
1. Once you’ve selected the desired location for the speaker, begin by installing the iCB6 or iCB8 mounting bracket between adjacent
ceiling joists. First attach the mounting wings to the bracket by inserting them into the locking plastic tabs in the side of the bracket
(fig.1).
2. The wings feature progressively elongated sections (1”, 1”, 2”, 2”, 2”, 3”, 3”) with screw holes spaced in one inch increments. The
iCB6 and iCB8 have NHT logos on one side, this side should be oriented away from the drywall. Attach the wings to the joists with the
5 x 50mm flathead screws or staples. For maximum stability, use two screws for each wing. Bend back the extra portion of the wing at
one of the pre stamped “break” lines (fig.2).
3. Complete the pre wiring before the drywall goes up (see “Tech Tips: Pre-Wiring for New Construction”). Leave an extra few feet of
speaker wire, and tie it to the the mounting bracket.
3456789
1
0
1
1
3
4
5
6
7
8
9
1
0
11
12
12
13
14
1
2
1
2
1
3
1
4
Mounting
bracket
Aluminum
Mounting
wing
Speaker
Assembly
Metal grille
Paint shield -
cutout template
Absorptive
Foam Pad
Butyl
Rubber
iCB6 / iCB8
(optional)
Use
for models iC1, iC2, iC3
iCB6
Use
for model iC4
iCB8
iC1
iC2
iC3
iC4
1
2
1
2
3
3
1
2
1
2
3
4
5
6
7
8
9
10
11
3
4
5
6
7
8
9
10
11
1
2
12
13
14
1
2
12
13
14
3
4
5
6
7
8
9
10
11
3
4
5
6
7
8
9
10
11
1
2
12
13
14
1
2
12
13
14
Bend
Joists
3
4
5
6
7
8
9
10
11
3
4
5
6
7
8
9
10
11
1
2
12
13
14
1
2
12
13
14
Bend
fig.1
fig.2