Service and adjustments, Warning – Poulan 545146926 User Manual
Page 12
12
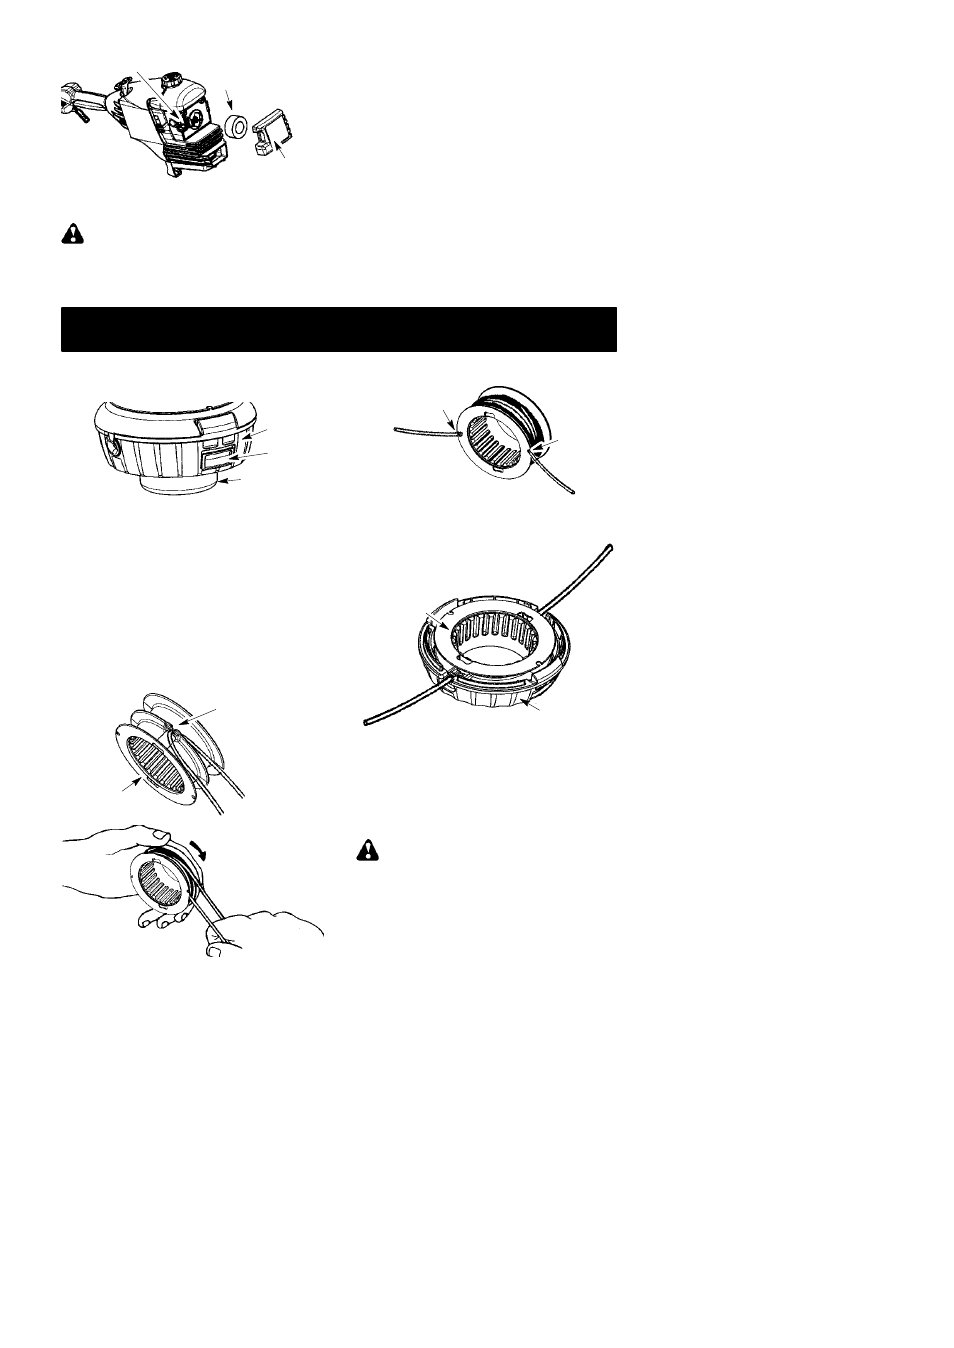
Air Filter
Air Filter Cover
Button
MUFFLER AND SPARK ARREST-
ING SCREEN
WARNING:
The muffler on this prod-
uct contains chemicals known to the State of
California to cause cancer.
As your unit is used, carbon deposits build up
on the muffler and spark arresting screen.
For normal homeowner use, however, the
muffler and spark arresting screen will not re-
quire any service. After 50 hours of use, we
recommend that your muffler be serviced or
replaced by your authorized service dealer.
REPLACE SPARK PLUG
Replace the spark plug each year to ensure
the engine starts easier and runs better.
Inspect spark plug every 25 hours of usage.
Clean and/or replace as necessary. Set spark
plug gap at 0.025 inch (0.6 mm). Ignition tim-
ing is fixed and nonadjustable.
1. Twist, then pull off spark plug boot.
2. Remove spark plug from cylinder and
discard.
3. Replace with Champion RCJ-6Y spark
plug and tighten securely with a 3/4 inch
(19 mm) socket wrench.
4. Reinstall the spark plug boot.
SERVICE AND ADJUSTMENTS
REPLACING THE LINE
1. Press the tabs on the side of the trimmer
head and remove cover and spool.
Tab
Cover
Tap Button
2. Remove any remaining line.
3. Clean dirt and debris from all parts. Re-
place spool if it is worn or damaged.
4. Replace with a pre-wound spool, or re-
place line using a 25 feet (8 meters)
length of 0.080 inch (2 mm) diameter
Poulan PRO brand line.
5. When installing new line on an existing
spool, hold the spool as shown in the il-
lustration below.
6. Bend the line at the midpoint and insert
the bend into the slot in the center rim of
the spool. Ensure line snaps into position
in the slot.
Slot
Spool
7. With your finger between the lines, wrap
the lines evenly and firmly around the
spool in a clockwise direction.
8. Position the lines in the guide slots.
Guide
Slot
Guide Slot
9. Insert the ends of the lines through exit
holes in the sides of the cover.
10. Place the spool in the cover.
Spool
Cover
11. Make sure the lines are not caught be-
tween the rim of the spool and the wall of
the cover.
12. Reinstall the spool and cover onto the
trimmer head. Push until cover snaps into
place.
CARBURETOR ADJUSTMENT
WARNING:
Keep others away when
making idle speed adjustments. The trimmer
head or any optional attachment will be spin-
ning during most of this procedure. Wear your
protective equipment and observe all safety
precautions. After making adjustments, the
trimmer head or any optional attachment
must not move/spin at idle speed.
The carburetor has been carefully set at the
factory. Adjustments may be necessary if you
notice any of the following conditions: