Battery installation – Porter-Cable H1000 User Manual
Page 11
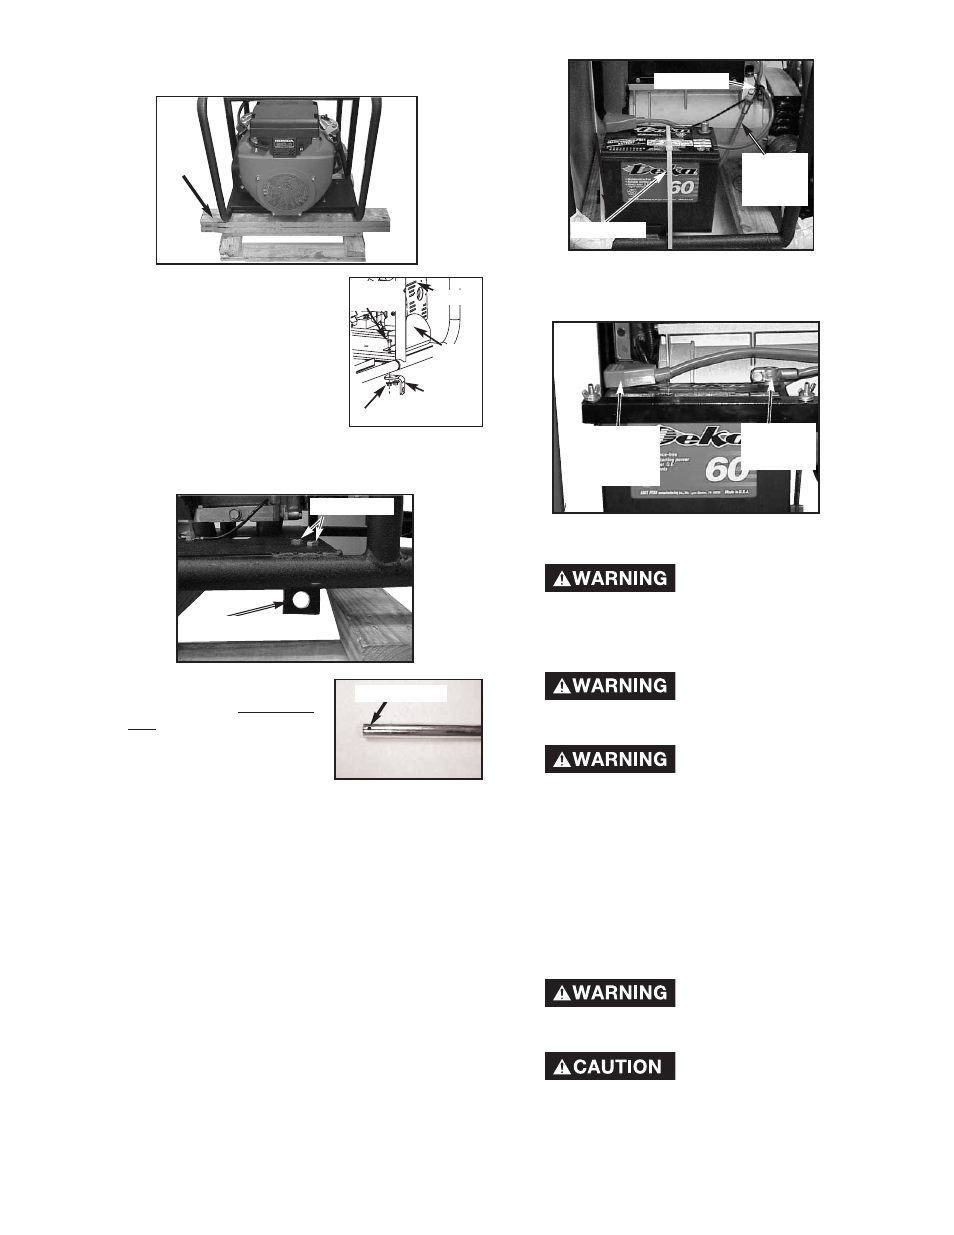
2.
Connect black negative cable to negative (-) battery
post. Tighten securely. NOTE: Make sure rubber boot is
covering positive (+) battery terminal.
NOTE: If battery needs to be charged, follow these
instructions.
When charging the battery,
do not smoke. Keep away
from any sparks. The fumes from the battery
acid can cause an explosion. To prevent
explosive fumes from accumulating do not
charge in an enclosed area.
Sulfuric acid is a
flammable and explosive
chemical that is harmful to the skin, eyes, and
clothing.
To prevent sparks,
disconnect the black
battery cable from the negative (-) terminal
before disconnecting the red positive cable.
1.
Remove black negative battery cable from the battery.
2.
Remove red positive battery cable from the battery.
3.
Use a portable 12 volt battery charger, if needed, to
bring battery to full charge (12.6 at 70ºF.). Refer to the
battery charger’s operator’s manual for the correct
procedure. If a battery charger is not available, have an
authorized service center charge the battery.
4.
Connect the battery cables.
To Prevent sparks connect
the red (positive) cable to
the positive (+) terminal before connecting the
black negative cable.
When transporting unit over
extremely rough terrain by
vehicle the battery should be secured.
BATTERY INSTALLATION
The generator is equipped with a maintenance free battery.
1.
For packaging purposes the black negative battery cable
and battery were secured with wire ties. Cut these wire
ties.
11 — ENG
Positive
Battery
Cable with
rubber boot
Negative
Battery
Cable
6.
Lift other end of generator and place two 2x4s between
generator and pallet as shown.
7.
On the muffler side of the engine,
remove cap screws and flange
nuts holding the heat shield to the
frame. Reassemble cap screws,
heat shield, wheel bracket, and
flange nuts and as shown. Tighten
securely.
8.
On other side, assemble wheel
bracket using cap screws and
flange nuts supplied. Tighten securely.
NOTE: Brackets are placed under frame with hole facing
outward.
9.
Using a hammer tap axle cap
onto end of axle, without the
hole.
10. Slide wheel onto axle with
valve stem to the outside.
11. Slide spacer onto axle against
wheel.
12. Slide axle through axle brackets. NOTE: The pallet will
need to be removed before the wheel can be
assembled.
13. Lift generator and slide pallet and 2x4s out. NOTE:
Generator will tilt.
14. Lift generator and slide spacer, then wheel (with valve
stem to the outside) onto axle.
15. Slide flat steel washer onto axle against wheel.
16. Secure with cotter pin.
2x4
Cap screws
Wheel Bracket
Hole in Axle
Negative
Battery
Cable
Wire Tie
Wire Tie
Muffler
Heat
Shield
Cap
Screw
Wheel
Bracket
Flange Nuts