Setting up your d 200 – Parasound Model D 200 User Manual
Page 15
15
SETTING UP YOUR D 200
Navigating the Setup Menu with the Remote Handset
You’ll need to make some selections so that the D 200 performs correctly in your home theater
system. These Menu settings are selected by using the D 200’s remote control handset. If you
have not already done so, open the battery compartment cover and install the batteries, making
sure their directions match the markings on the remote.
Notes:
- You don’t need to make all of these selections right away.
- Your D 200 must be connected to a TV to use the setup menu because its front panel does not
display the setup menu. Don’t forget to select the proper input on your TV.
- If you think your D 200 is set up for the wrong video type (NTSC or PAL) or if there is no output
from the HDMI jack please see the FAQ section of this manual.
- If your D 200 is connected to your TV only by an HDMI cable and you cannot see the setup
menu, you may need to temporarily connect a composite video cable in order to view the setup
menu. Then you can turn on your D 200’s HDMI output.
Start with your D 200 power turned on and at full stop (press the
STOP button twice).
Press the
SETUP button on your remote handset.
The main menu will appear.
This is the onscreen display (OSD)
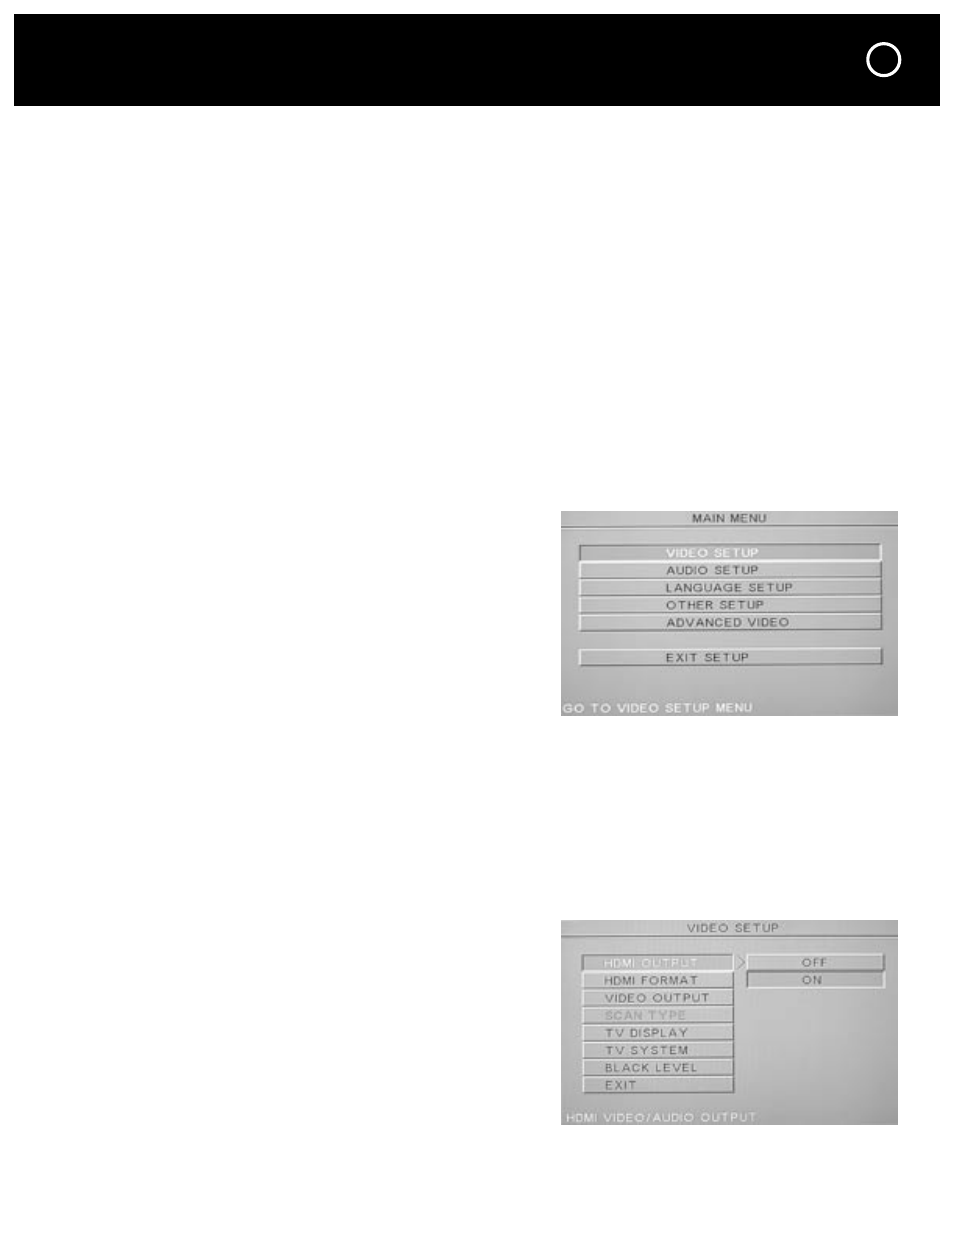
Setup Menu Structure
The
MAIN MENU setup screen shows the titles of the five setup categories.
- VIDEO SETUP
- AUDIO SETUP
- LANGUAGE SETUP
- OTHER SETUP
- ADVANCED VIDEO
Each of these titles branches out into its own page,
where you will make your actual selections or adjust-
ments. For example, when you select VIDEO SETUP
you will see the VIDEO SETUP page.