Basic connections, Step 4: connecting the mains lead, Continued) – Philips DVR5100 User Manual
Page 16
16
English
Basic Connections
(continued)
RS-232
DIO OUTPUT
CM / DOLBY DIGITAL
COAXIAL
Manufactured under license from
Dobly Laboratories. “Dolby” and
the double-D symbol are
trademarks of Dolby Laboratories.
OPTICAL
ANALOG
HDMI
OR
1
2
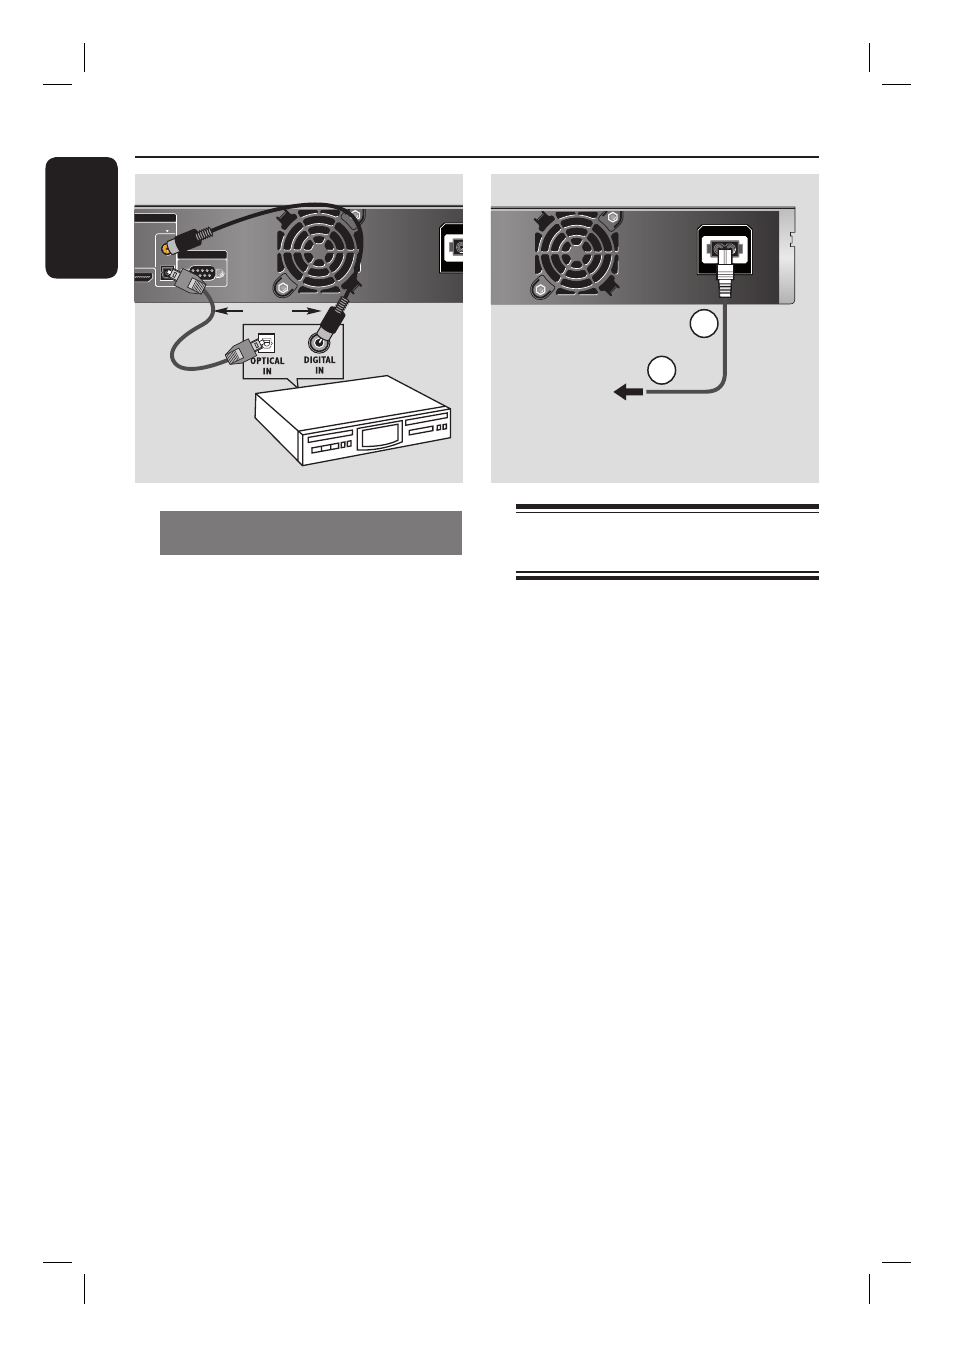
Option 2: Using the digital audio
socket (COAXIAL or OPTICAL)
You can connect the recorder to an AV
amplifi er/receiver in order to enjoy
multichannel surround sound.
Use a coaxial cable (not supplied) to
connect the COAXIAL socket to the
digital coaxial input socket (or labelled as
COAXIAL IN or DIGITAL IN) of the
connected device.
– an A/V receiver or amplifi er with a
digital multi-channel sound decoder.
– a receiver with two-channel digital
stereo (PCM).
OR
Use an optical fi bre-optic cable (not
supplied) to connect the OPTICAL
socket to the optical input socket of the
connected device.
– Make sure that both plugs are fully
inserted (until a click is heard).
Step 4: Connecting the
mains lead
Connect the supplied mains lead to the
AC IN terminal of the recorder. Then
plug the recorder into the mains. After
you connect the mains lead, you must
wait for a short while before
operating the recorder. You can
operate the recorder once the front
panel display lights up and the recorder
enters standby mode.
AV amplifi er/receiver
to mains
to AC IN
Option 2