Cleaning agitator, Replacing agitator, Agitator assembly – Panasonic MC-V325 User Manual
Page 34: Montaje assemblage
- 34 -
1)
➢
Ne brancher qu’une fois l’assemblage
terminé.
➢
Retirer la vis du manche.
➢
Insérer le manche avec le crochet de
rangement du cordon à l’arrière de
l’aspirateur.
2)
➢
Insérer la vis.
➢
Serrer la vis.
3)
➢
Insérer le cordon d’alimentation à
l’intérieur du crochet.
4)
➢
Enrouler le cordon autour du crochet.
➢
Fixer la fiche au cordon d’alimentation à
l’aide de son agrafe.
Colocación del mango
Montaje
Assemblage
Montage du manche
1)
➢
No enchufe hasta que el montaje esté
completo.
➢
Quite el tornillo del mango.
➢
Meta el mango con los sujetadores del
cordón en la parte posterior de la
aspiradora.
2)
➢
Instale el tornillo.
➢
Apriete el tornillo.
3)
➢
Empuje el cordón eléctrico hacia el
soporte del cordón.
4)
➢
Envuelva el cordón eléctrico alrededor
de los sujetadores del cordón.
➢
Asegure la clavija en el cordón eléctrico.
- 15 -
Cleaning Agitator
➢
➢
Clean agitator after every five uses
and every time the belt is replaced.
➢
➢
Remove lower plate.
➢
➢
Cut off any carpet pile and lint
entangled around agitator with a pair
of scissors.
➢
➢
Remove agitator.
➢
➢
Remove any string or debris located
on the end caps, washers or agitator
shaft.
➢
➢
Reinstall agitator and lower plate.
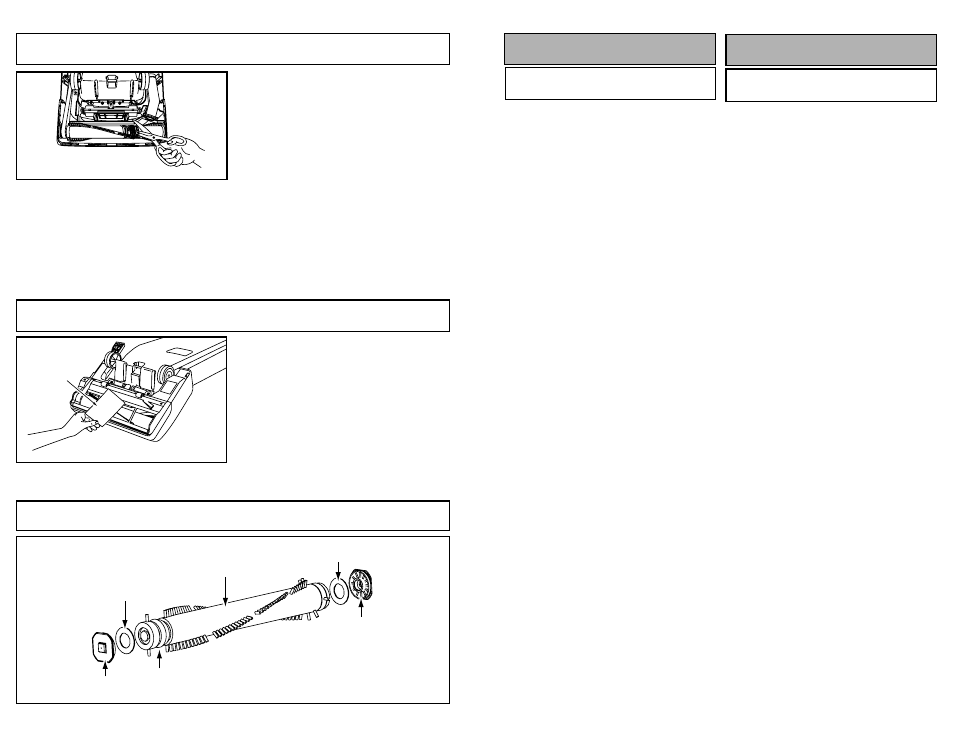
Agitator Assembly
➢
➢
When the bristles on the agitator are
worn so that they do not touch a card
held across the lower plate, the
agitator should be replaced.
➢
➢
Remove lower plate and agitator.
➢
➢
Position belt over belt pulley on the
new brush unit.
➢
➢
Reinstall agitator and lower plate.
Replacing Agitator
End Cap
End Cap
Washer
Washer
Belt Pulley
Brush Unit
Card
Carte
Tarjeta