Installation diagrams – PYLE Audio DISC CD CHANGE User Manual
Page 8
7
ø3.5mm
c)
e)
e)
a)
a)
c)
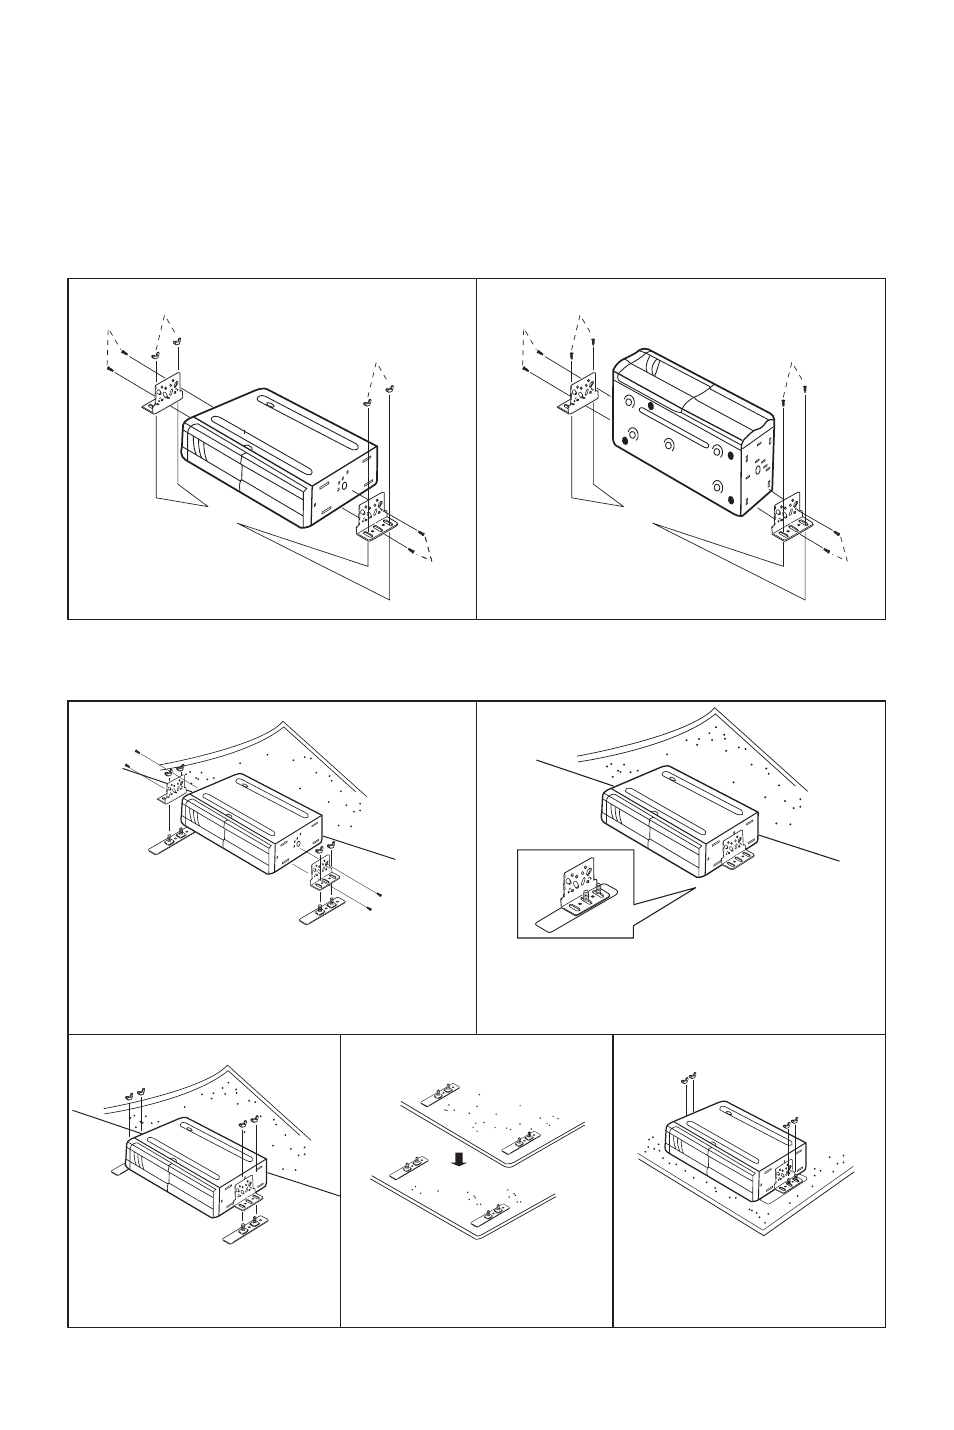
Press the unit to the floor, and
remove the wing nuts (d), and lift
off the changer
Lay down the carpet. Cut 1 “X” on
each area of the carpet where the
mounting bolts will pass through
Mount the unit in place, using 4
wing nuts (d)
Attach the brackets (a) to each side of the unit
using hex bolts with washers (c).
Attach the floor base plate (b) to the brackets a)
using the wing nuts (d)
Lift the carpet and determine the mounting
location. Fix the floor base plate (b) to the floor
using self-tape screw (f).
c)
e)
a)
a)
d)
c)
b)
b)
d)
d)
d)
d)
INSTALLATION DIAGRAMS
HORIZONTAL / VERTICAL INSTALLATION PROCEDURES
1. Attach the brackets (a) to each side of the unit. Using the hex bolts with washers
(c).
2. Determine the mounting location and drill 4 mounting holes approximately 3.5mm
in diameter .
3. Secure the unit in place using 4 self-tapping screws (e).
HORIZONTAL INSTALLATION
ø3.5mm
c)
e)
e)
a)
a)
c)