Setting-up the projector, Positioning: room light, Leveling and elevating adjustments – Proxima ASA Pro AV 9400L User Manual
Page 7
200"
154"
26.9' (8.2 m)
600"
462"
80.7' (24.6 m)
7
40"
77" 115"
154"
231"
308"
462"
600"
100"
150"
200"
300"
400"
760 mm
760 mm
100"
SCREEN
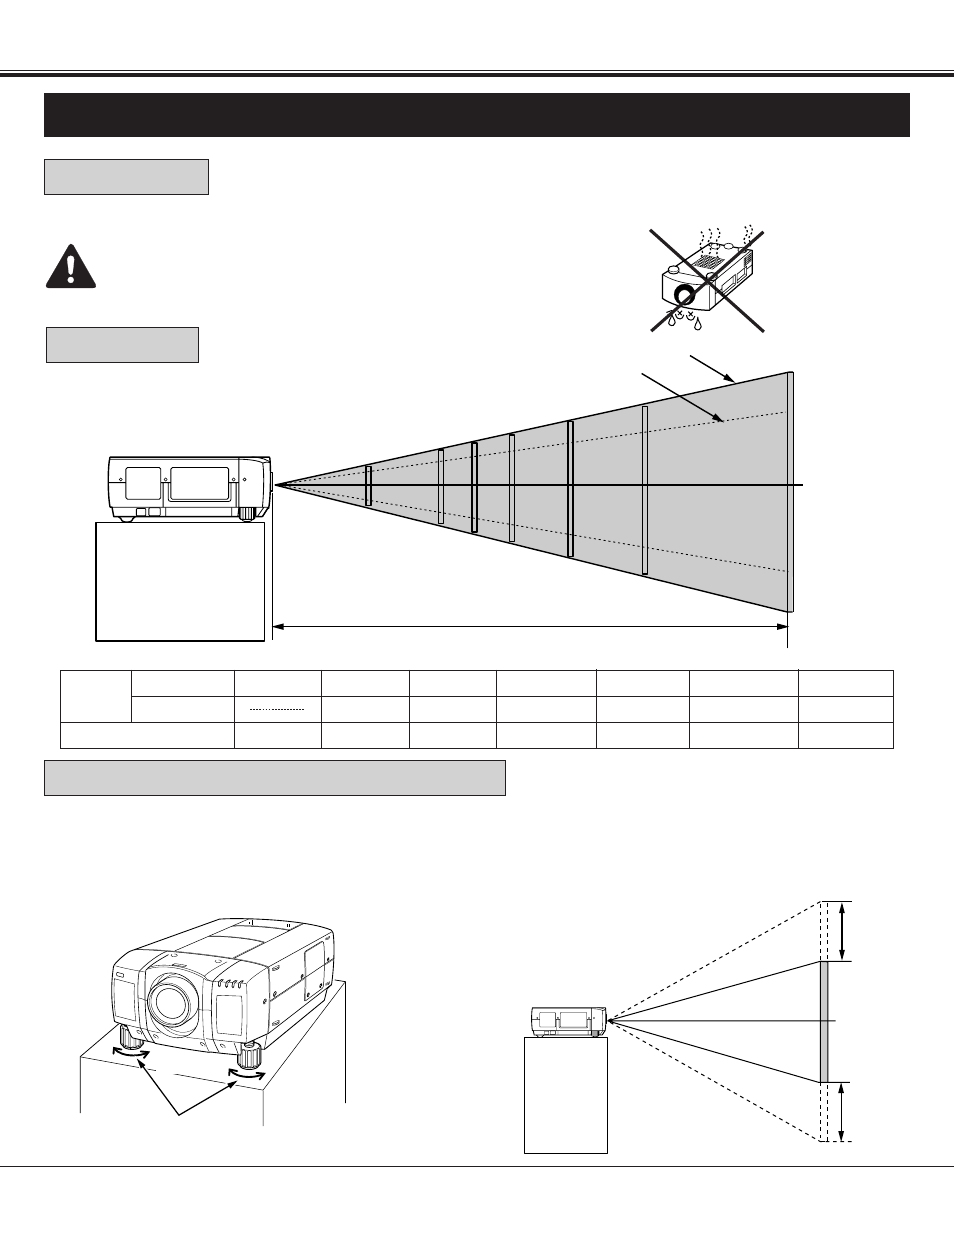
POSITIONING:
ROOM LIGHT
●
This projector is basically designed to project on a flat projection surface.
●
This projector can be focused from 4.9' (1.5 m) ~ 80.7' (24.6 m).
●
Refer to the figure below as an example when positioning the projector to the screen.
The projector should be placed in a room with
limited light. Picture quality will be directly
affected by lightning conditions.
Minimum Zoom
Maximum Zoom
DISTANCE
Screen
Size
Max. Zoom
Min. Zoom
Distance
40"
4.9' (1.5 m)
100"
77"
13.1' (4.0 m)
150"
115"
20' (6.1 m)
300"
231"
40' (12.2 m)
400"
308"
53.8' (16.4 m)
THIS PROJECTOR SHOULD NEVER BE SET IN THE WAY
INDICATED. NEVER HANG THE PROJECTOR UPSIDE DOWN.
IT MAY RESULT IN FIRE HAZARD.
Two feet adjust the projection angle and leveling the
projector. The projection angle can be adjusted up to 4
°
degrees by rotating the two (left and right) feet located on
the bottom of the projector.
Level the projector by rotating the two feet.
MOVE THE PROJECTED IMAGE POSITION
Adjust the projected image position (maximum 760mm
downward or upward on the 100" screen) by using lens shift
function. (See page 33.)
UP
UP
DOWN
DOWN
LEVELING/ELEVATION
FEET
LEVELING AND ELEVATING ADJUSTMENTS
SETTING-UP THE PROJECTOR
INSTALLATION