Programming recordings with the g-code ® system, Quick install guide, 6programming recordings with the g code – Philips HDRW720/69 User Manual
Page 6: System
6
Programming recordings with the
G Code
®
System
1 Switch on the TV set. If required, select the programme number
for the DVD recorder.
2 Press TIMER s on the remote control.
P
The 'Schedule' screen will appear
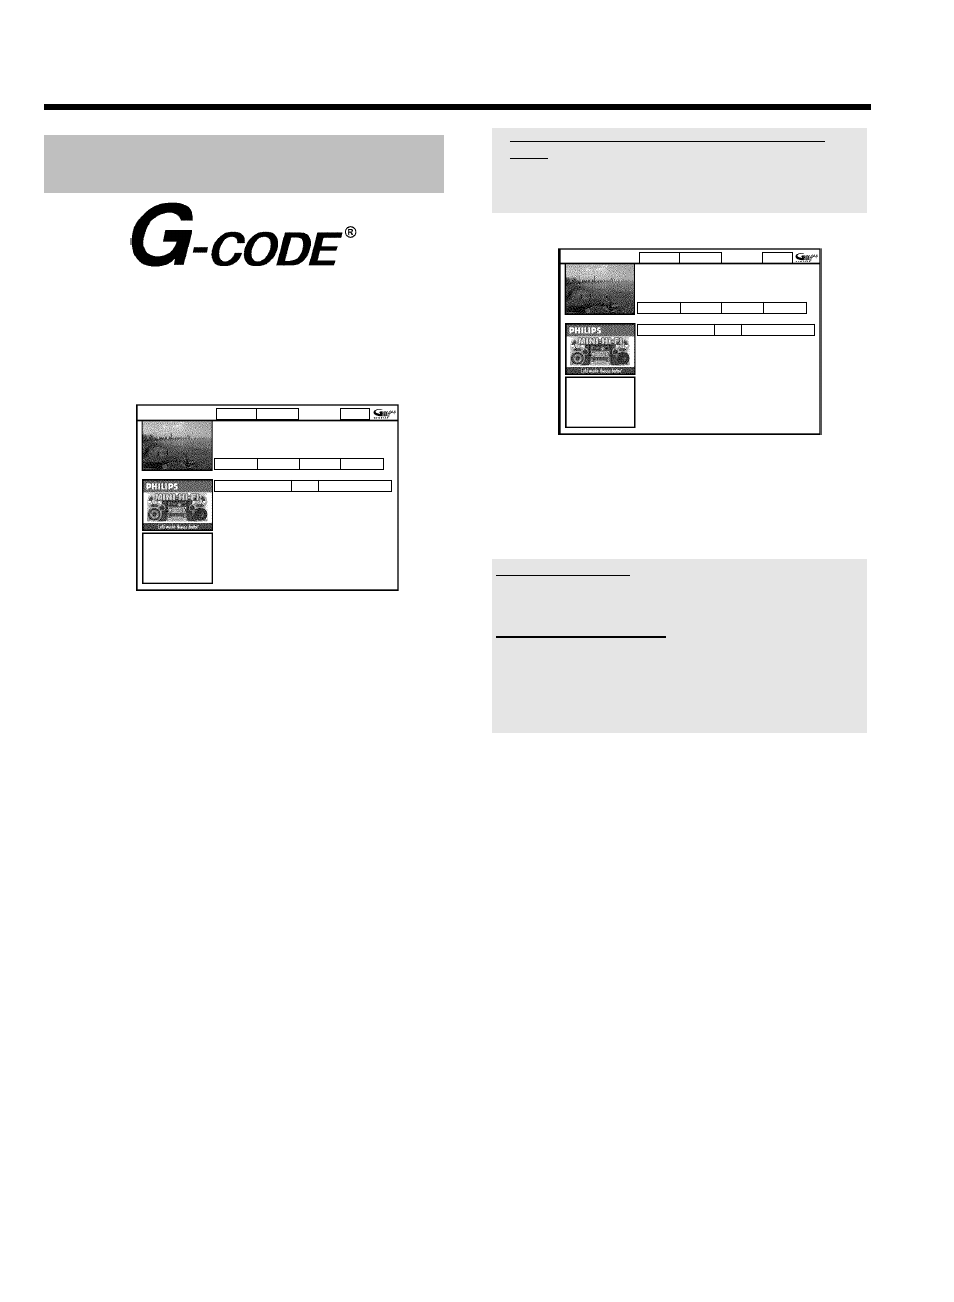
3 Press the red function button ('G-Code').
G-Code
Manual
Home
Please enter the G-Code programming number and
press OK to confirm.
= = = = = = = = =
Grid
Search
Schedule
Info
No programmes
Once 0
4 Enter the entire G-Code number. This number is up to 9 digits
long and can be found next to the start time of the TV programme
in your TV listings magazine.
e.g.: 5-312-4 or 5,312 4
Enter 53124 for the G-Code-number.
Use therefore the number buttons 0..9 on the remote control.
If you make a mistake you can press
D or the green action button
to go back a position.
5 Confirm with OK .
a
'Please enter programme number' appears on the
screen
b
This message appears when the TV channel has not been assigned
yet.
Enter the program number and confirm with OK .
G-Code
Manual
Home
Please enter the G-Code programming number and
press OK to confirm.
1 2 3 4 5 = = = =
Grid
Search
Schedule
Info
/Record
Freq. Timing
21-Oct 20:00
21:30 BBC1
Once 0
P
The decoded data appears after confirmation.
You can use the colour buttons to make the following settings.
First, the right tile must be highlighted (
C button). Check the
functions (descriptions) in the corresponding colour field
before pressing a button.
Deactivate 'VPS/PDC'!
If 'VPS/PDC' appears instead of the time, press the yellow function
button until the 'V/P' sign disappears.
Setting up repeat recordings
You can choose from the following settings with the green action button:
'Frequency': 'Once': single recordings
'M-F': Repeated daily recordings (Monday to Friday).
'Mon': Repeated weekly recordings (every week on the
same day e.g. Monday).
6 If all information is correct, press the OK button. The data is
stored.
7 To end, press TIMER s .
If one or more recordings have been programmed 'TIMER' will light up
on the display.
Quick install guide