Service and adjustments, Warning – Poulan PPB100E User Manual
Page 12
12
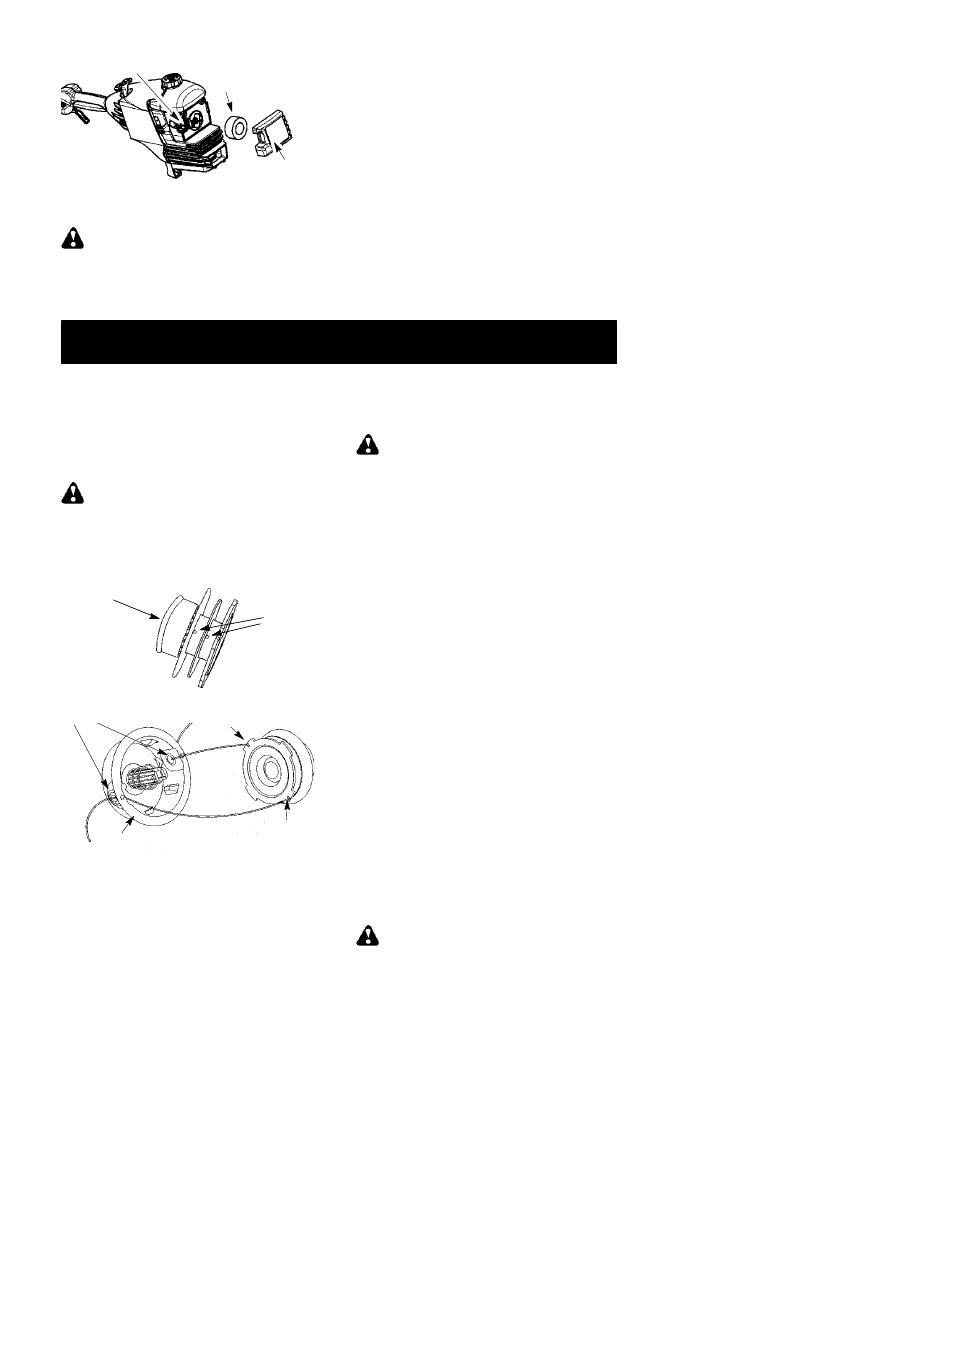
Air Filter
Air Filter Cover
Button
MUFFLER AND SPARK ARREST-
ING SCREEN
WARNING:
The muffler on this prod-
uct contains chemicals known to the State of
California to cause cancer.
As your unit is used, carbon deposits build up
on the muffler and spark arresting screen.
For normal homeowner use, however, the
muffler and spark arresting screen will not re-
quire any service. After 50 hours of use, we
recommend that your muffler be serviced or
replaced by your authorized service dealer.
REPLACE SPARK PLUG
Replace the spark plug each year to ensure
the engine starts easier and runs better.
Inspect spark plug every 25 hours of usage.
Clean and/or replace as necessary. Set spark
plug gap at 0.025 inch (0.6 mm). Ignition tim-
ing is fixed and nonadjustable.
1. Twist, then pull off spark plug boot.
2. Remove spark plug from cylinder and
discard.
3. Replace with Champion RCJ-6Y spark
plug and tighten securely with a 3/4 inch
(19 mm) socket wrench.
4. Reinstall the spark plug boot.
SERVICE AND ADJUSTMENTS
REPLACING THE LINE
1. Remove spool by firmly pulling on tap
button.
2. Clean entire surface of hub and spool.
3. Replace with a pre-wound spool, or cut two
lengths of 12-1/2 feet of 0.080″ (2 mm) di-
ameter Poulan PRO brand line.
WARNING:
Never use wire, rope,
string, etc., which can break off and become a
dangerous missile.
4. Insert ends of the lines about 1/2 inch (1
cm) into the small holes on the inside of
spool.
Small
Holes
Spool
Hub
Line in Notch
Line in Notch
Line exit holes
5. Wind the line evenly and tightly onto the
spool. Wind in the direction of the arrows
found on the spool.
6. Push the lines into the notches, leaving 3
to 5 inches (7 -- 12 cm) unwound.
7. Insert the lines into the the exit holes in
the hub as shown in the illustration.
8. Align the notches with the line exit holes.
9. Push spool into hub until it snaps into
place.
10. Pull the lines extending outside of the hub
to release the lines from the notches.
CARBURETOR ADJUSTMENT
WARNING:
Keep others away when
making idle speed adjustments. The trimmer
head or any optional attachment will be spin-
ning during most of this procedure. Wear your
protective equipment and observe all safety
precautions. After making adjustments, the
trimmer head or any optional attachment
must not move/spin at idle speed.
The carburetor has been carefully set at the
factory. Adjustments may be necessary if you
notice any of the following conditions:
S
Engine will not idle when the throttle is
released.
S
The trimmer head or any optional
attachment moves/spins at idle.
Make adjustments with the unit supported so
the cutting attachment is off the ground and
will not make contact with any object. Hold
the unit by hand while running and making ad-
justments. Keep all parts of your body away
from the cutting attachment and muffler.
Idle Speed Adjustment
Allow engine to idle. Adjust speed until engine
runs without trimmer head or any optional at-
tachment moving or spinning (idle too fast) or
engine stalling (idle speed too slow).
S
Turn idle speed screw clockwise to
increase engine speed if engine stalls or
dies.
S
Turn idle speed screw counterclockwise to
decrease engine speed if trimmer head or
any optional attachment moves or spins at
idle.
WARNING:
Recheck the idle speed
after each adjustment. The trimmer head or
any optional attachment must not move or
spin at idle speed to avoid serious injury to the
operator or others.