Powermatic 29 User Manual
Page 12
12
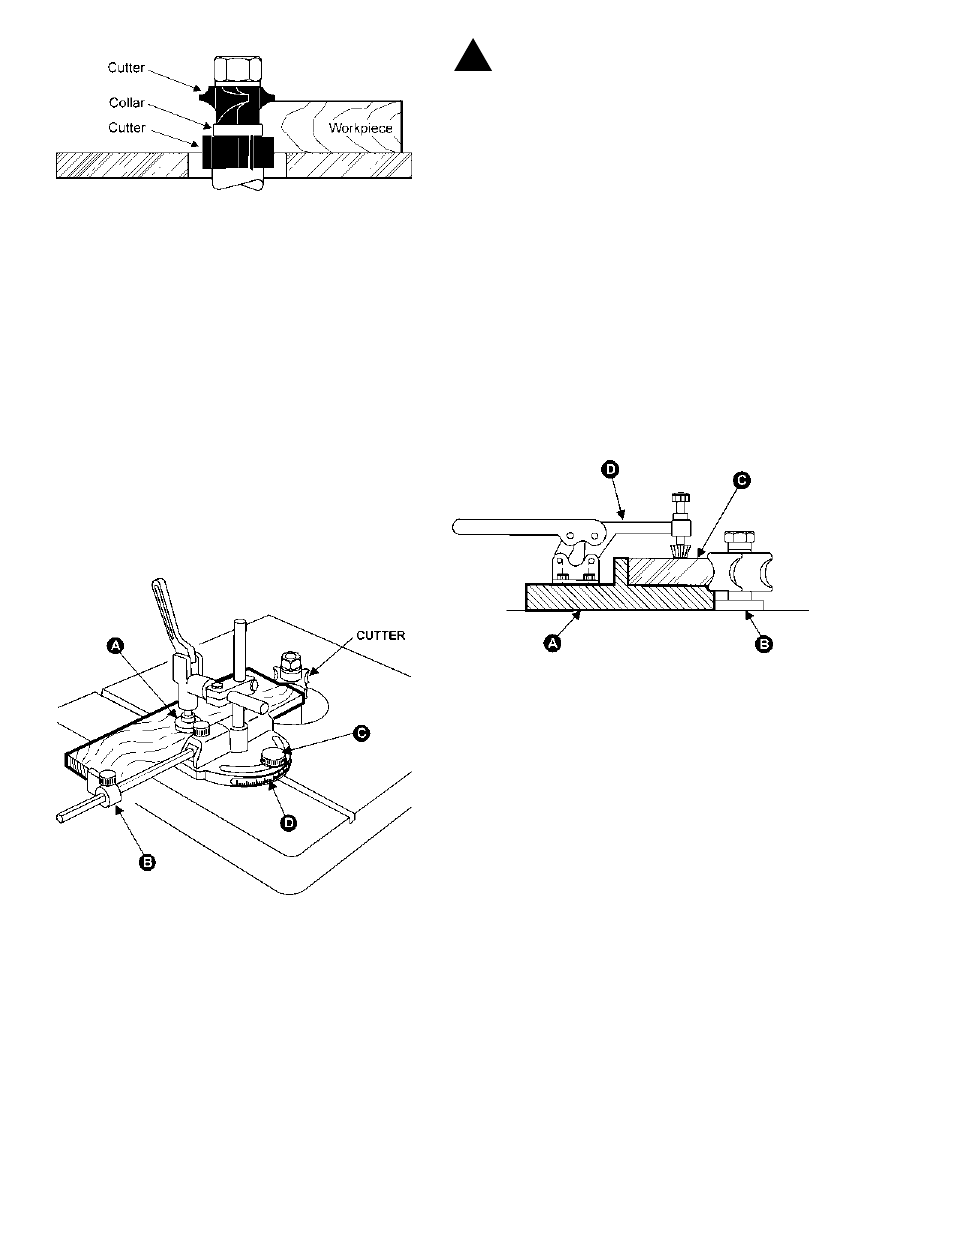
FIGURE 24
NOTE: It is advisable to place the cutter as low as
possible on the spindle to reduce spindle deflection
and ensure the best possible finish. Also make sure
that the contacting surfaces of the cutter are smooth,
clean and without dents.
MITER GAUGE
The miter gauge is used for shaping the end of stock,
usually requiring removal of the fence. To edge-
shape, place the stock against the gauge as shown,
Figure 25. Tighten clamp (A) firmly against stock and
adjust work stop (B) against rear edge of stock. Push
work past cutterhead.
The miter gauge can be adjusted to shape at an angle
by loosening the knob (C) and rotating the gauge body
to the desired angle on the indicator (D).
FIGURE 25
The Shaper can be used for molds, rabbets, grooves,
tenons, copying, etc.:
TENONING
The provided miter gauge and clamp can be used for
tenoning operations.
CAUTION: When using tenoning cutters with
a diameter of 11-13/16" or 9-13/16", run spindle at a
speed not higher than 3,000 RPM. If tenoning cut-
ters have a diameter of 7-7/8" or 6- 3/8", run spindle
at a speed not higher than 6,000 RPM. If tenoning
cutters have a diameter no larger than 3-3/16", run
spindle at 10,000 RPM.
COPYING
When using the same procedure on multiple
workpieces, a jig or template can be made to facili-
tate the operation:
1.
Prepare the jig (A), Figure 26, to accomodate
your original workpiece.
2.
Place the jig (A) against the table insert guide
shoulder (B).
3.
Fasten the new workpiece (C) on the jig (A)
with the clamp (D) and push the assembly past the
cutter.
FIGURE 26
!