01> people, 02> rules, 03> angles – Premier Mounts bravia X series User Manual
Page 13: 04> settings, 05> horizons, 06> lighting, 07> composition, 09> position, 10> balance, Digital slrs
W
hether you’re using a ‘point and
shoot’ camera, like a fabulously
compact Sony Cyber-shot, or a
larger camera like Sony’s new digital SLR,
there are some simple things you can do to
dramatically improve your shots. Brent Williams,
a professional photographer, shares his top tips.
01> People
If you’re shooting people, focus on the eyes, it
doesn’t matter so much if the other elements are
slightly out of focus. Whether you’re shooting
a person or group, make sure lighting is even
across the face.
02> Rules
Apply the rule of thirds. This is the
compositional rule that the main subject of
the photo should not be perfectly centred, but
should be offset by roughly a third. The main
subject should align to an edge or corner of the
centre square. This creates a visually appealing
photo that has balance and energy.
03> Angles
Try turning the camera on its side for a portrait
shot – varying the orientation of a shot can
dramatically improve the photo’s impact.
04> Settings
Generally speaking, keep the ISO sensitivity
down as low as possible to maximise image
quality, although when using the tele end of
the zoom range, a higher ISO setting may be
useful in combination with Super SteadyShot in
avoiding blurry images.
05> Horizons
Use ‘horizons’ to prevent camera tilt. That can
be the actual horizon or a ceiling line, they
can indicate undesirable camera tilt. This can
sometimes be trickier than it sounds. If you’re
taking a picture at an angle to your horizon,
the camera’s perspective will make the horizon
appear to slope. It’s also a good idea to check
vertical lines, such as door frames, to avoid tilt.
06> Lighting
At parties or in dark rooms, do some practice
shooting to get lighting levels right. It’s common
for people to get overexposed because of the
fl ash – a problem that’s very diffi cult to correct
later with software. If your subjects are getting
overexposed, lower the fl ash level through
the camera’s menu or put a little bit of tissue
paper over the fl ash to tone it down. As a rule,
t s bette to u de e pose t a ove e pose.
it’s better to underexpose than overexpose.
Underexposure can often be corrected by
software. Outside, it’s often better to shoot in the
shade than in direct sunlight.
07> Composition
While the LCD is a good tool for general
composition, use the optical viewfi nder (if your
camera has one) to engage the subject more
easily. With the optical viewfi nder you see the
subject with no delay and in higher resolution,
so the camera becomes an extension of yourself
and you’re able to engage with the subject
more easily. Even with the latest LCD screen
technology, the resolution on the LCD never
matches the clarity of seeing something through
the optical viewfi nder with your own eye.
08> Memory
Get a big memory card and go berserk with the
number of shots that you take, don’t just take
one shot. Shoot off three or four very quick
shots, which gives you the chance to skip any
pictures with closed eyes, wacky half-smiles and
other common fl aws.
09> Position
Don’t feel intimidated about asking people
to change position. Be a director! A fun part
of the process is getting people to do things
for the photo. Move people around to get rid
of distracting background elements. You can
also do a little post-production cropping with
software too, if something doesn’t add to the
photo, take it out! Make sure when cropping
that you keep the photo’s original aspect ratio
(approximately), so that the photo doesn’t
become too wide or too thin.
10> Balance
If there’s one accessory that will improve your
photography, it’s a tripod. It eliminates blurry
photos completely and allows you to use longer
exposure times. Even if a tripod is not available,
try and steady your hands by resting your elbows
on your knees or any available surface.
Check out examples of Brett’s work at
www.creativepix.net
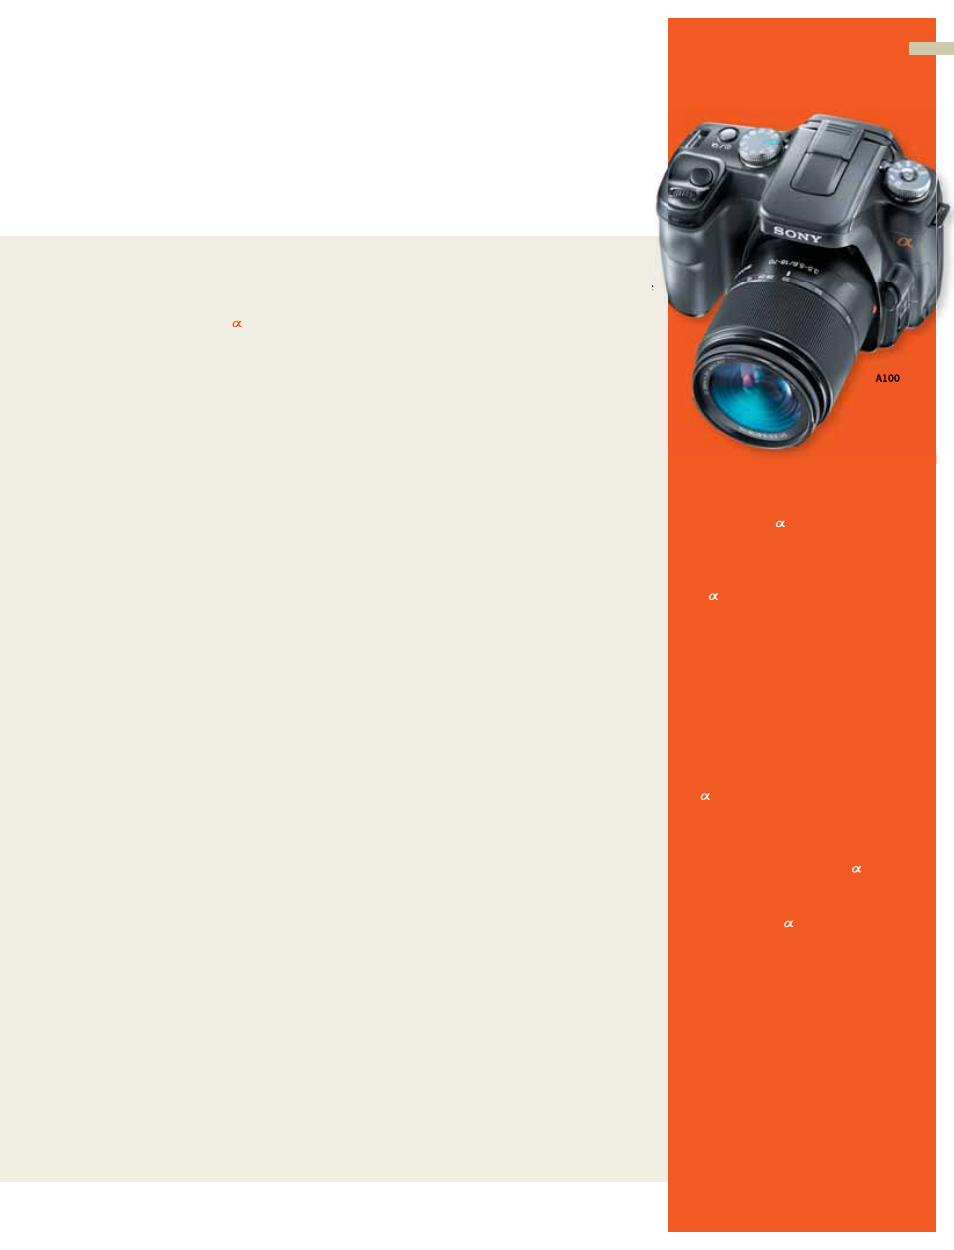
Digital SLRs
With the launch of its brand, Sony has a new
range of digital SLR cameras. The advantages
of digital SLRs are much the same as fi lm SLRs
– you get through-the-lens viewfi nding. Sony’s
DSLR cameras use a mount system based on
the Konica Minolta (KM) lens mount system for
attaching compatible KM and new Sony lenses.
Single-lens refl ex (SLR) cameras have been
popular in the fi lm world for decades. An SLR
gives the photographer the capacity to see
exactly what the photo will look like before taking
the shot. SLR cameras are also more likely to
have switchable lenses, making them the perfect
choice for professional photographers and
serious amateurs alike.
The cameras complement the compact Sony
Cyber-shot range. The Cyber-shot models take
great photos, with resolutions of up to 10 mega
pixels, and they’re the kind of camera you can
carry with you everywhere you go. The DSLR,
however, gives you the capacity to engage the
subject in ways that only an SLR can.
Sony has designed the to make it easy for
point and shooters to make the move to a
digital SLR. A host of automatic settings makes
those fi rst few shots with the new style of
camera easy. These automatic functions can be
progressively turned off as the user becomes
more comfortable with the camera settings. It
also has advanced features like Sony’s sensor-
based Super SteadyShot, which builds anti-shake
technology into the camera’s body: and a special
anti-dust vibration technology that reduces the
risk of dust attaching to the image sensor and
ruining a good photo. There’s also the Eye-Start
Autofocus system, which starts the autofocus as
soon as you bring your eye to the viewfi nder.
Photo: Getty Ima
ge
s
Sony Pulse 17
11
SNAPSHOT