Installation – PYLE Audio PLDVD130 User Manual
Page 6
1
2
3
SCREW
M4x5
6
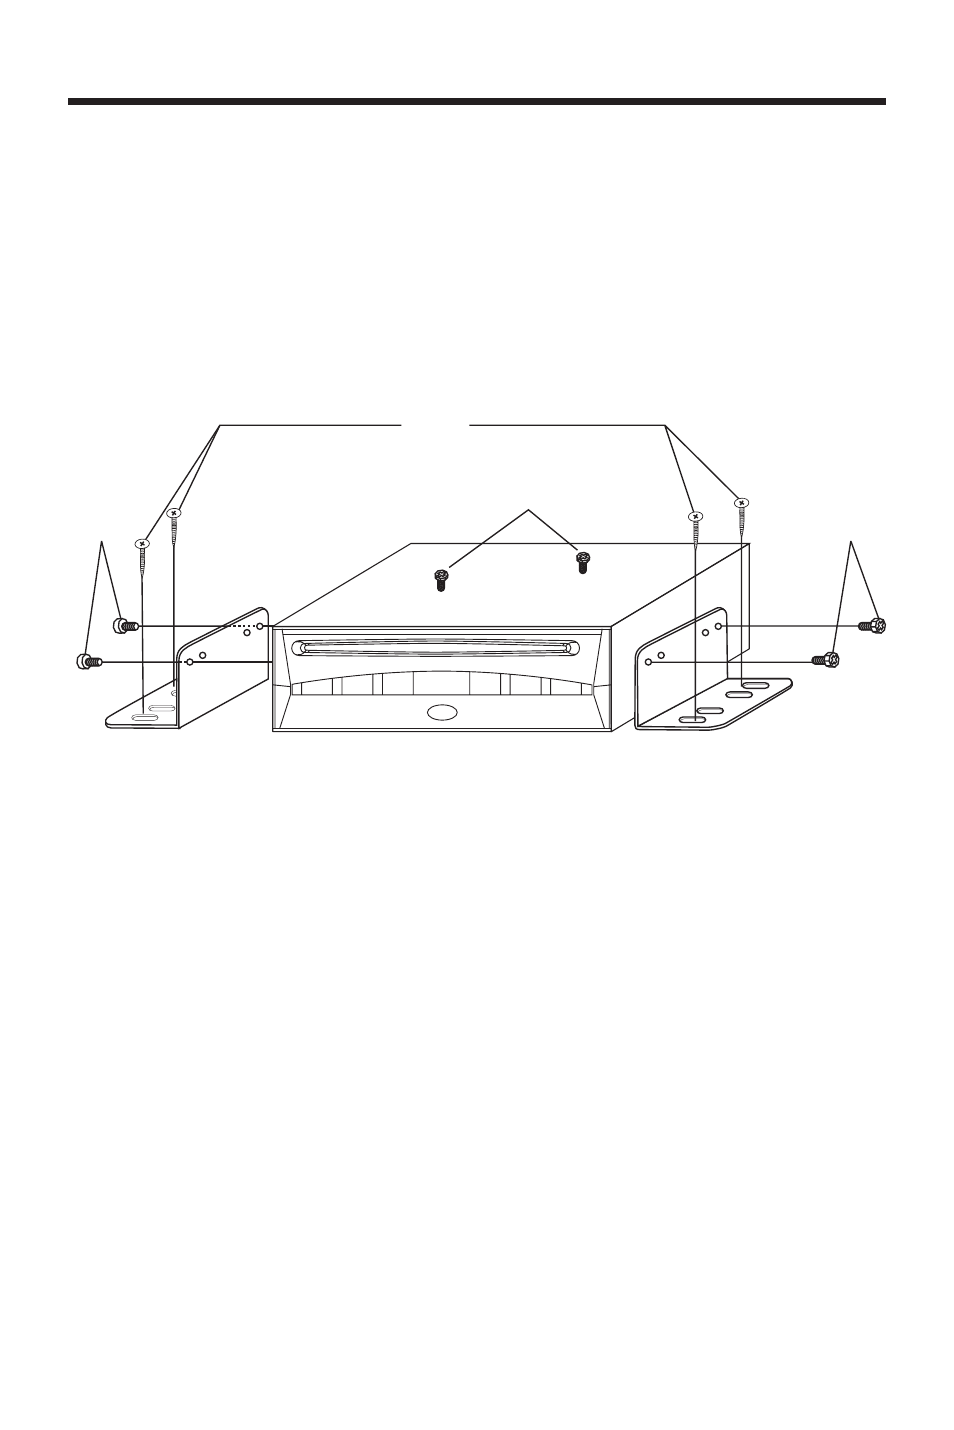
INSTALLATION
Note:
1. First remove the two screws that locket the unit core, then attach the brackets on
both sides of unit with screws (M4x5), last install the unit with screws (M5x25).
2. When fix the unit, you can slide the screw (M5x25) to left side or right side to meet
your needed position. In the figure above, select two holes among the positions
that marked 1, 2, 3 and 4 to fix the bracket.
SCREW
M4x5
SCREW
M5x25
1
2
3
4
SCREWS LOCKED THE UNIT CORE
See also other documents in the category PYLE Audio Car Video:
- PLCD19XMR (18 pages)
- PLRD102 (8 pages)
- PLVW1350IR (12 pages)
- PLPK5TVD (20 pages)
- PLTVD5P (26 pages)
- PLVWR81IR (2 pages)
- PLD70BT (40 pages)
- PLR7N (33 pages)
- PLRD103F (16 pages)
- PLD52MU (24 pages)
- VIEW PLRDVD13 (15 pages)
- PLVHR5IR (6 pages)
- PLVS420 (8 pages)
- PLDVD178USB (24 pages)
- PLDVCR600 (45 pages)
- PLDBT30U (20 pages)
- PL71PHB (8 pages)
- PLTVD7IN (41 pages)
- PLVH72 (3 pages)
- PLDN70U (14 pages)
- VIEW PLVW1045R (7 pages)
- PLD58MUT (26 pages)
- PLTK120 (5 pages)
- PL2DNTV7 (16 pages)
- PLD43MU (35 pages)
- PLVW1770IR (11 pages)
- PLVWR71IR (2 pages)
- PLVW1040R (12 pages)
- PLTVRDIN65 (32 pages)
- PLVS7HM (16 pages)
- PLMDR7 (25 pages)
- PYLE VIEW PLRDVD10 (15 pages)
- PLD175TBT (27 pages)
- PLVW1445R (7 pages)