Service and adjustments, Storage – Poulan 331 User Manual
Page 12
12
SERVICE AND ADJUSTMENTS
REPLACING THE LINE
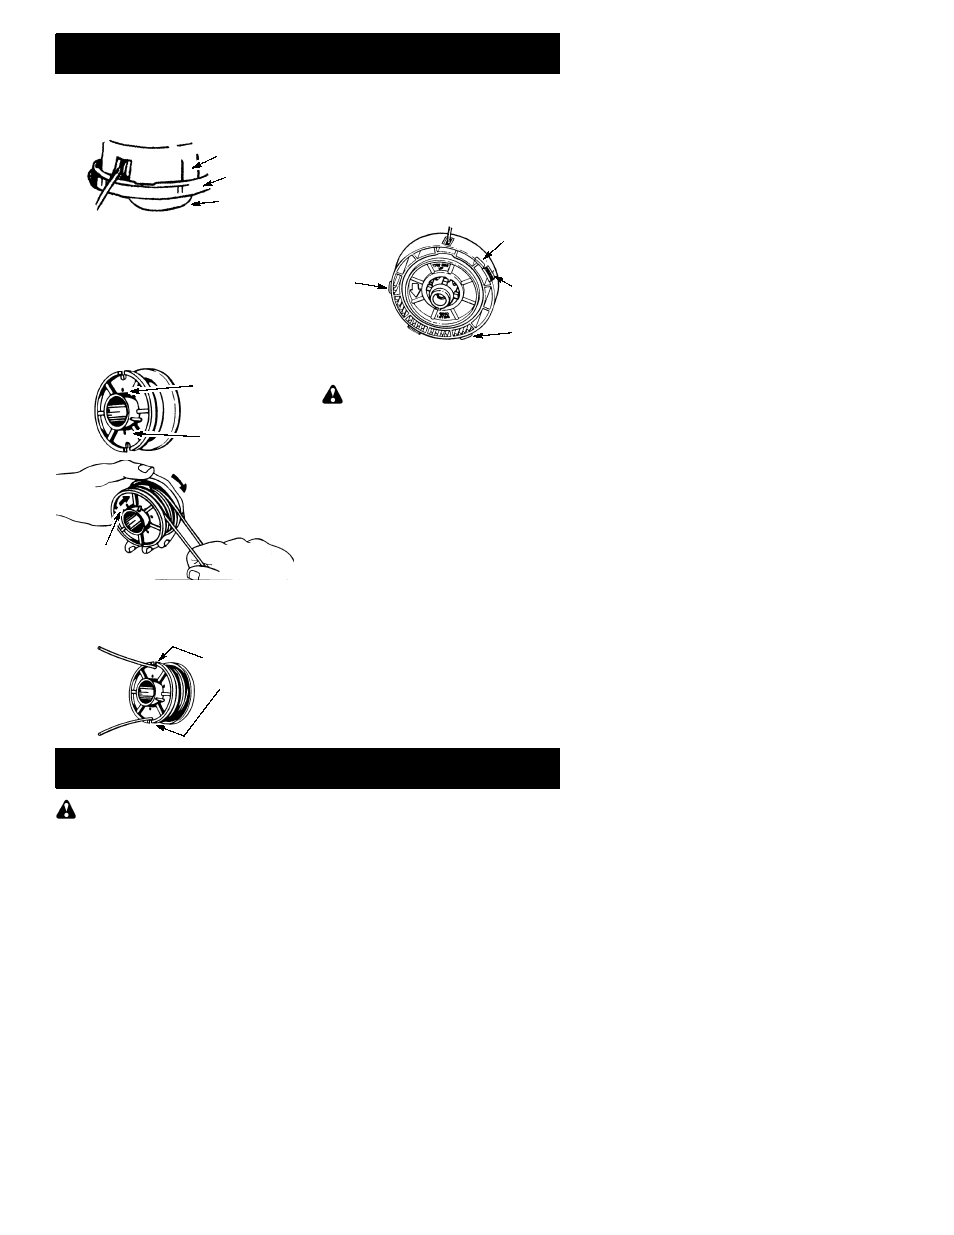
1. Press the tab on the side of the trimmer
head and twist the lock ring.
2. Remove the lock ring and tap button.
Tab
Lock Ring
Tap Button
3. Pull the spool out of the trimmer head.
Remove any remaining line.
4. Clean dirt and debris from all parts. Re-
place spool if it is worn or damaged.
5. Replace with a pre-wound spool, or re-
place line using two 20 foot lengths of
0.095 inch (2.4 mm) diameter Poulan
PRO
R
brand line.
6. When installing new line on an existing
spool, insert 1/16 inch of the end of each
line into the anchoring holes in the bed of
the spool.
Anchoring
Holes
Arrow
7. With your finger between the lines, wrap
the lines evenly and and firmly around the
spool in the direction of the arrow on the
spool.
8. Position the lines in the guide slots.
Guide
Slots
9. Insert the ends of the lines through exit
holes in the sides of the trimmer head.
10. Place the spool in the trimmer head.
11. Make sure the lines are not caught between
the rim of the spool and the wall of the trim-
mer head.
12. Reinstall the tap button and lock ring onto
the trimmer head.
13. Align the lock ring over the catches on the
trimmer head. Push the ring down and
turn until the catches lock into place.
Catch
Catch
Catch
Lock
Tab
14. Make sure the lock ring is securely fas-
tened by pulling on it and twisting in both di-
rections.
WARNING:
All catches must be fas-
tened and the lock tab latched in the lock ring.
If installed incorrectly, the lock ring can fly off
and become a dangerous missile.
15. Pull line extending from trimmer head.
BLADE REPLACEMENT
Refer to the ASSEMBLY section for blade re-
placement instructions and illustrations.
CARBURETOR ADJUSTMENT
Your carburetor is equipped with limiter caps.
Carburetor adjustment is a complicated task.
We recommend that you take your unit to an
authorized service dealer. Damage will occur
if you turn the needles beyond the limiter
stops.
STORAGE
WARNING:
Perform the following
steps after each use:
S
Allow engine to cool before storing or trans-
porting.
S
Store unit and fuel in a well ventilated area
where fuel vapors cannot reach sparks or
open flames from water heaters, electric
motors or switches, furnaces, etc.
S
Store unit with all guards in place. Position
unit so that any sharp object cannot acci-
dentally cause injury.
S
Store unit and fuel well out of the reach of
children.
SEASONAL STORAGE
Prepare unit for storage at end of season or if
it will not be used for 30 days or more.