Operation – Powermatic JTG-10Q User Manual
Page 9
9
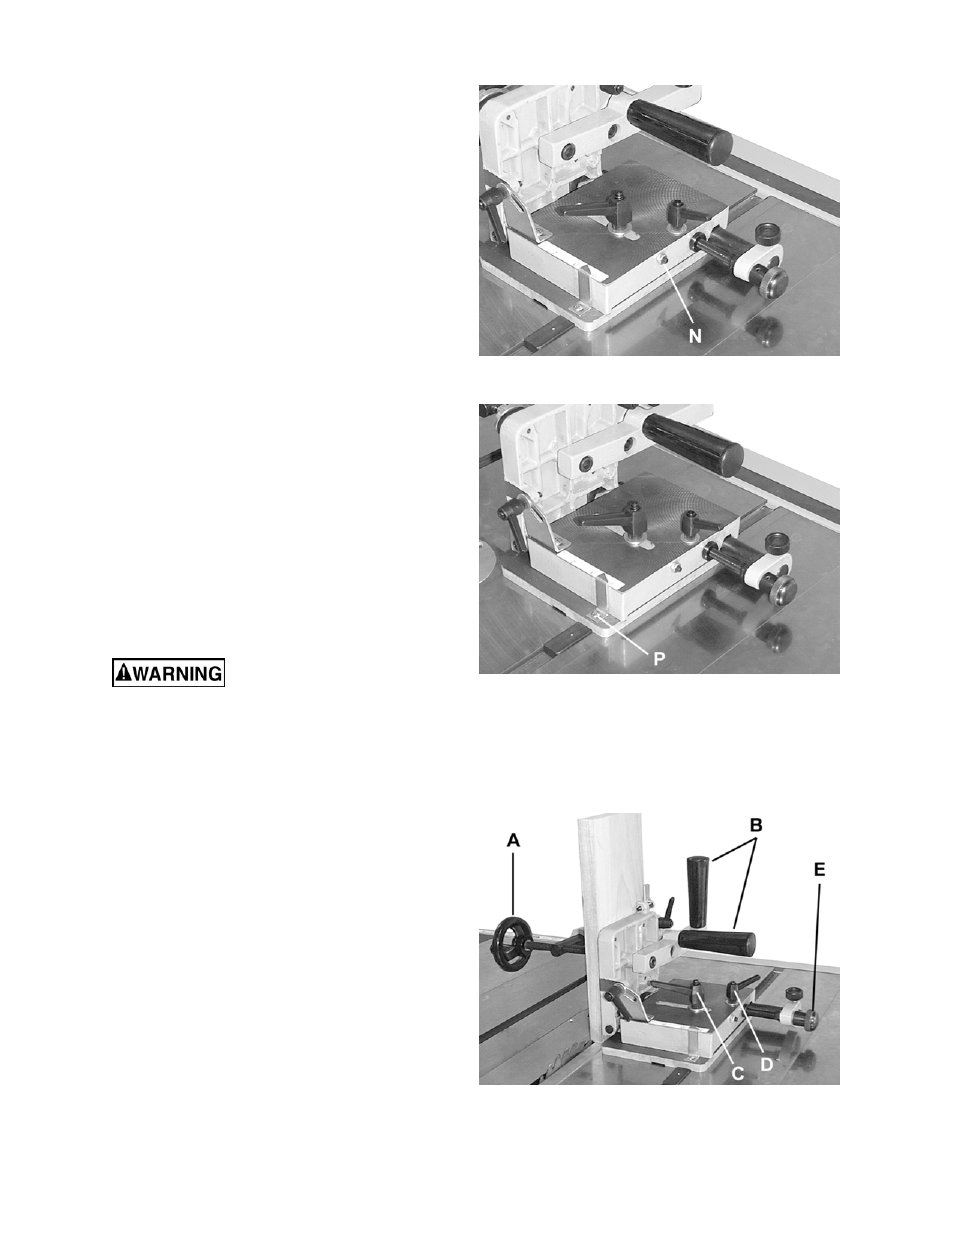
10. To prevent the fence from being pushed, or
moved, into the blade, loosen the nut (N) on
the setscrew and turn the setscrew clockwise
until it bottoms out (Figure 6). Tighten down
the nut.
11. For a final adjustment, loosen screw (P)
holding the pointer and adjust pointer to the
1/8" position. See Figure 7. Tighten screw.
Operation
Use of the tenoning jig
requires removal of the table saw's blade
guard. After the jig operation is complete,
disconnect saw from power source and re-
install the blade guard immediately.
1. Use the handwheel (A) to tighten your
workpiece against the fence. See Figure 8.
2. Use the two large handles (B) to securely
move the workpiece through the saw blade.
3. NOTE: Never pass the jig back over the
moving saw blade. Wait until the power is off
and the blade comes to a complete stop.
4. For rapid or large adjustments moving the
fence toward or away from the saw blade,
loosen both locking levers (C, D). Move the
fence into position and tighten both locking
levers (C, D).
5. For fine adjustments moving the fence toward
or away from the saw blade, loosen both lock
levers (C & D). Move the fence away from the
saw blade and tighten lock lever (D) only.
Move the fence into position with knob (E) and
then tighten lock lever (C).
Figure 6
Figure 7
Figure 8