Basic connections, Step 4: connecting the fm and am/mw antennas, Step 5: connecting the power cord – Philips HTS3156 User Manual
Page 16
16
English
Basic Connections
(continued)
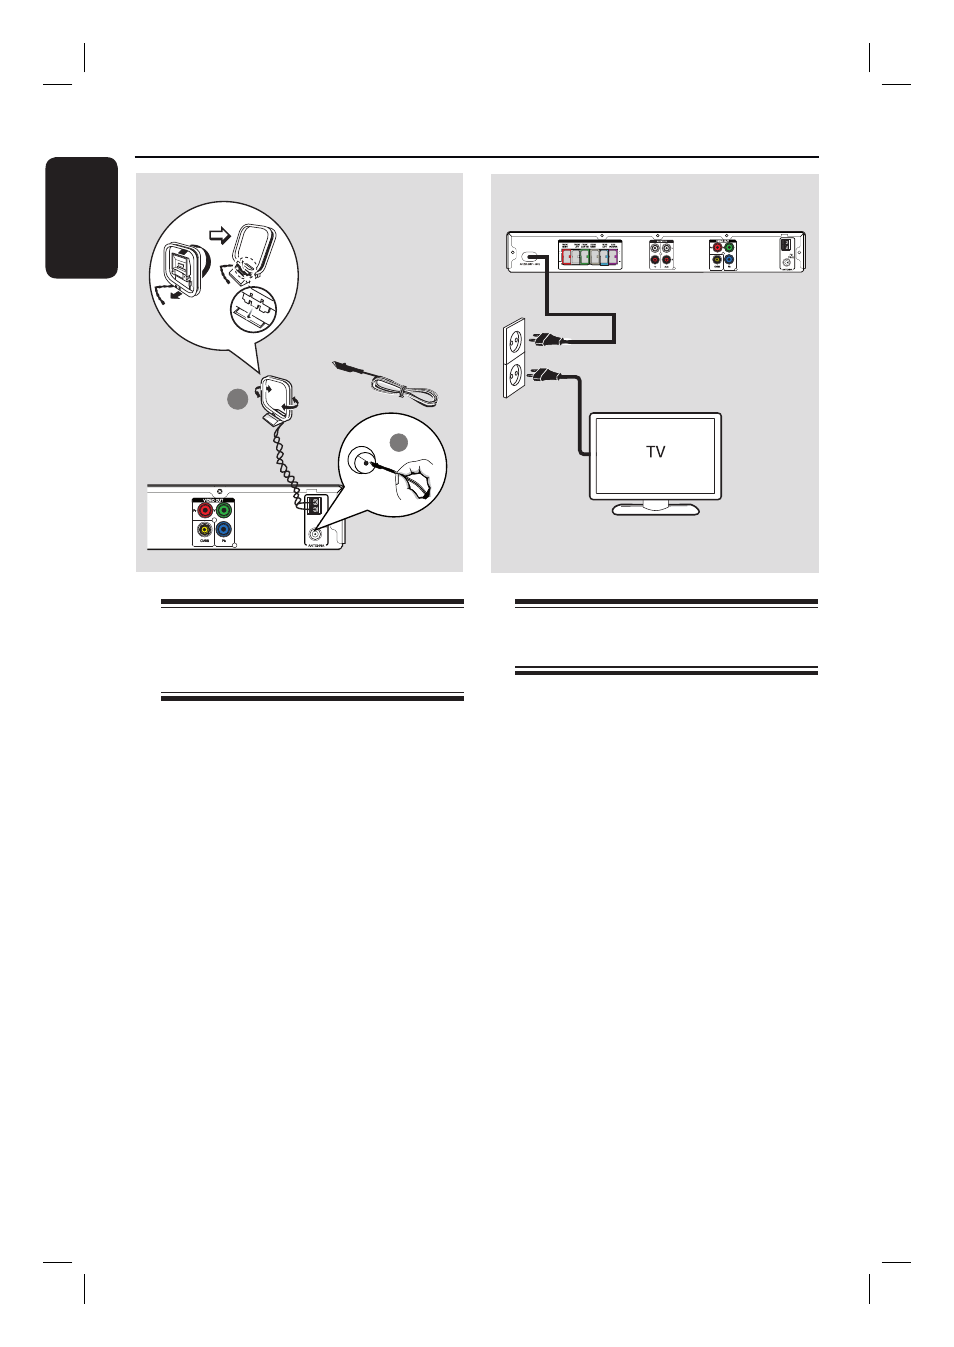
FM
antenna
AM/MW
antenna
fi x the claw
into the slot
Step 4: Connecting the
FM and AM/MW
antennas
A
Connect the supplied AM/MW loop
antenna to the AM/MW socket. Place
the AM/MW loop antenna on a shelf, or
attach it to a stand or wall.
B
Connect the supplied FM antenna to the
FM 75
Ω
socket. Extend the FM antenna
and fi x its ends to the wall.
For better FM stereo reception, connect
an external FM antenna (not supplied).
Helpful Hints:
– Adjust the position of the antennas for
optimal reception.
– Position the antennas as far away as
possible from your TV, VCR or other
radiation source to prevent any unwanted
interference.
Step 5: Connecting the
power cord
After everything is connected
properly, connect the AC power
cord into the power outlet.
The standby LED on the main unit lights
up.
Helpful Hints:
– Refer to the type plate at the rear or
bottom of the product for identifi cation and
supply ratings.
– Before making or changing any
connections, make sure that all the devices
are disconnected from the power outlet.
SPEAKERS
AM/
MW
Main Unit (rear)
AM/
MW
1
2
1_hts3156_93_eng2_final815.indd 16
1_hts3156_93_eng2_final815.indd 16
2008-04-11 10:51:15 AM
2008-04-11 10:51:15 AM