Calling up readings from memory – Panasonic EW3037 User Manual
Page 11
20
Setting (checking) the measurement notification time
19
M
/
R
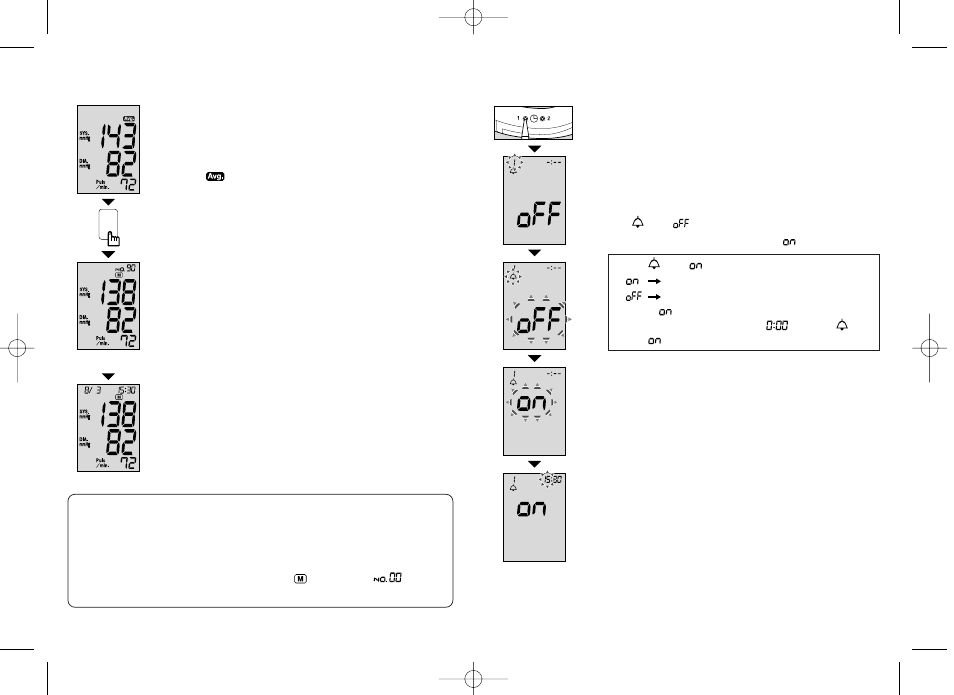
Calling up readings from memory
Readings can be recalled after being saved without
having to switch the unit on.
1. Press the Memory/Recall button.
• The average readings of all recorded measurements
are displayed.
• The
mark will be displayed (Fig. 11-a).
• When, for example, readings from 90 measurements
have been saved the average of the readings from 90
measurements will be displayed.
2. Press the Memory/Recall button to display readings
starting with from the most recent measurement.
• Each time the Memory/Recall button is pressed
readings are displayed in order of the most recent
measurement (Fig. 11-c, 11-d).
• No readings will be displayed when there are none in
the memory.
3. Press the On/Off and Start button to switch off the
unit.
If you forget to switch off the unit it will do so
automatically after approx. 30 seconds.
Deleting all data stored in memory
(1) Recall stored data using the Memory/Recall button.
(2) Press the Memory/Recall button again and hold it (for approx. 3
seconds) until all readings are deleted.
NOTE: Readings from individual measurements cannot be deleted.
(3) When data has been deleted the
mark and
will be
displayed on the screen.
Fig. 11-a
Fig. 11-c
Fig. 11-b
Fig. 11-d
To let you take measurements at the same time every
day, 3 times per day can be set as notification times.
1. Press the Set button on the top surface of the blood
pressure monitor (Fig. 12-a).
• Notification Time 1 will blink (Fig. 12-b).
* If date and time have not been set, the display will
change to the date/time setting display.
2. Press the Set button again.
• The
and
will blink (Fig. 12-c).
3. Press the Adjust button to display
.
• The
and
will blink (Fig. 12-d).
•
Notification sound will sound.
•
Notification sound will not sound.
• When
is displayed and the Set button is
pressed, the time becomes
and the
and will
light.
4. (1) Press the Set button. The hour value will blink
(Fig. 12-e).
(2) Press the Adjust button repeatedly to set the
desired hour.
Fig. 12-a
Fig. 12-c
Fig. 12-b
Fig. 12-d
Fig. 12-e
(After approx.
one second.)