Philips Saeco Syntia Sup037R User Manual
Page 18
• 38 •
• 38 •
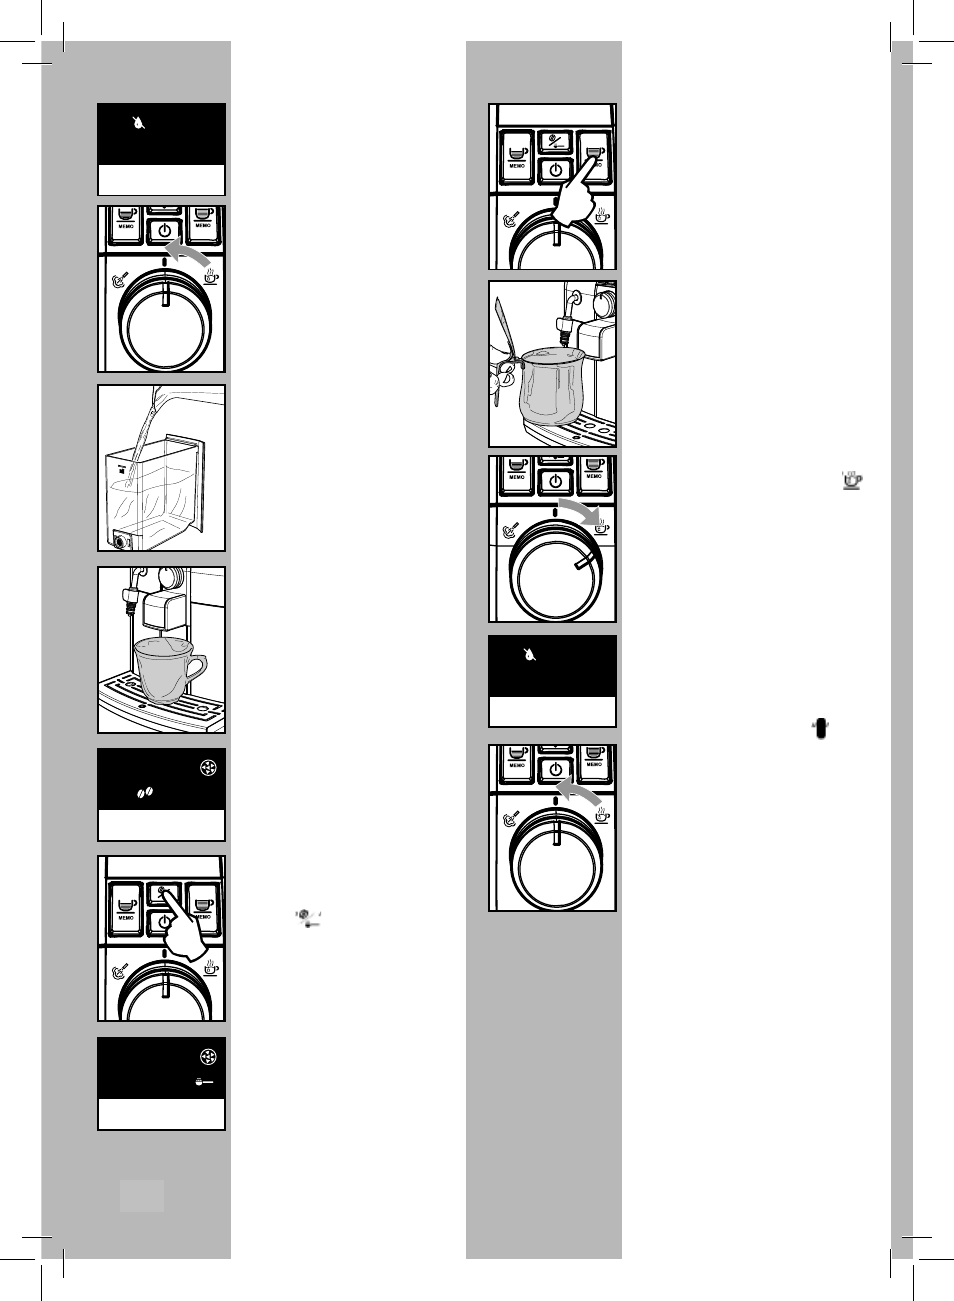
9 When the water in the tank is fi nished,
the icon on the side is displayed to
indicate that the selector switch must
be brought back to the “ ” position.
10 Rinse the water tank thoroughly and
refi ll it with fresh drinking water.
11 Empty the container used to collect the
liquid dispensed by the machine.
13 Before starting the procedure, check
that the following icons are displayed.
12 Place a large container under the
dispensing spout.
14 Select the pre-ground coff ee function
by pressing the “
“ button one or
more times.
Do not add the pre-ground
coff ee to the compartment.
The icon will appear on the display.
15 Press the button to brew a long cof-
fee.
16 Wait until brewing is completed and
empty the container with water.
17 Repeat the operations from step 12 to
step 16 for 3 times; then continue with
step 18.
18 Place a container under the steam wand
(Pannarello, if supplied).
19 Turn the selector switch clockwise to set
it to the“
” position.
20 Dispense water until the no water si-
gnal is displayed, then turn the selec-
tor switch counter-clockwise to set it
to the “ ” position.
21 At the end, fi ll the water tank again.
Steady on
Steady on
Steady on
Steady on
9 Когда вода в резервуаре
закончится, на дисплее
загорится иконка, которая
показывается, что рукоять
должна быть повёрнута к
центральной позиции.
10 Прополощите резервуар
для воды и заполните его
свежей питьевой водой.
11 Опустошите резервуар,
использованный для сбора
отходов, произведённых
аппаратом.
12 Разместите большой
контейнер под краном подачи
пара.
13 Перед началом процедуры
проверьте, что на дисплее
загорелись следующие иконки
(см. рис. слева)
14 Выберите функцию
молотого кофе нажатием
кнопки один или
несколько раз.
Не добавляйте молотый
кофе в отсек!
На дисплее загорится иконка.
15 Нажмите на кнопку, чтобы
приготовить кофе.
16 Подождите, пока процесс
приготовления закончится и
опустошите контейнер с водой
17 Повторите операции с шага
12 до 16 три раза; затем
продолжите шагом 18
18 Разместите контейнер под
краном подачи пара
(Pannarello, если присутствует).
19 Поверните рукоять по
часовой стрелке до позиции
20 Готовьте горячую воду до
тех пор, пока не загорится
сигнал; затем поверните
рукоять против часовой стрелки,
чтобы вернуть её
в центральную позицию.
21 В завершение, заполните
резервуар для воды снова.
18