Din rear-mount (method b) – Legacy Car Audio Car CD Player User Manual
Page 4
1
3
4
5
2
2
5
4
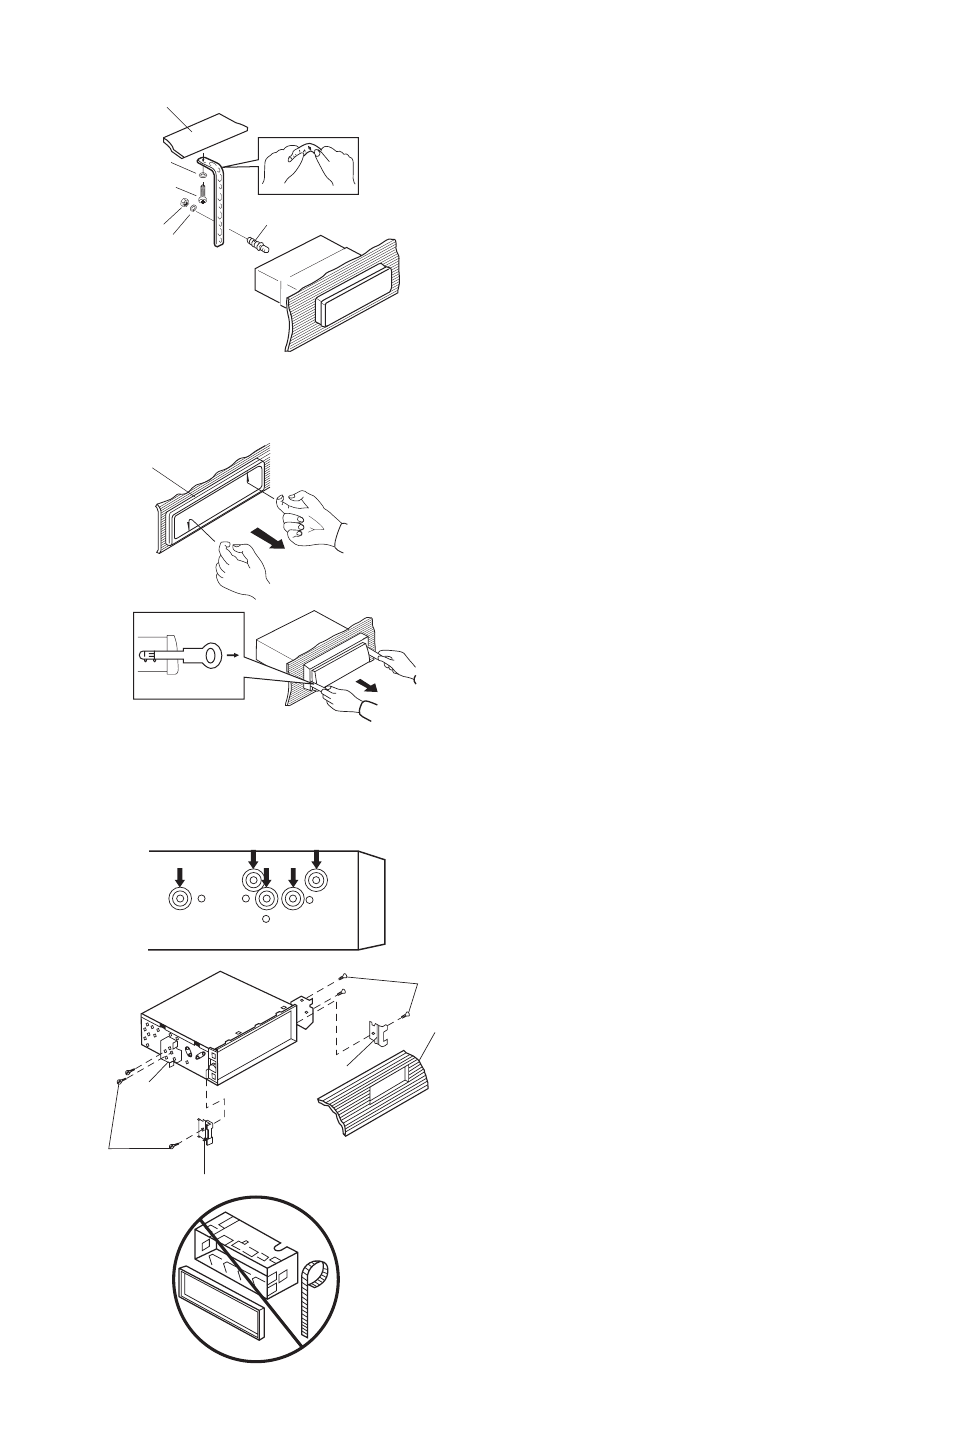
1. Dashboard
2. Nut (5mm)
3. Spring washer
4. Screw (5 x 25mm)
5. Screw
6. Strap
Be sure to use the strap to secure the
back of the unit in place. The strap can
be bent by hand to the desired angle.
7. Plain washer
Removing the unit
1. Frame
2. Insert fingers into the groove in the front
of frame and pull out to remove the frame.
(When re-attaching the frame, point the
side with a groove downwards and attach
it.)
3. Lever
Insert the levers supplied with the unit
into the grooves at both sides of the unit
as shown in figure until they click. Pulling
the levers makes it possible to remove
the unit from the dashboard.
DIN REAR-MOUNT (Method B)
Installation using the screw holes on the sides of the unit.
Fastening the unit to the factory radio
mounting bracket.
1. Select a position where the screw holes
of the bracket and the screw holes of the
main unit become aligned (are fitted), and
tighten the screws at 2 places on each
side.
Use either truss screws (5 x 5mm) or
flush surface screws (4 x 5mm),
depending on the shape of the screw
holes in the bracket.
2. Screw
3. Factory radio mounting bracket
4. Dashboard or Console
5. Hook (Remove this part)
Note: The mounting box, outer trim ring,
and half-sleeve are not used for method B
installation.
1
3
2
1
2
6
5
4
3
7
(Fig. 2)