Land Pride FDR2572 User Manual
Page 11
9
Section 1: Assembly & Set-Up
FDR2572 & FDR2584 and Rear Discharge Grooming Mowers 310-262M
5/29/13
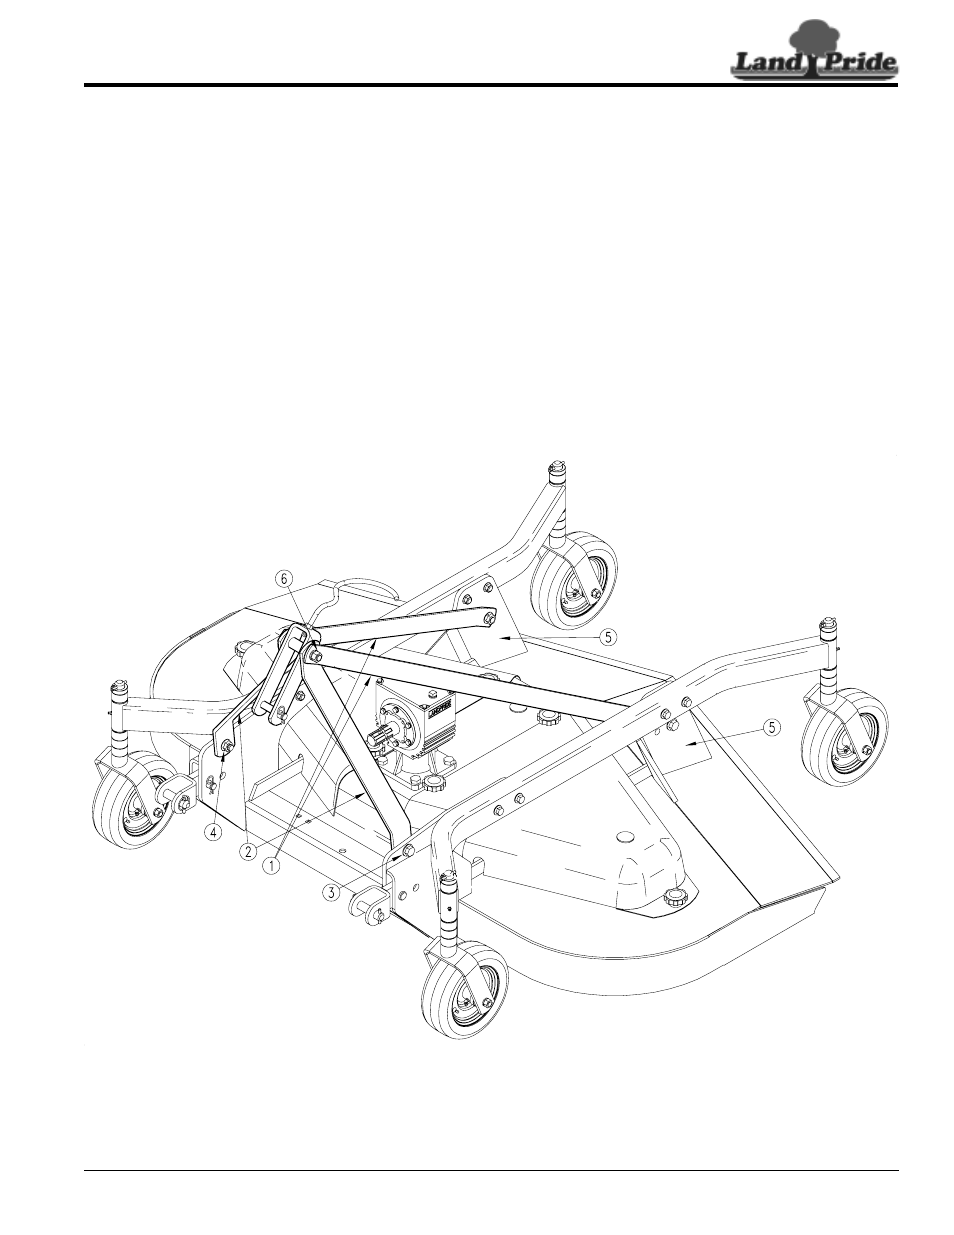
A-Frame
Upper Hitch Assembly
Refer to Figure 1-2:
1.
There are flat washers placed between the rear
braces (#1) and rear hitch plates (#5) for shipping.
2.
Remove flat washers and reassemble rear braces.
Do not tighten bolt and nut at this time.
3.
The lower holes of the A-Frame (#2) are bolted to the
shipping crate with lag bolts for shipping.
Hitch Braces Assembly
Figure 1-2
17365
4.
Remove lag bolts from the A-Frame.
5.
Loosen 5/8" nut (#6). This will allow the hitch to be
rotated into to position.
6.
Rotate rear hitch braces (#1) up until the lower holes
of the A-frame (#2) line up with the top holes of the
hitch plates on the deck.
7.
Secure rear hitch braces to the A-frame with
5/8" flange bolts (#3) and flange nut (#4) already
mounted in the holes of the front hitch plates.
8.
Tighten all hardware in the rear hitch braces and
A-frame.