Connecting your lacie slim blu-ray, Connecting the usb 2.0 y cable, See section – LaCie Slim Blu-ray User Manual
Page 14: Connecting your lacie slim blu-rayy, Connecting your lacie slim blu, Rayy, Lacie slim blu-ray, User manual
LaCie Slim Blu-ray •
D
esign
by
s
am
H
ecHt
Getting Connected
User Manual
page 14
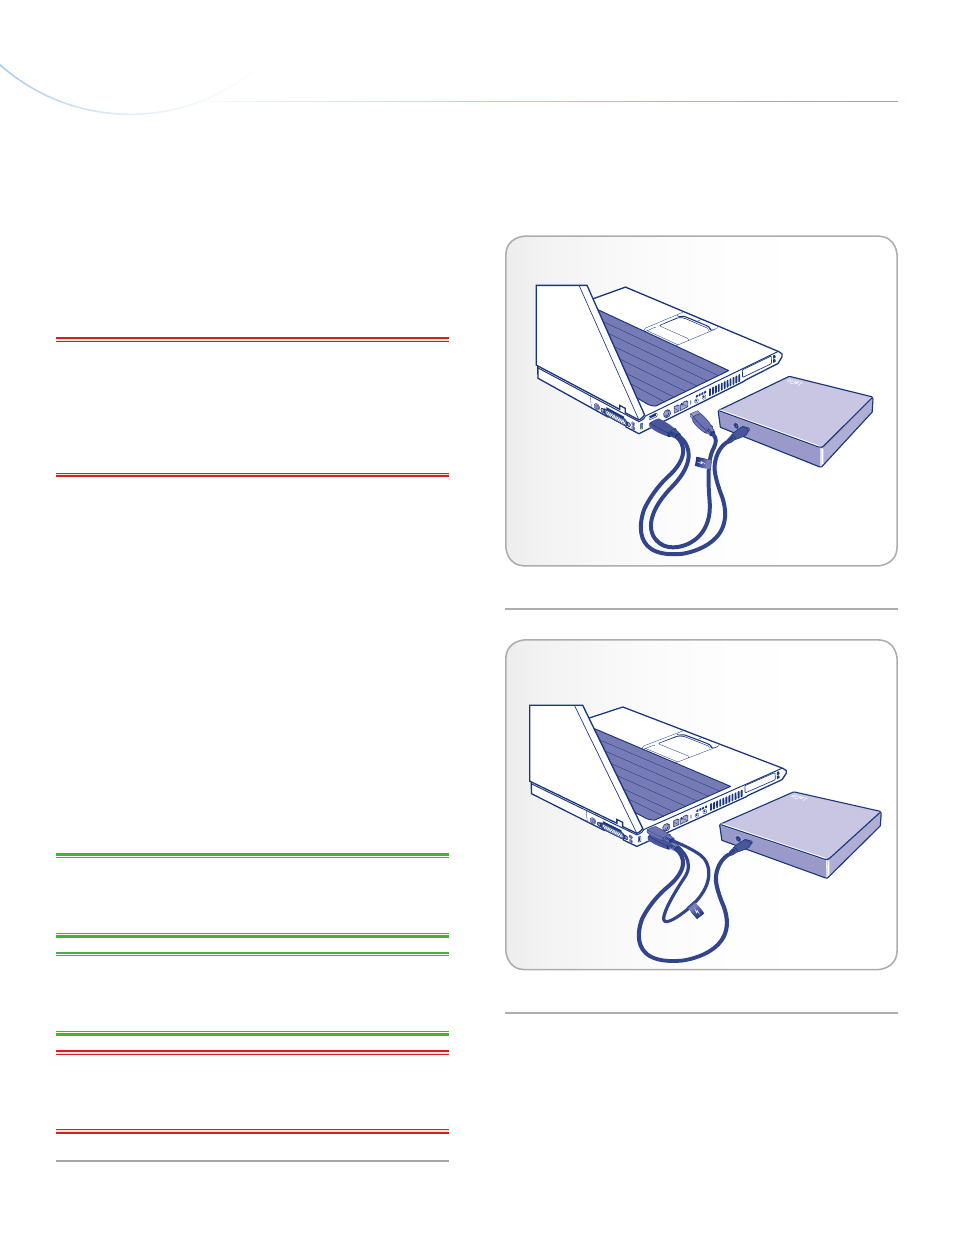
2.1. Connecting the USB 2.0 Y Cable
1. Connect the Y cable’s primary Hi-Speed USB 2.0 A connector
) to an available USB 2.0 port
on your computer.
IMPORTANT INFO:
The Y cable has two USB 2.0 connectors: the
primary A connector for signal and power and the secondary A con-
nector for additional power, if necessary. The difference is clearly
marked by a lightning bolt sticker on the secondary (power only)
connector. You must connect the primary A connector in order to
send and receive data. See
2. Attach the other end (mini USB) of the USB 2.0 Y cable to your
3. Your drive should now be ready for use. To verify that your drive
is correctly installed and communicating with your computer,
follow these steps:
✦
Windows Users
– Right-click
My Computer
to select Properties > Gen-
eral. Your drive should be listed.
✦
Mac Users
– In the Apple menu, choose About This Mac > More Info
to open the
Apple System Profiler
. Your drive should be
listed under
Hardware
.
4. If your Slim Blu-ray does not appear to be receiving adequate
power, attach the secondary USB 2.0 A plug (with the lightning
sticker) to an available USB 2.0 port on your computer. See
.
TECHNICAL NOTE:
Your drive must be connected to a USB 2.0
port. Performance is not guaranteed with USB 1.1. See section
.
TECHNICAL NOTE:
For more information on USB connections,
and
.
IMPORTANT INFO:
The LaCie Slim Blu-ray includes a power
supply connection (see
1.2. Minimum System Requirements
) that will
accept an external power supply (not included).
2. Connecting Your LaCie Slim Blu-ray
Fig. 07
Fig. 08