La Crosse Technology 306-645 User Manual
La Crosse Technology Thermometers
1
Garden Thermometer with Solar Lighting
Model 306-645
FEATURES
Clear Functional Design
Large digital Display with 2 Diff Modes
Maximum and Minimum
Clock
Automatic
Backlight
Solar Panel with 180 Degree Rotation
Weather
Resistant
2
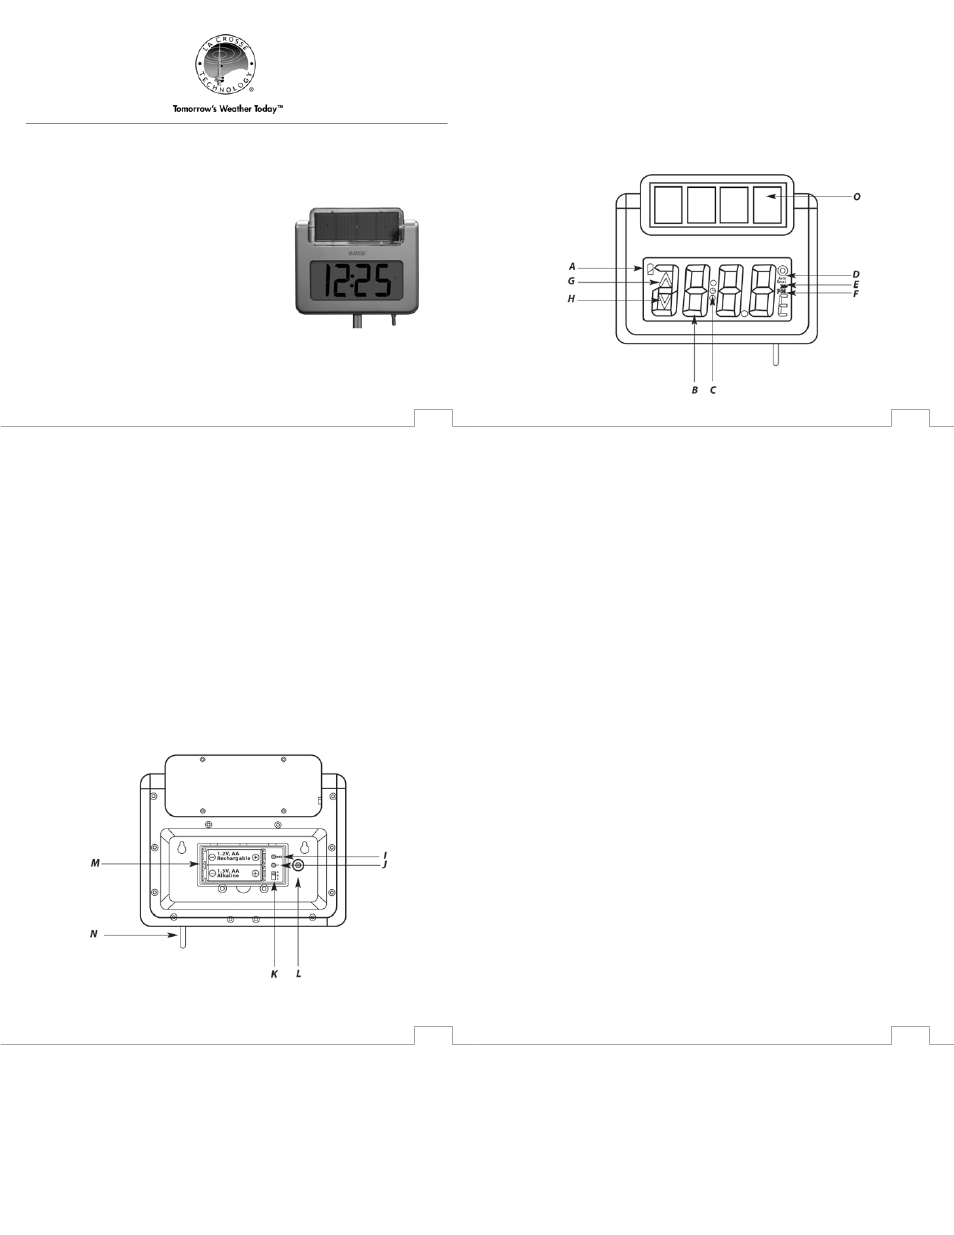
DISPLAY (see Fig. 1)
A. Battery
Indicator
B. Time/Temperature
C.
DST (Daylight Saving Time) Indicator
D. Auto
Reset
E. Display
Mode
F. PM
Indicator
G. MAX
Temperature
H. MIN
Temperature
O. Solar
Panel
Fig. 1
3
BUTTONS (see Fig. 2)
I. MODE
Button
J.
+ 1 Button
K. Display
Mode
Switch
L.
+/- 1hr Button
M. Battery
Compartment
N. Temperature
Probe
Fig. 2
4
SETUP INSTRUCTIONS
Pull off the protection foil on the display.
Open the battery compartment with a small Phillips screwdriver.
Insert the AA NiMh rechargeable battery into the top position. Make sure to observe the
correct polarity.
Insert the AA alkaline battery into the bottom position. Make sure to observe the correct
polarity.
Note: The upper battery is the illumination battery. The lower battery provides power for all other
functions.
Note: The 1.2V NiMh rechargeable battery for the backlight is not fully charged when shipped. For
maximum efficiency it is recommended to charge the battery fully (place battery into display and
display unit outside on a sunny day) before first use. Alternatively, the rechargeable battery can be
charged with a NiMh battery charger.
Replace
the
battery
compartment
cover.
All LCD segments will light up for a few seconds.
The thermometer is now ready to use.
On the display, 0:00 is flashing and the DST symbol (see Fig. 1, C) is flashing.
If you are setting up the thermometer during Daylight Saving Time, press the +/-1hr button
for confirmation while the DST symbol is flashing and the DST symbol will remain,
indicating that the unit is in DST mode.
If there is no confirmation within 15 seconds, the DST symbol will stop flashing and will
disappear. If this has happened and you need to put your thermometer into DST mode, see
the section on Daylight Saving Time later in this manual.
SET THE CLOCK
Slide the switch to position B or C.
When the time appears in the display, press and hold the MODE button to enter the setting
mode.
The hour digits in the upper display start flashing.
Press
the
+1 button to adjust the hour value.