Wwarning, Stacking kit installation, Pedestal installation – LG DLEX7177RM User Manual
Page 21
O P T I O N A L AC C E S S O R I E S
O P T I O N A L AC C E S S O R I E S
1
Make sure the surface of the washer is clean
and dry. Remove paper backing from the
tape on one of the stacking kit side brackets.
2
Fit the side bracket to the side of the washer
top as shown in the above illustration. Firmly
press the adhesive area of the bracket to the
washer surface. Secure the side bracket to
the washer with a screw on the back side of
the bracket. Repeat steps 1 and 2 to attach
the other side bracket.
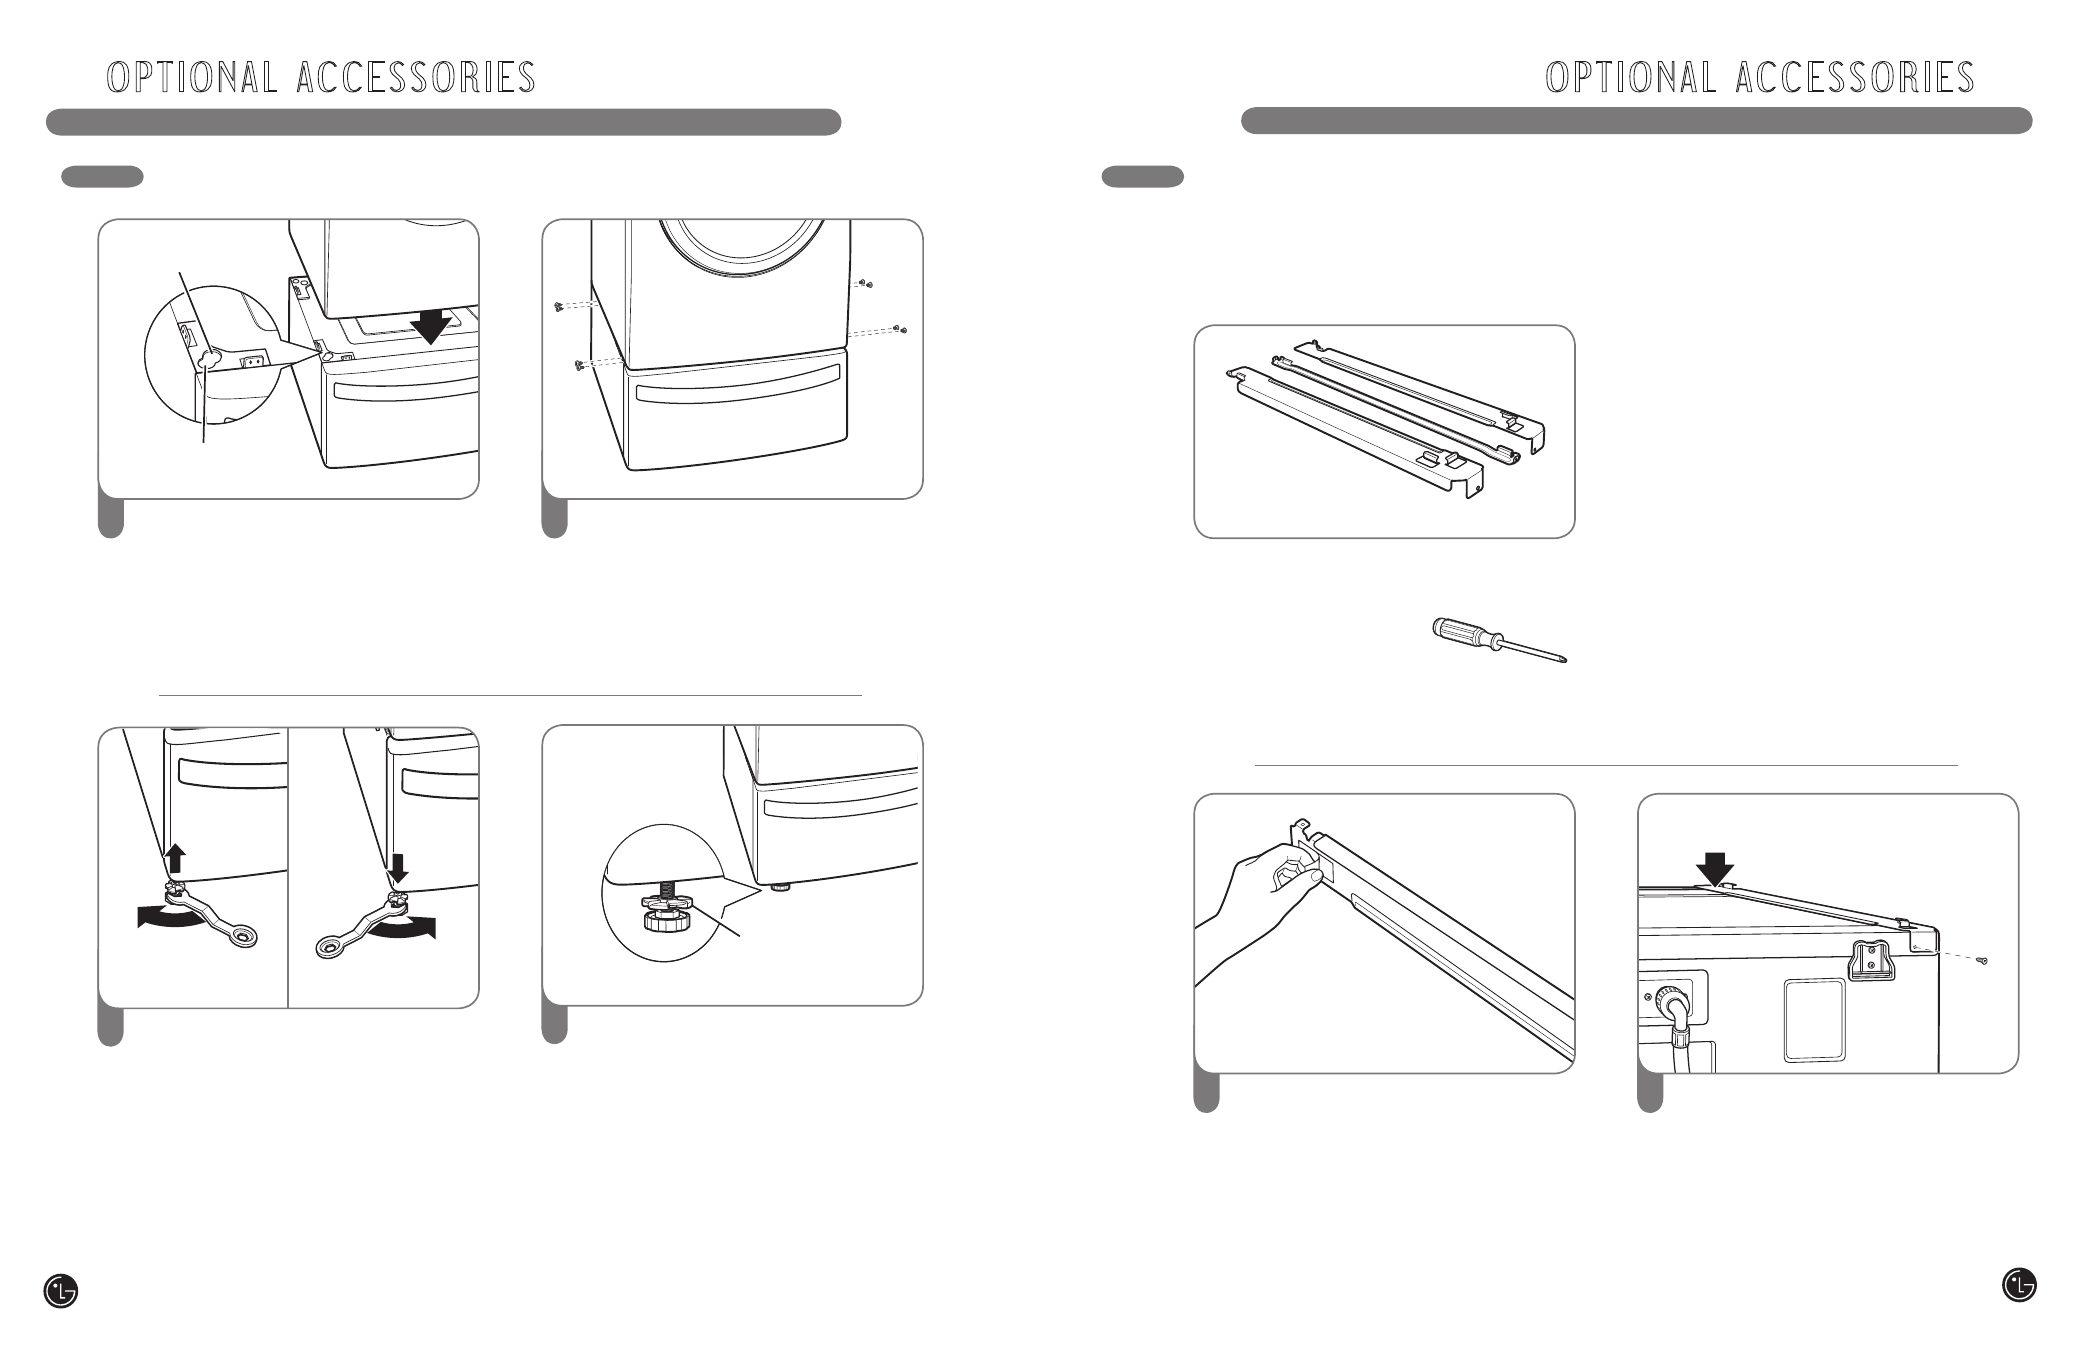
STACKING KIT INSTALLATION
This stacking kit includes:
• Two (2) side rails
• One (1) front rail
• Four (4) screws
To ensure safe and secure installation, please
observe the following instructions.
Tools Needed for Installation:
• Phillips-head screwdriver
w
WARNING
•
Incorrect installation can cause serious
accidents.
•
The weight of the dryer and the height of
installation make this stacking procedure too
risky for one person. Two or more people are
required when installing the stacking kit.
There is a risk of serious back injury or other
injuries.
•
Do not use the stacking kit with a gas dryer
in potentially unstable conditions such as a
mobile home. Failure to follow this warning can
result in serious injury.
•
Place the washer on a solid, stable, level
floor capable of supporting the weight of
both appliances. Failure to follow this warning
can result in serious injury.
•
If appliances are already installed,
disconnect them from all power, water, or
gas lines and from draining or venting
connections. Failure to do so can result in
electrical shock, fire, explosion, or death.
PEDESTAL INSTALLATION
(cont.)
3
4
Make sure the screws on the pedestal align
with the holes in the retainers, then install 4
screws at each corner to securely attach the
appliance to the pedestal.
NOTE: If the screws are not installed
properly, noise and vibration may result.
Move the appliance to the desired location.
5
Loosen the locknuts on all 4 leveling feet
of the
pedestal until you can turn them
with the wrench. Turn clockwise to raise or
counterclockwise to lower until the pedestal
is level and all 4 feet are solidly against
the floor.
Raise
Lower
Place the dryer on the pedestal. Make sure
the front and back feet are in the correct
positions. The dryer feet will fit into the
innermost positions as shown.
6
Securely tighten all locknuts by hand.
NOTE: Noise and vibration may result if
locknuts are not tightened.
Be sure to connect the appliances to all
water, power, or gas lines and draining or
venting connections before operation.
If there is excessive vibration during the
first operation after installation, slightly
adjust the leveling feet.
Locknut
For washer/combo
For dryer
40
41