Lennox Hearth COUNTRY 506033-13 User Manual
Page 2
Printed in U.S.A. © 2008 Lennox Hearth Products
P/N 506033-13 REV. NC 12/2008
Lennox Hearth Products reserves the right to make changes at any time, without notice, in design,
materials, specifications, prices and the discontinuance of colors, styles and products. Consult
your local distributor for fireplace code information.
NOTE: DIAGRAMS & ILLUSTRATIONS ARE NOT TO SCALE.
2
IMPORTANT NOTE: DO NOT OVERTIGHTEN SCREWS.
SECURE UNTIL SNUG ONLY!
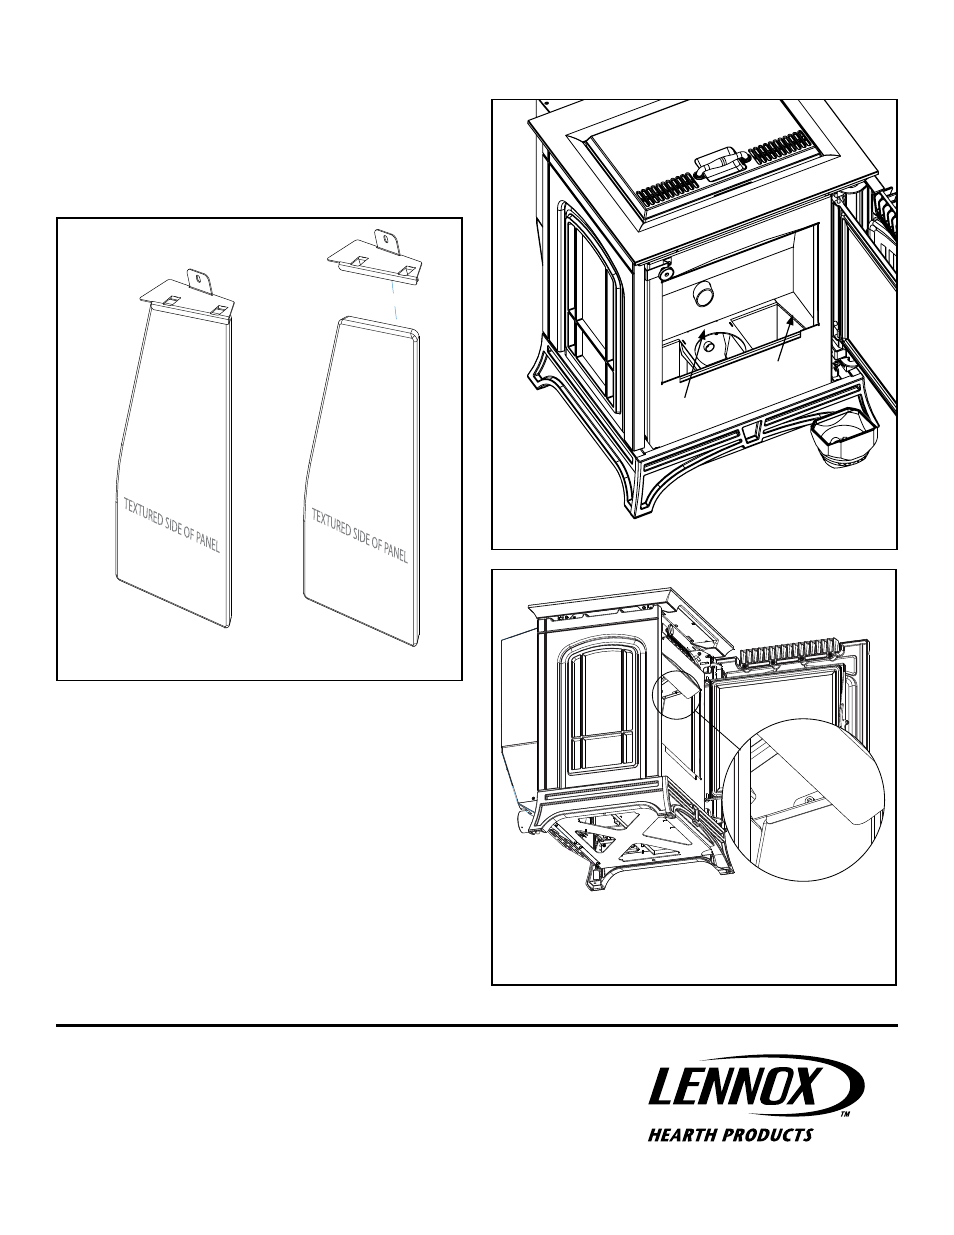
Step 3. Place the right brick panel bracket on the right brick panel (see
Figure 3). The bracket should fit snug. Adjust the bent tabs to
ensure a snug fit between the bracket and the panel.
Figure 3
Step 4. Repeat step 3 using the left brick panel bracket and left brick
panel.
Step 5. Carefully place the back brick panel into the stove and rest the bot-
tom on the small ledge behind the ash pots (A in Figure 4).
Step 6. While holding the back brick panel in place, carefully place the right
side panel with attached bracket into the stove and rest the bottom
of the panel on the ledge to the right of the ash pot (B in Figure 4).
Step 7. Secure the brick panel bracket to the inside of the stove using one
(1) 10-24 x 3/8” socket head screw (see Figure 5).
Step 8. Repeat steps 6 and 7 on the left side of the stove.
Figure 4
Figure 5
1110 West Taft Avenue • Orange, CA 92865
DO NOT OVERTIGHTEN SCREWS! SNUG ONLY!
RIGHT BRICK PANEL WITH BRACKET
A
B