Kawasaki 840108 User Manual
Page 16
SYMBOL
NAME
EXPLANATION
Diameter
Size of Drill Bits,
Grinding Wheels, etc.
No load speed
No-load Rotational Speed
.../min
Revolutions per Minute
Revolutions, Surface Speed,
Strokes, etc. per Minute
1,2,3, …
Ring Selector Settings
Speed, Torque or Position Settings
OPERATING INSTRUCTIONS
Parts of this Worklight heat up almost immediately when
in use. To avoid burns, use caution when handling light bulb and metal reflector.
Never change a hot light bulb. Bulb must be cool to the touch before attempting
to remove or replace it.
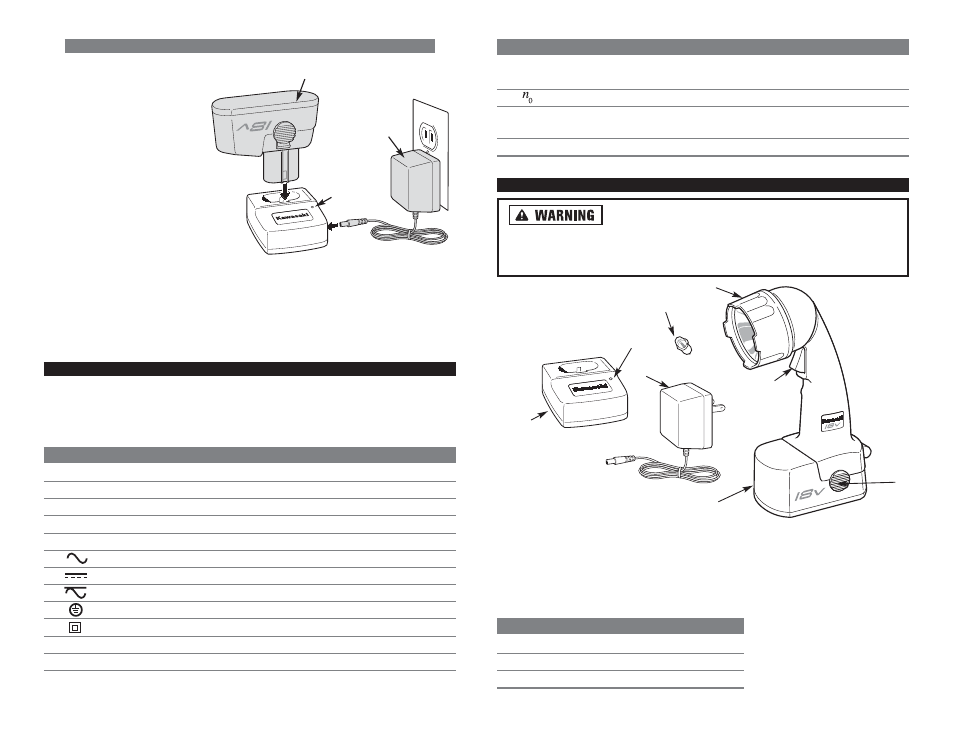
CONTROLS AND COMPONENTS:
1. Battery Pack
2. Release Buttons on Each Side
3. 120V AC Adapter
4. Charger
5. LED Charging Indicators
COMPONENT
MODEL NUMBER
BATTERY PACK
690506
120V ADAPTER
690074
CHARGER
690072
CHARGING BATTERY PACK
CHARGE BATTERY PACK:
1. Make sure the trigger on
the Cordless Worklight
is in the “OFF” position
and remove the battery
pack from the Cordless
Worklight.
2. Plug the 120V AC adapter
into household outlet
and into side of battery
charger. Insert battery
pack into battery charger.
LED light will turn green
when battery pack is fully
charged (approx. 3 hours).
3. When fully charged, reattach battery pack onto Cordless Worklight, making
certain latches fasten securely. Cordless Worklight will not operate properly
if the battery pack is not seated properly.
SYMBOLS
IMPORTANT: Some of the following symbols may be used on your tool. Please
study them and learn their meaning. Proper interpretation of these symbols will
allow you to operate the tool better and safer.
SYMBOL
NAME
EXPLANATION
V
Volts
Voltage (Potential)
A
Amperes
Current
Hz
Hertz
Frequency (Cycles per Second)
W
Watt
Power
Kg
Kilograms
Weight
Alternating Current
Type of Current
Direct Current
Type of Current
Alternating or Direct Current
Type of Current
Earthing Terminal
Grounding Terminal
Class II Construction
Denotes Double Insulation
min
Minutes
Time
s
Seconds
Time
7
6. ON/OFF Switch
7. Reflector Rim
ACCESSORIES:
8. Replacement Light bulb (inside unit)
6
7
8
2
1
3
4
5
BATTERY PACK
120V AC
ADAPTER
LED LIGHT
BATTERY
CHARGER