Cleaning & maintenance, Programming your brew size, Cleaning external parts – Keurig B70 User Manual
Page 7: Cleaning the k-cup, Pack holder assembly, Controls & indicators (lcd control center)
13
simply press the Power Button and you can
brew as soon as the water is heated and the
“READY TO BREW” indicator is displayed on
the LCD Control Center.
NOTE: The On time and
Off time functions operate independently from
one another. To cancel either function, follow the
steps above and use the “H” and “M” Buttons to
advance to 12:00 AM. When you reach 12:00 AM,
the Control Center will indicate “OFF” and the
function will be disabled (fig. 15).
NOTE: The Auto Off timer and the On/Off Time
programming options operate independently,
but can also be programmed to work together.
For example, you can set the On Time function to
turn on at 7:00 AM and then set the Auto Off timer
function to turn off the Brewer two hours after
the last brew.
SECTION 3
Cleaning & Maintenance
SECTION 2
Controls & Indicators (LCD Control Center)
12
fig.
15
Programming Brew Temperature (187° – 192º F)
The Brewer brews at a preset temperature of 192°. You can adjust this
temperature down by 5 degrees if you prefer a cooler cup of coffee, tea
or hot cocoa. Simply follow the instructions below.
1.
Press the MENU Button on the LCD Control
Center five times to program the Brew
Temperature feature.
2.
The LCD Control Center will now display the
programming options with a small arrow next
to “SET BREW TEMP” (fig. 16). Also, the
temperature 192° (initial setting) will be
displayed at the top of the LCD Control Center
to indicate the current temperature setting.
3 .
A minus sign will appear over the Left Button
and/or a plus sign over the Right Button. Use
these Buttons to raise or lower the temperature
one degree at a time.
4.
Once you have reached your desired brew
temperature, press the MENU Button twice to
exit the programming mode. “BREW TEMP SET”
will be indicated in the LCD Control Center if you
have changed it from 192°.
MENU
BREW
MENU
CLOCK
AUTO OFF SET
ONOFF TIME SET
SET BREW TEMP
BREW SIZE
-
-
+
fig.
16
5.
To change the brew temperature again, repeat steps 1 through 3 to
change the temperature up or down, remembering that the temperature
can only be between 187° and 192° .
NOTE: At high altitudes (over 5,000
feet), if boiling occurs, use the temperature adjustment (+0 and -5 degrees)
to lower the temperature.
Programming Your Brew Size
The Brewer is preset with the Small Mug
(7.25 oz.) as the default brew size. The default
brew size allows the user to avoid scrolling
through brew sizes if a particular size is
chosen most often.
To change the default brew size to your
desired brew size:
1.
Press the MENU Button six times.
2.
Using Left and Right Buttons, select your
desired default brew size (fig. 17).
3.
Once the desired default brew size is selected,
press the MENU Button once to exit. The LCD
Control Center will indicate the brew size set.
CLOCK
AUTO OFF SET
ONOFF TIME SET
BREW TEMP
SET BREW SIZE
fig.
17
Cleaning External Parts
Regular cleaning of the Brewer’s external components is recommended.
1.
Never immerse the Brewer in water or other liquids. The Housing
and other external components may be cleaned with a soapy, damp,
non-abrasive cloth.
2.
The Drip Tray can accumulate up to 12 oz. of overflow. The Drip Tray
and Drip Tray Plate should be periodically inspected and rinsed clean.
To remove the Drip Tray Assembly, simply slide it toward you, keeping it
level at all times to avoid spilling. The Drip Tray and Drip Tray Plate
should not be placed in the dishwasher. They should be cleaned with a
damp, soapy, non-abrasive cloth and rinsed thoroughly.
Cleaning the K-Cup
®
Pack Holder assembly
1. Cleaning the Parts —
The K-Cup
®
Pack Holder
Assembly can be placed onto the top shelf of a
dishwasher.
NOTE: Use low temperature cycles in
the dishwasher.
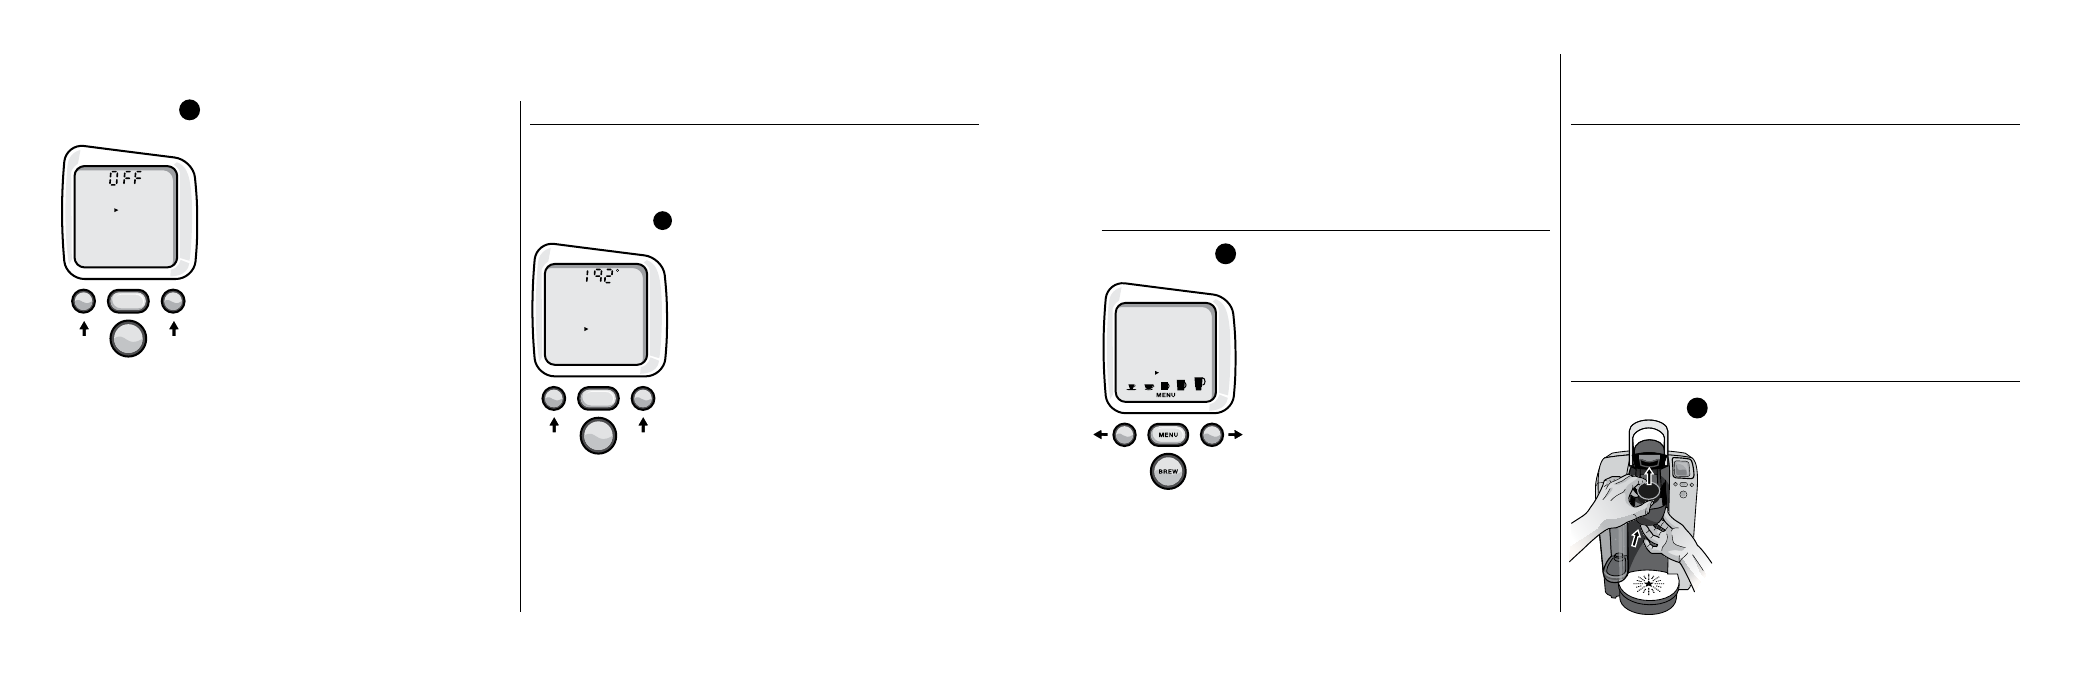
To remove from the Brewer,
open the cover by lifting the Handle. Grasp the
top of the K-Cup
®
Pack Holder with one hand
while pushing up on the bottom of the K-Cup
®
Pack Holder from underneath with the other
until it releases (fig. 18). After cleaning, align the
K-Cup
®
Pack Holder with the opening using the
two front ribs as a guide, and snap into place
from the top.
fig.
18
Set
Hours
Set
Minutes
MENU
BREW
MENU
SET CLOCK
AUTO OFF
ONOFF TIME
BREW TEMP
BREW SIZE
M
H