Kawasaki 840055 User Manual
Page 42
• Put on eye protection.
• Clear the saw of any foreign material.
• Make sure the work piece is held securely in place. Hold smaller pieces in a vise
or attach to the workbench with clamps.
• Mark out the line to be cut so it is easily visible.
• Check the lower guard for damage. If damaged, do not use tool.
• Always use the right blade for the material.
• Make sure all bolts, screws and locking levers are secure before starting tool.
• Pull the trigger to start the saw.
• Set the shoe against the work piece.
• When the blade reaches full speed, slowly feed the blade into the work piece.
When the blade starts cutting, release the blade guard.
P
PO
OC
CK
KE
ET
T C
CU
UT
TT
TIIN
NG
G
IIff tth
hee b
bllaad
dee b
biin
nd
dss,, rreelleeaassee tth
hee ttrriig
gg
geerr iim
mm
meed
diiaatteellyy.. Do
not move the saw until the blade comes to a complete stop. Find the cause of
the binding before starting the saw again.
IIff tth
hee b
bllaad
dee b
beecco
om
meess p
piin
ncch
heed
d,, ttw
wiisstteed
d,, m
miissaalliig
gn
need
d o
orr
b
bo
ou
un
nd
d,, iitt w
wiillll ssttaallll aan
nd
d lliifftt u
up
p o
ou
utt o
off tth
hee w
wo
orrkk p
piieeccee,, ssu
ud
dd
deen
nllyy jjeerrkkiin
ng
g b
baacckk
tto
ow
waarrd
d tth
hee o
op
peerraatto
orr.. This reaction is referred to as KICKBACK.
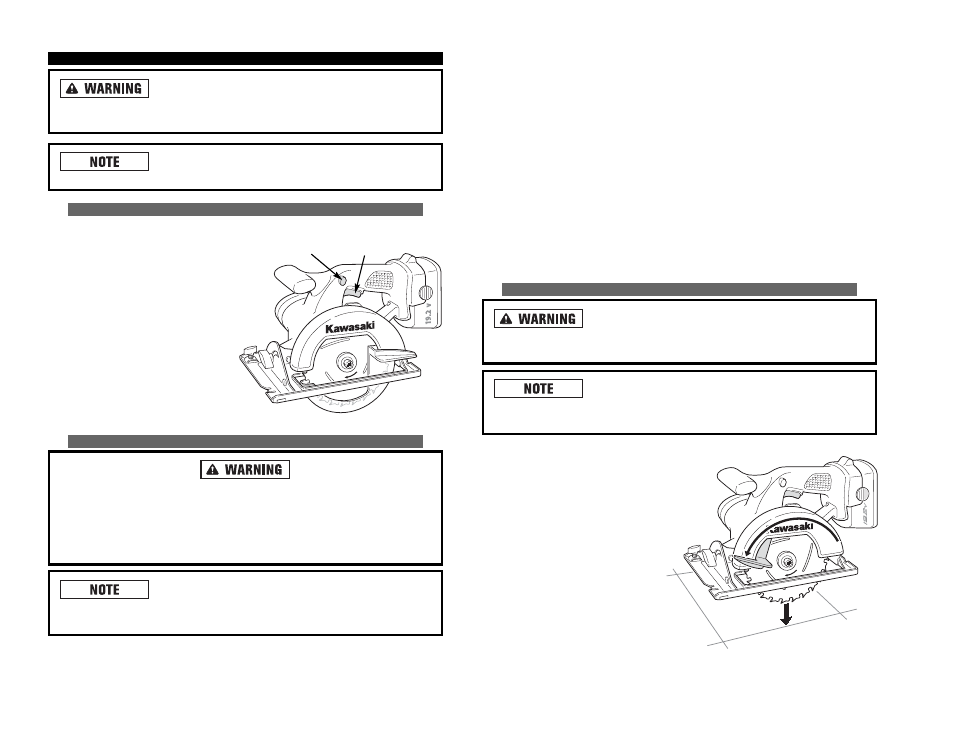
• Mark out the line to be cut so it is
easily visible.
• Start inside the area to be cut out.
• Set the shoe against the work
piece at an angle.
• Lift the blade guard.
• Pull the trigger to start the saw.
• When the blade reaches full
speed, slowly feed the blade into
the work piece. When the blade
starts cutting, release the blade
guard.
18
O
OP
PE
ER
RA
AT
TIIN
NG
G T
TH
HE
E C
CIIR
RC
CU
UL
LA
AR
R S
SA
AW
W
N
Neevveerr ttaap
pee tth
hee ttrriig
gg
geerr ssw
wiittcch
h d
do
ow
wn
n tto
o p
prro
ovviid
dee
cco
on
nttiin
nu
uo
ou
uss h
hiig
gh
h ssp
peeeed
d.. The tool may fail under such conditions causing fire
or personal injury.
T
Th
hee llo
occkk--o
offff b
bu
utttto
on
n h
heellp
pss p
prreevveen
ntt aacccciid
deen
nttaall ssttaarrttiin
ng
g..
This button can be pressed from either side.
O
OP
PE
ER
RA
AT
TIIN
NG
G T
TH
HE
E T
TR
RIIG
GG
GE
ER
R S
SW
WIIT
TC
CH
H
T
TH
HIIS
S T
TO
OO
OL
L IIS
S C
CO
ON
NT
TR
RO
OL
LL
LE
ED
D B
BY
Y A
A
T
TR
RIIG
GG
GE
ER
R S
SW
WIIT
TC
CH
H::
• Press the lock-off button, then pull
the ““O
ON
N//O
OFFFF”” trigger to turn the
Circular Saw ““O
ON
N””. To turn the
Circular Saw ““O
OFFFF””, release the
trigger switch. The lock-off button
will automatically reset.
G
GE
EN
NE
ER
RA
AL
L C
CU
UT
TT
TIIN
NG
G
A
Allw
waayyss h
ho
olld
d tth
hee ssaaw
w iin
n ffrro
on
ntt o
off yyo
ou
u aan
nd
d aaw
waayy ffrro
om
m yyo
ou
urr b
bo
od
dyy.. K
Keeeep
p yyo
ou
urr
h
haan
nd
dss aan
nd
d ffeeeett w
weellll aaw
waayy ffrro
om
m tth
hee w
wo
orrkk p
piieeccee..
N
Neevveerr ffeeeed
d tth
hee b
bllaad
dee iin
ntto
o tth
hee w
wo
orrkk p
piieeccee u
un
nttiill tth
hee b
bllaad
dee iiss aatt ffu
ullll ssp
peeeed
d..
IIff tth
hee b
bllaad
dee iiss n
no
ott aatt ffu
ullll ssp
peeeed
d,, tth
hee ssaaw
w m
maayy kkiicckk b
baacckk ccaau
ussiin
ng
g sseerriio
ou
uss
p
peerrsso
on
naall iin
njju
urryy..
D
Do
o n
no
ott ffo
orrccee tth
hee ssaaw
w.. E
Exxcceessssiivvee ffo
orrccee m
maayy rreessu
ulltt iin
n aa
b
brro
okkeen
n b
bllaad
dee.. Use only enough pressure to keep the saw moving through the
work piece.
17
LOCK-OFF BUTTON
TRIGGER SWITCH