Warning, Cutting grooves and dadoes – Shopsmith 555970 User Manual
Page 35
MARK V – MOUNTED OVERARM PIN ROUTER
555970
35
WARNING
Depending on the size of your
workpiece, you may have to use a push
stick (see Fig. 28), push block (see Fig.
29) or Feather Board(s) (see Fig. 30) in
order to keep you hands at a safe dis-
tance when feeding the workpiece
against the Fence and Bit.
NOTE
For some operations, you may need to use a
featherboard to hold your workpiece down
to provide additional accuracy and safety. To
do this, you will need to build a vertical
Fence extension with a 3/4" wide groove to
accommodate the Shopsmith Featherboard
(see Figure 30).
Figure 28. Straight-line routing using
a push stick.
Figure 29. Cross-grain routing using
a push block.
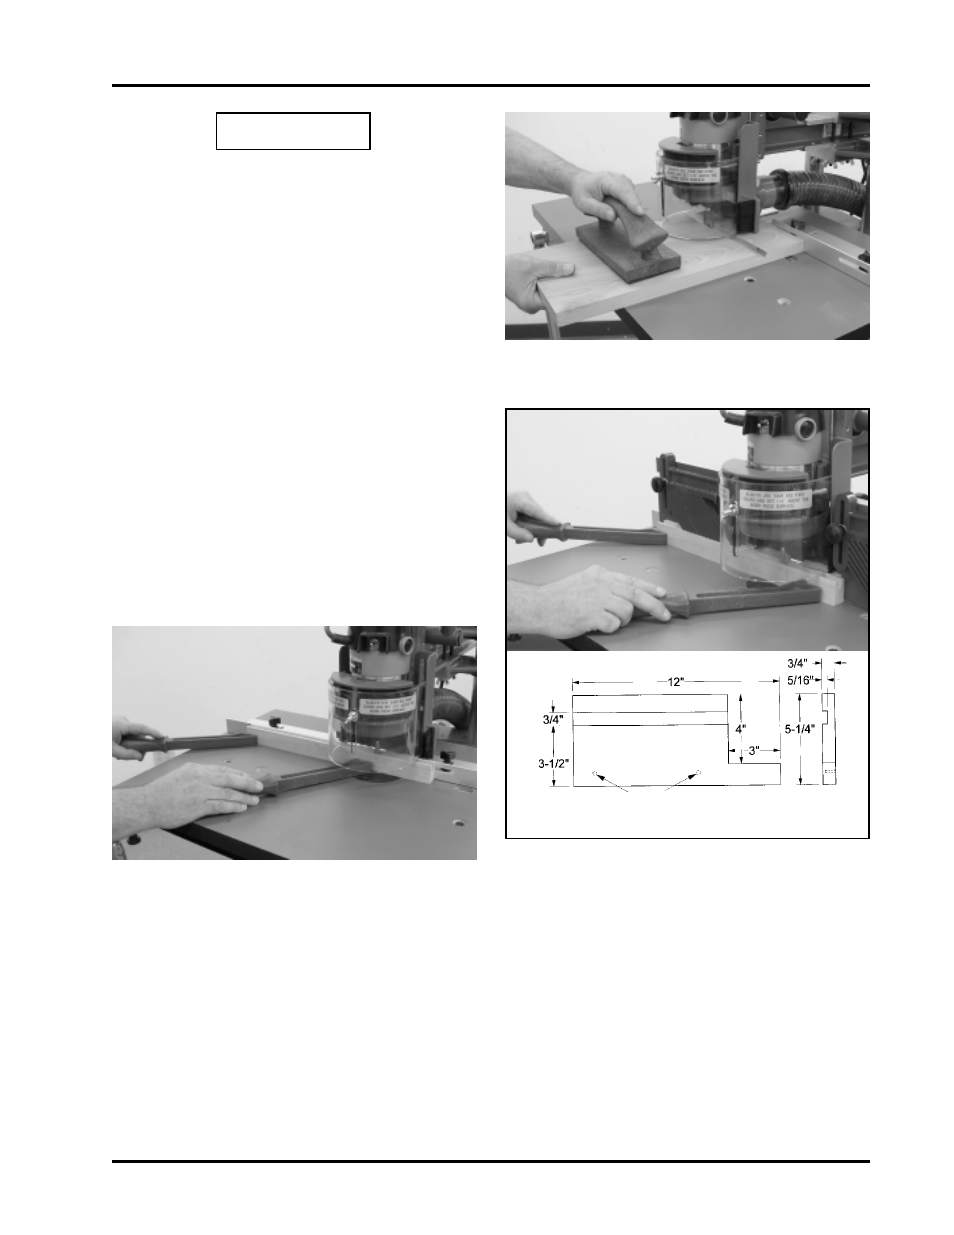
Figure 30. Straight-line routing using
feather boards mounted to wooden
fence boards and push sticks.
END
VIEW
FACE VIEW
LEFT FENCE BOARD
5/32" DIA. x 5/8" DEEP HOLES ON
BACK FACE FOR #12 SCREWS AND
WASHERS. ALIGN MOUNTING HOLES
WITH FENCE SLOTS.
CUTTING GROOVES AND DADOES
Grooves are cuts made with the wood grain,
while dado cuts are made across the grain.
Both of these straight line cuts must be per-
formed using a Fence.
Grooves
1. Set up your Overarm Router, following
the “General guidelines for overarm
routing” on page 18 in the front section
of this Manual and install the Bit of your
choice.
2. Install the two-piece Overarm Router
Fence, as described in the straight-line
routing section above. For this opera-
tion, both halves of the Fence should be
installed in perfect alignment with one
another.