Step 10: bumper installation, 34 stellar cable hoist owner’s manual – Stellar Industries SI-60 User Manual
Page 40
34
Stellar Cable Hoist Owner’s Manual
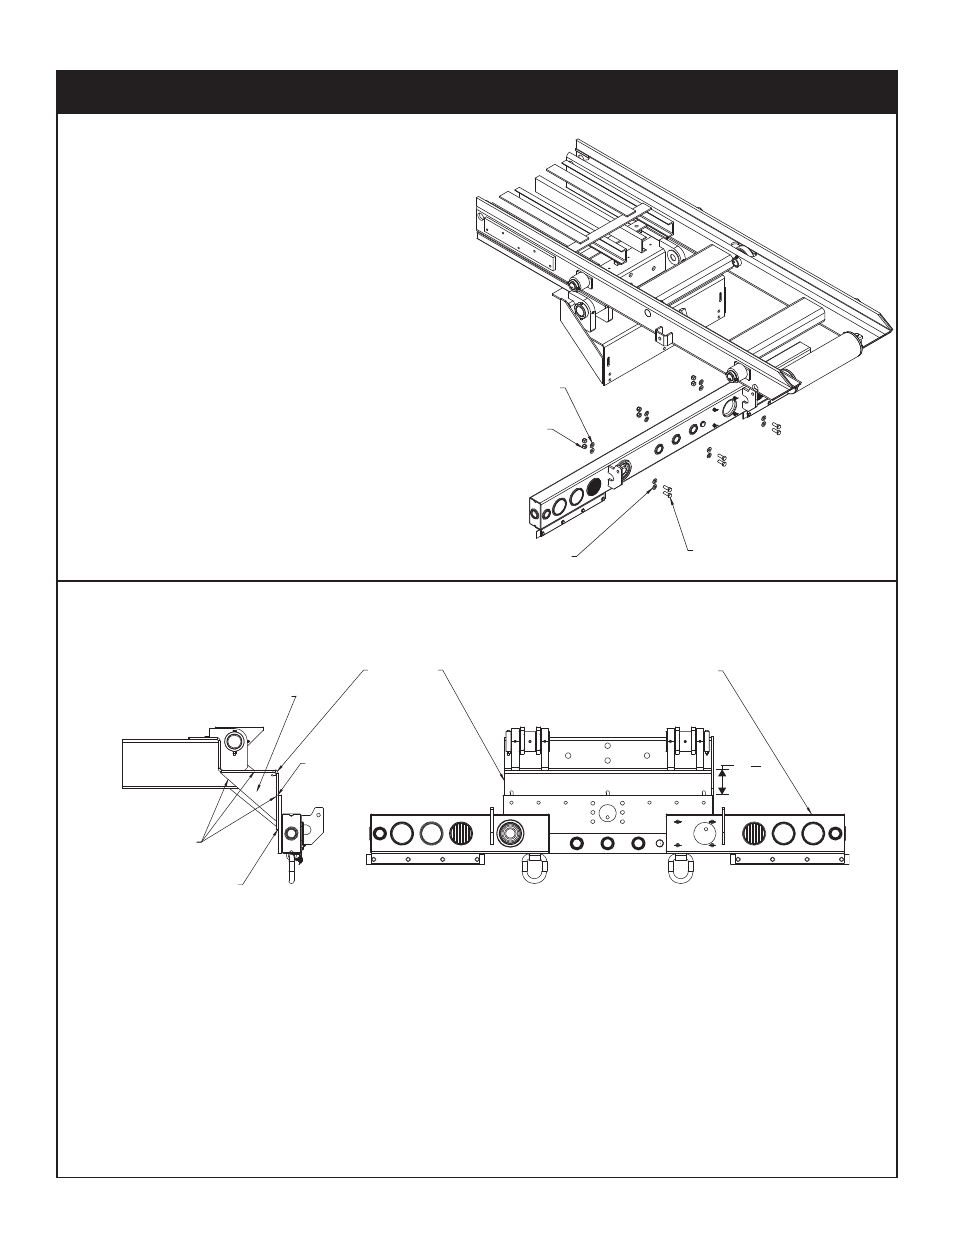
Lighted Bumper Installation
1. Align the holes in the lighted bumper with
the holes in the hoist sub-frame apron.
2. Install six (6) 5/8NC x 1-3/4” GD.8 Cap
Screws, twelve (12) Flat Washers, and six (6)
Hex Nuts. Torque to specifications.
3. Install wiring harness P/N 38056 through the
access hole.
4. Install the bumper lights as shown on parts
pages 59-60.
5. Connect the female end of wiring harness
P/N 38056 to the male end of wiring harness
P/N 40310 as shown on page 42.
6. Check all light functions. Important: The
back-up alarm should sound when the
back-up lights are on.
Pintle Bumper Installation
1. Position the bumper weldment over the hoist apron and center.
2. Make sure bumper is level and tack weld into position.
3. Match drill all fender and pintle mounting holes through the hoist apron.
4. Weld bumper to apron per weld call-out shown.
5. Position and weld the reinforcement gussets as shown.
6. Check all light functions. Important: The back-up alarm should sound when the back-up lights
are on.
PN 46818
PINTLE BUMPER ASSEMBLY
HOIST APRON
PN 46822 GUSSET
SLIDE UNDER HOIST APRON
ON OUTSIDE OF FRAME RAILS
AND WELD SOLID
FRAME RAIL
1/4" FILLET WELD
1/4" FILLET WELD
1/4” FILLET WELD
4- ”
13
32
PINTLE BUMPER
INSTALLATION
Step 10: Bumper Installation
5/8" GRADE 8
5/8"NC X 1-3/4" GRADE 8
HEX HEAD CAP SCREWS
FLAT WASHERS
5/8" GRADE 8
FLAT WASHERS
5/8"NC SELF
LOCKING NUTS
LIGHTED BUMPER
INSTALLATION