Operating instructions – Shark GI472 User Manual
Page 6
OPERATING INSTRUCTIONS
OPERATING INSTRUCTIONS
Fig. 4
Fig. 3
For Steam Ironing
Fig. 2
3. Plug the cord into a polarized, 120V
AC electrical outlet.
4. Turn the temperature dial to any of
the temperatures within the steam
band and allow the iron to heat for
approximately 2 minutes before
ironing. Place iron on its heel (on a
stable, protected surface) while the
iron is warming to the desired
temperature.
5. Turn the variable steam control to
the right to increase the amount of
steam. (See figure 3) When using
extra steam, the iron uses more
water and it may be necessary to fill
the tank more often. For refilling the
iron with water follow the steps listed
above.
1. Turn temperature dial to "••" or
“MAX“ and turn the variable steam
control to “0”.
2. Holding the iron at a slight angle,
pour water slowly into the water
filling inlet. See figure 2. Fill tank to
desired level or to the “MAX”
water level marking using the water
filling flask. (When the iron is upright,
see-through water tank allows you to
gauge the amount of water.) DO
NOT overfill the tank.
5
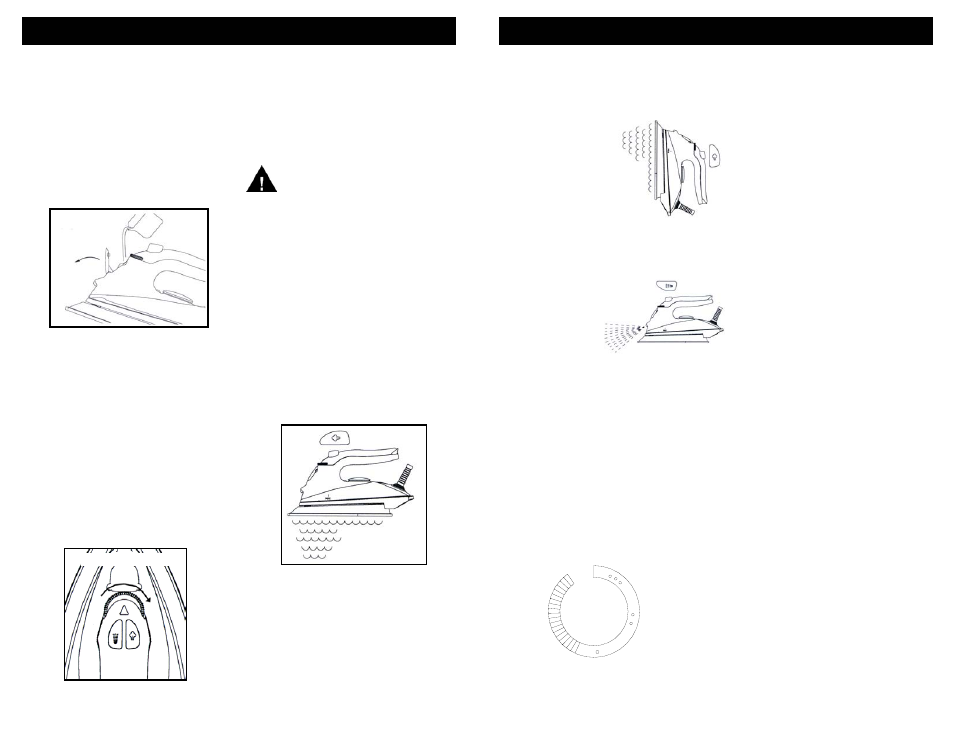
BLAST OF STEAM
WARNING!
DO NOT aim iron
at face, towards yourself, or
anyone else while using or
adjusting steam. Burns or
serious injury may occur.
6. Steam is produced as soon as the
iron is held in the horizontal position.
Steam will stop coming out when the
iron is put on its heel in a vertical
position or by turning the steam
control dial to "0".
The blast-of-steam button is useful
when ironing denim, cotton, and linens.
It provides extra, sudden blasts of
steam which aid in removing stubborn
wrinkles.
The blast-of-steam feature can be used
with Dry or Steam ironing as desired.
1. Make sure the water tank is at least
1/2 filled with water.
2. Set the temperature dial. Place the
iron on its heel (on a stable,
protected surface) and allow it to
heat for approximately 2 minutes.
3. With the iron in a horizontal position,
press the blast of steam button
several times to prime the pump.
See Figure 4.
The water spray is
useful on fabrics
with stubborn
wrinkles. Press the
spray button and a
jet of water will
spray onto the
fabric being ironed.
See Figure 6. The water spray can be
used with dry or steam ironing as
desired.
Fig. 6
Fig. 5
The auto shut-off safety function of your
iron is designed to engage after approx.
7 minutes of non-use. The auto shut-off
indicator light will flash when the auto
shut-off has activated. To reset your iron
and continue ironing follow these steps.
1) Lift the iron.
2) Holding the iron horizontally in front of
you, gently rock the iron back and
forth several times. This motion will
reset the safety switch inside the iron.
Do Not Shake the Iron.
The red temperature ready light will
illuminate when the auto shut-off system
has been reset. Allow time for the iron to
re-heat. The red temperature indicator
light will go out when the iron is ready for
use.
NOTE: If the tank runs dry, remove the
plug from wall outlet. Then, fill the iron
with water and re-prime the pump. The
iron may be filled with water while it is
hot.
4. For vertical steam,
press the blast of
steam button while
holding the iron
in a vertical
position. See
figure 5. The
vertical steam
function is useful
for steaming
curtains and
drapes while still hanging.
NOTE: Before starting to iron delicate
fabrics, it is best to first test the
temperature of the iron on a hem or
an inside seam.
AUTOMATIC SHUT-OFF
WATER SPRAY
SELECTING IRON TEMPERATURES
Always read garment labels and follow
the manufacturer's ironing instructions.
Refer to the "Ironing Chart" on page 9
for temperature recommendations: See
figure 7.
•
Use low settings for synthetics.
•• Use moderate settings for wool,
silks, and blends.
••• Use high settings for cottons and
linens.
Fig. 7
6