Installing the speakers on the wall – Sony HTDDW670 User Manual
Page 13
Getting Star
ted
masterpage:Right
lename[E:\SEM_Janet\Revision_DDW670\J904000_2342216121DDW670_GB\2342216121\G
B03CON_HT-DDW670-U.fm]
model name1[HT-DDW670]
[2-342-216-12(1)]
13
GB
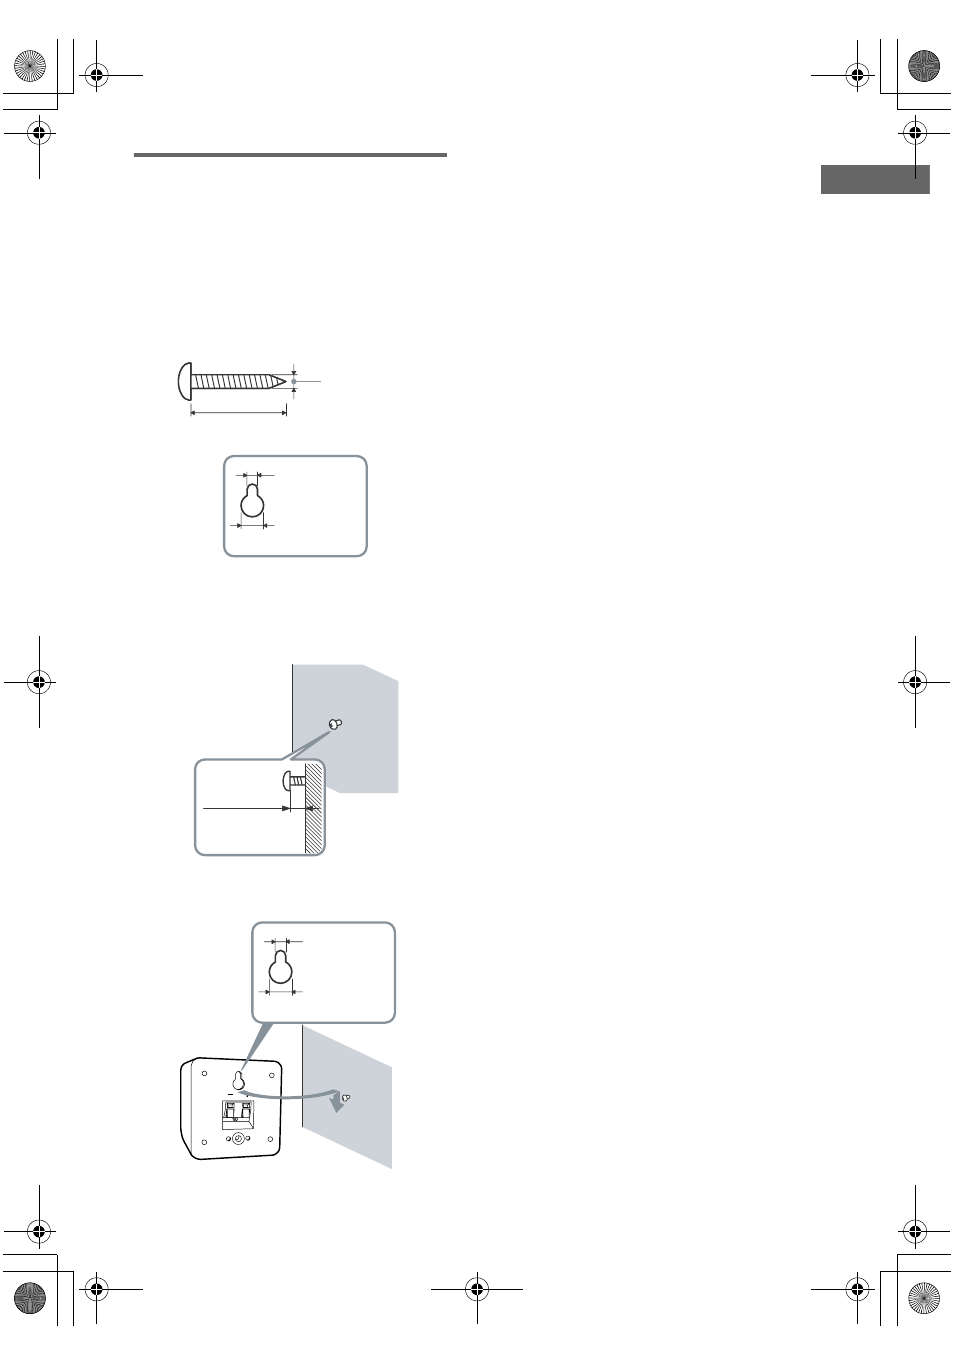
Installing the speakers on the
wall
You can install your front and surround speakers
on the wall.
1
Prepare screws (not supplied) that are
suitable for the hole on the back of
each speaker. See the illustrations
below.
2
Fasten the screws to the wall. The
screws should protrude 5 to 7 mm (7/32
to 9/32 inch).
3
Hang the speakers on the screws.
Notes
• Use screws that are suitable for the wall material and
strength. As a plaster board wall is especially fragile,
attach the screws securely to a beam and fasten them
to the wall. Install the speakers on a vertical and flat
wall where reinforcement is applied.
• Contact a screw shop or installer regarding the wall
material or screws to be used.
• Sony is not responsible for accident or damage
caused by improper installation, insufficient wall
strength or improper screw installation, natural
calamity, etc.
more than 4 mm
(5/32 inch)
more than 25 mm (1 inch)
Hole on the back of the speaker
4.6 mm
(3/16 inch)
10 mm
(13/32 inch)
5 to 7 mm
(7/32 to 9/32 inch)
4.6 mm
(3/16 inch)
10 mm
(13/32 inch)
Hole on the back of the speaker
GB01COV_HT-DDW670-U.book Page 13 Saturday, January 1, 2005 7:54 AM