Step 5: secure upper mount wall brackets – Sony SU-WTS1 User Manual
Page 7
7
GB
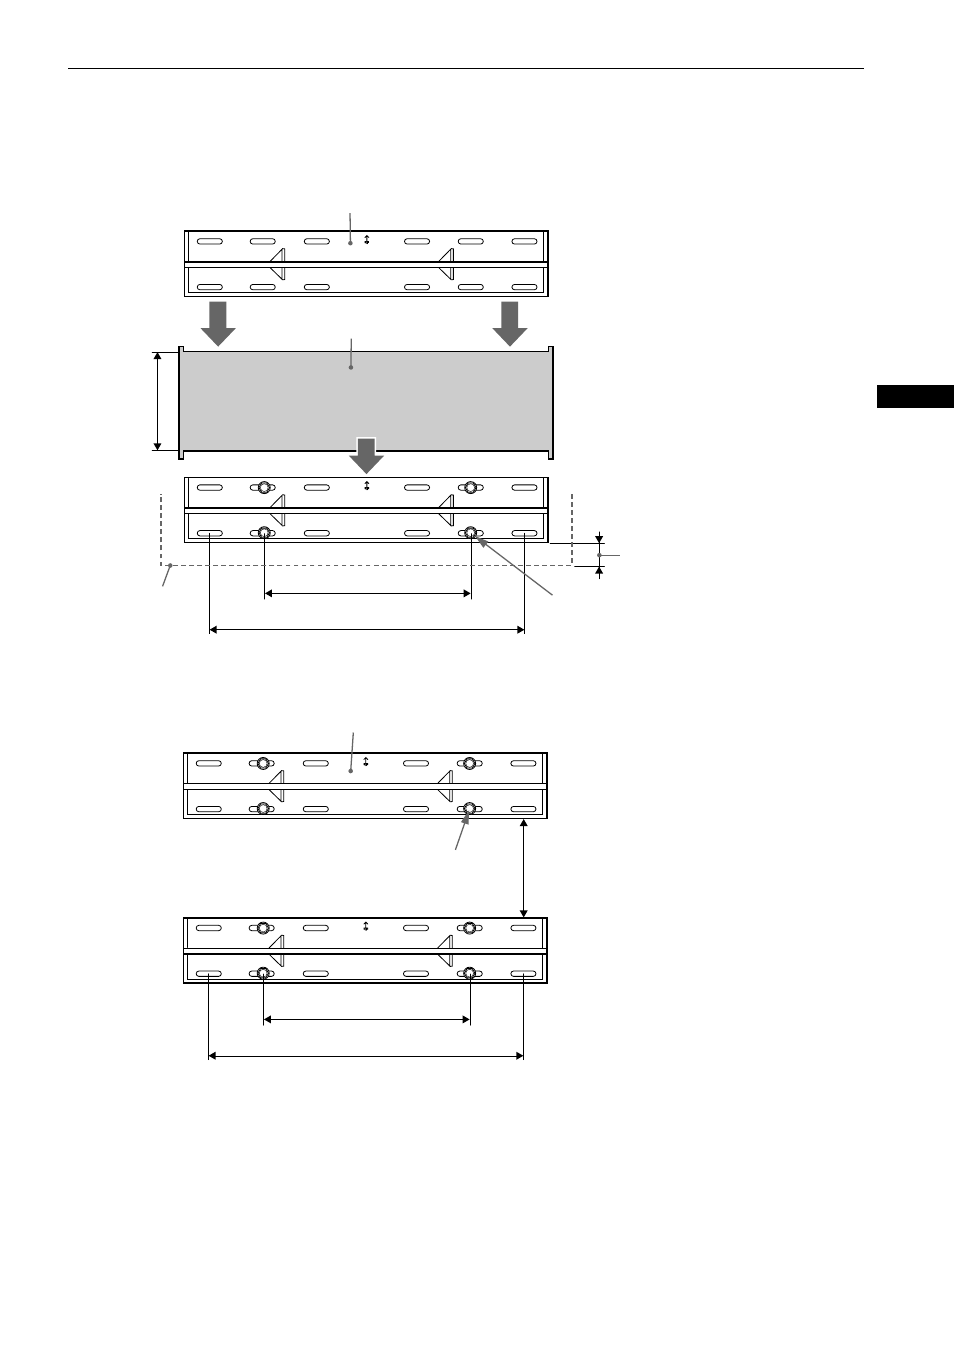
Step 5: Secure Upper Mount Wall Brackets
1
With the lower mount wall bracket secured to the wall structure, place the supplied cardboard template (
C
) over
the top outside edges of the lower mount wall bracket. Place the bottom and outside edges of the upper mount
wall bracket (
B
) into the top portion of the cardboard template (
C
) and mark the second set of securing points for
the upper mount wall bracket (
B
).
2
Secure the upper mount wall bracket (
B
) with the four (4) lag bolts and flat washers (not supplied). The mount wall
bracket must be secured to wall capable of supporting at least four (4) times the weight of the unit. The distance
between the two mount wall brackets should end up at 230mm.
B
C
Set on top of cardboard template (
C
)
and secure.
Set on top of secured lower mount wall
bracket.
Lab bolts and flat
washers (not supplied)
406 mm
610 mm
230 mm
TV line
Dimension noted in Step1 of “Step4:
Fasten Lower Mount Wall Brackets” on
page 6.
B
Lab bolts and flat washers
(not supplied)
230 mm
406 mm
610 mm