Skylink TC-318-7 User Manual
Page 2
2. PROGRAMMING TRANSMITTERS TO RECEIVER MODULE (CONT)
“PROG” button
Programming for Zone Operation
In the above example, both the Family Room Ceiling Lighting and Family
Room Floor Light are in zone 1. You need to assign the zone 1 signal
to both receiver modules in these 2 locations.
Learn Code
Follow steps 2 and 3 above to transmit the "Learn"
code when programming the remote to receiver
modules.
Following the same instructions to program the zone number into various
receiver modules to form a zone with multiple lights, i.e. Zone 1 signal
to both Family Room Ceiling Light Module and Family Room Floor Light
Module.
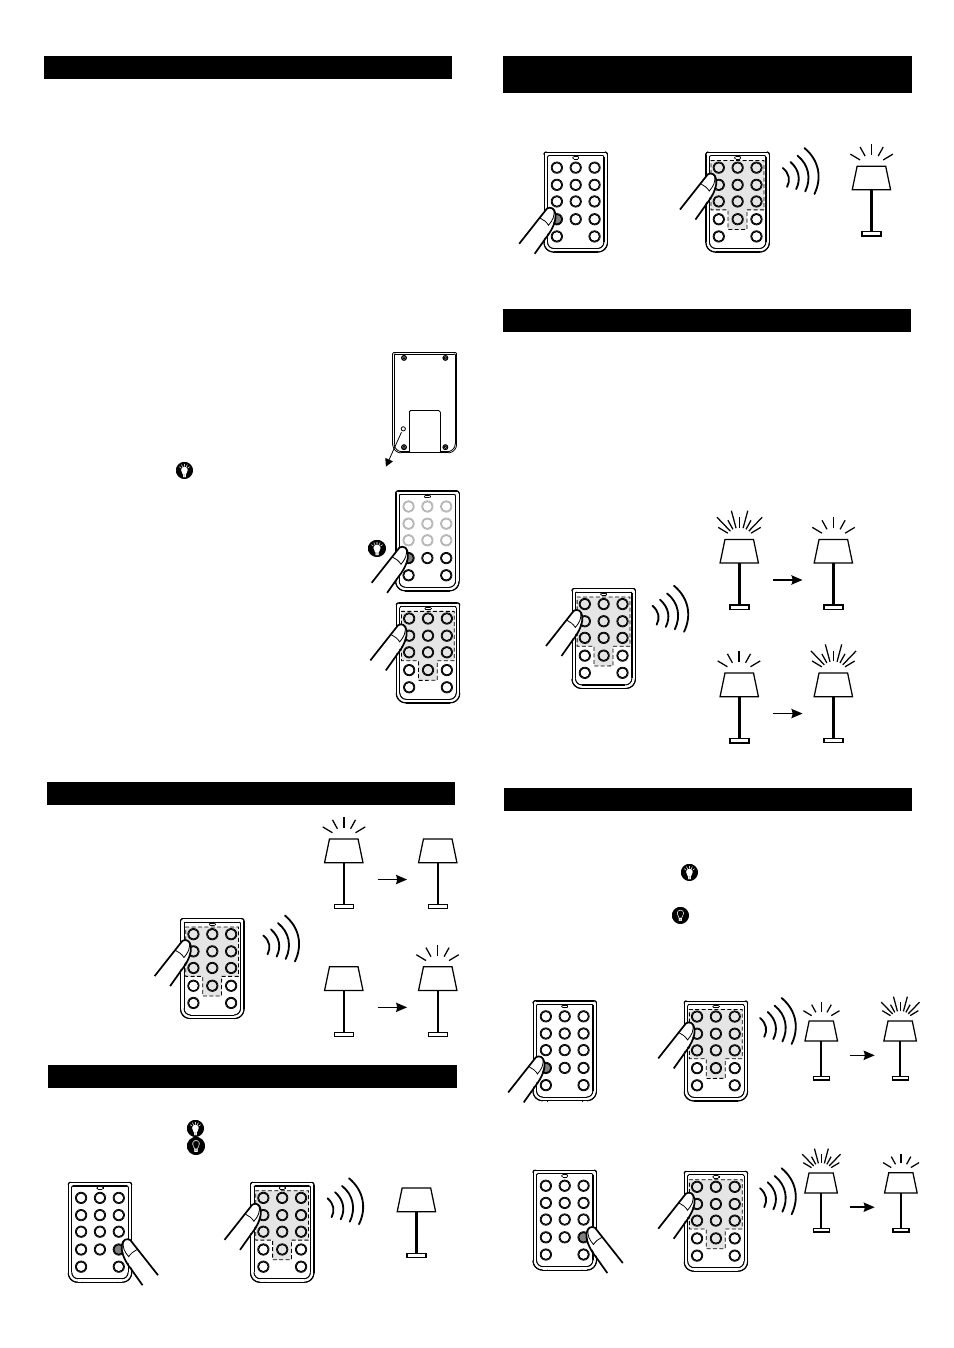
3. INDIVIDUAL OPERATION - ON / OFF (TOGGLE)
3. INDIVIDUAL OPERATION - ON / OFF (DESIGNATED ON/OFF)
3. INDIVIDUAL OPERATION - ON / OFF (DESIGNATED ON/OFF)
(CONT)
3. INDIVIDUAL OPERATION - DIMMING (TOGGLE)
3. INDIVIDUAL OPERATION - DESIGNATED DIM / BRIGHTEN
To turn on or off a load connected to a
receiver, simply press the programmed
numeric button. The light will be controlled
in a toggle manner, from On to Off, or from
Off to On.
From On
To Off
From Off
Press Once
To On
OR
Light must be On
Light must be off,
regardless previous
status
Press Once
Press Once
Press Once
+
Press Once
Press Once
+
Designated Off
Designated On
Instead of toggle operation, you can send a designated on or off signal to
a load.
To turn on a load, press [ ] and then the programmed numeric button.
To turn off a load, press [ ] and then the programmed numeric button
You may also control the brightness of the light if the receiver module and
the light bulb is dimmable, i.e. either incandescent light or dimmable
compact fluorescent light.
To change the brightness, first turn on the light.
Press and hold the programmed numeric button, the brightness will
change. Hold the button until the desired brightness is reached, then
release the button.
Press and hold the same button again to change the brightness in the
opposite way.
From Bright
To Dim
From Dim
Press &
Hold
To Bright
OR
You may control the light specifically to dim down or brighten up, instead
of toggle dimming.
To brighten up the light, press [ ] and then hold the programmed
numeric button until the desired brightness is reached.
To dim down the light, press [ ] and then hold the programmed numeric
button until the desired brightness is reached.
Press &
Hold
+
Press &
Hold
Press Once
+
Press Once
Must Dim Up
Must Dim Down
Designated Brighten
Designated Dim
Press & Hold
3 sec.
That means for Light 1 in the example, you need to program the following
signals:
- Button 1 to Light 1 based on Programming for Individual Operation
- Zone 1 Command to Light 1 based on Programming Zone Operation
For Light 2 in the example, you need to program the following signals:
- Button 2 to Light 2 based on Programming for Individual Operation
- Zone 1 Command to Light 2 based on Programming Zone Operation
To assign a zone to a receiver module, follow the instructions below:
1. Put the receiver module that you plan to program
into programming mode. Refer to the User's
Instructions of that receiver module.
2. Use a sharp object to press the “PROG”
button on the back of the transmitter. The red
LED on the transmitter will be on for 15 seconds.
3. Press and hold the [ ] button until the red LED
flashes three times and keeps on, release the
held button and press the zone number button
on the transmitter. i.e. “1” for zone 1.
Red LED will flash then off.
4. Once the remote is programmed, the receiver
modules will quit from programming mode and
the programmed transmitter is ready to be
used now.